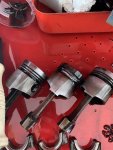
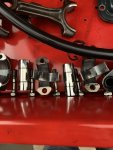
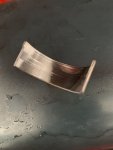
Mega years ago, when I was a kid, I tore down a Chevy 265 CI V8 engine that needed rings. Honed the cylinders, washed everything down with kerosene, and brake cleaner, the old stuff that would remove your skin! Those new rings didn't last but 20,000 miles before it started burning oil big time. I just couldn't figure out what I did wrong until I spoke to an old-time mechanic who showed me where I went wrong. He had an old disassembled engine and handed me the hone to hone out one of the cylinders. I honed it till I got a good cross-hatch pattern in the bore. Then he told me to clean it the way that I did with my engine, and after another half hour, I was done, and it looked perfect. He then told me to get the cotton cloth from the bathroom and put some clean oil on it, and rub it on the side of the cylinder and tell him what I observed. The cloth with the oil on it was blackish, and I just didn't understand, so he explained that the crosshatch pattern held minute particles of steel in them, and no amount of cleaning with kerosene or brake cleaner would remove them. He said that is why they put the engine blocks into a soapy water engine washing machine to get all those minute metal particles out of the engine. If they were left in the bore, they would lead to premature ring failure. I have used this many times to show people that you have to wash a cylinder after honing, whether it is an engine or a brake cylinder. I believe that this will apply to this method of cleaning up the walls of a diesel engine. I was going to post this when the subject first came up, but decided to see if anyone else would mention this first. I am not an experienced engine builder, but I did learn an important lesson from someone that was. I learned a lot from that old guy and the one thing that I learned that day was that I didn't know as much as I thought that I did. Many many decades later, I am still learning from others that know more than I know about a lot of subjects.