I know this is an old thread but I thought it would be easier to keep the information in one place. Please let me know if a new thread would be best. (especially considering the length.. )
I’ve been reading everything to that I could find for the last few weeks, time for some (dumb?) questions and comments and see what the people with the true experience have to say.
I believe I understand the hydraulic flow and plumbing theories….
Started looking for option for grapple, once I’m playing I figured add what I can for the rear. TnT and maybe another available port.
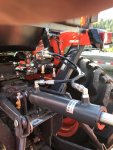
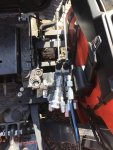
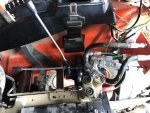
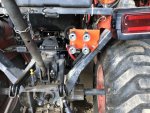
Eipo’s valve mount looks good, but what is done when also wanting to add forward lines for a grapple?
I see Chad D had the forward 3rd function already, and worked with the hose going from there to the 3PH.
- Suggestions on getting a forward grapple line from the rear valve?
I had some strange thoughts….
You aren’t using top/tilt and grapple at the same time. And chances are you are working with front remotes OR rear, depending on the project.
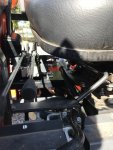
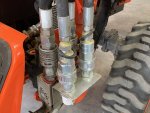
It would be hard to fit more than a two spools by the seat, you could have grapple line plumbed back there and plug in when needed, > which would be the least desirable.
- Could you put a T in the lines and run it up to the front, then disconnect the rear (TnT) when using the grapple?
- Another thought would be a solenoid activated diverter to run to the grapple
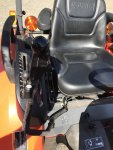
- This would be based on mounting valves on the left side of the seat, so right hand on joystick, left hand on grapple.
- > Could you mount these valves on the left..?
- And my most out of the box type thought, a single spool valve under the left side of the seat, with 3 or 4 solenoid operated valves stacked, to make something like Summit’s Hydraulic Multiplier Kit.
https://summit-hydraulics.com/produ...ve-including-couplers-and-switch-box-control/
- You can get these for $100 each, and specials for half that price. They draw 2.5 amps each, so no selection would be for the grapple, the item with the most run time would not draw any current. Then flip one switch for Top, second switch for Tilt, and even have one more available.
- So until I find a 4th accessory, 5 amps would be the most you would use while adjusting TnT, and would be fine with the ROPs dynamo.
Open any thoughts, comments or topic updates I may have missed, Thanks!