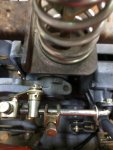
B7100 HST 3 point lift stops going up early.

tlcfj6082

New member

Equipment
B7100 HST , B2550
Nov 19, 2017
21
0
0
MI
Hi, I recently acquired a B7100 HST-D new style. I believe 1994. 406 Hrs. My plans are to use the front mounted snow blower this winter.

The issue is, the 3 point lift only works from the all the way down position up to 3". Anything after that It sounds like its maxed out - like the hydraulic pump is whining on the stops.

I did borrow the tractor last year, same set up, and it worked flawlessly. The person I got it from said he doesn't recall having any issues but didn't use it much this summer.

Things I have done attempting to remedy problem: Changed hydraulic fluid and filter with UDT fluid, removed both large screws and cleaned screens/filters (very little to no debris) , made sure the knob under front of seat is in correct direction, and tried with low to full engine power. All of this have made no change. I don't think there is a pressure loss as the lift moves quickly for those 2-3 inches until it stops.

My next steps are to removed the control valve or front pump and check for o-ring damage. Any other suggestions are appreciated.
 

Dave_eng

Well-known member
Lifetime Member

Equipment
M7040, Nuffield 465
Oct 6, 2012
5,128
933
113
Williamstown Ontario Canada
Hi, I recently acquired a B7100 HST-D new style. I believe 1994. 406 Hrs. My plans are to use the front mounted snow blower this winter.

The issue is, the 3 point lift only works from the all the way down position up to 3". Anything after that It sounds like its maxed out - like the hydraulic pump is whining on the stops.

I did borrow the tractor last year, same set up, and it worked flawlessly. The person I got it from said he doesn't recall having any issues but didn't use it much this summer.

Things I have done attempting to remedy problem: Changed hydraulic fluid and filter with UDT fluid, removed both large screws and cleaned screens/filters (very little to no debris) , made sure the knob under front of seat is in correct direction, and tried with low to full engine power. All of this have made no change. I don't think there is a pressure loss as the lift moves quickly for those 2-3 inches until it stops.

My next steps are to removed the control valve or front pump and check for o-ring damage. Any other suggestions are appreciated.
I have not looked at the WSM for your model in some time. Most 3 pt hitches have a feedback rod attached to one of the upper arms with a threaded adjustment in the rod.

Plse go to Kubotabooks.com and download the WSM to be certain.

In general terms, the rod is adjusted by raising the arms as far as they will go and then manually try and lift them up higher. The rod is adjusted so that when it stops the lifting action there is only a tiny bit of movement left. You don't want the hydraulic system to be running against the relief valve contiuously.

Don't start taking things apart as only grief will follow. Far too many owners start disassembling things and blowing compressed air through components and then fail to put a ball on the proper side of a spring or similar and come here looking for a solution which just may not be possible if, for their model of tractor, not enough technical material is available

Dave
 

tlcfj6082

New member

Equipment
B7100 HST , B2550
Nov 19, 2017
21
0
0
MI
Dave, Some experience has taught me to gather more information before tearing things to pieces and loosing a check ball or spring somewhere. :)

I have downloaded all the parts, service, and repair manuals I can find. Some of the older pictures are really faded but still are great to read. Recently came across a hydraulic flow chart that was enjoyable to study.

I tell you these tractors are a whole new hobby all together and I thought starting a bigger maple syrup production next year was going to be time consuming.

Your idea of checking the stops on the lift arm rod is good. One of the recent threads I came upon was on fram oil filters, and this has one on it. I will be getting a genuine ordered tomorrow.

Thanks.
 

Dave_eng

Well-known member
Lifetime Member

Equipment
M7040, Nuffield 465
Oct 6, 2012
5,128
933
113
Williamstown Ontario Canada
Dave, Some experience has taught me to gather more information before tearing things to pieces and loosing a check ball or spring somewhere. :)

I have downloaded all the parts, service, and repair manuals I can find. Some of the older pictures are really faded but still are great to read. Recently came across a hydraulic flow chart that was enjoyable to study.

I tell you these tractors are a whole new hobby all together and I thought starting a bigger maple syrup production next year was going to be time consuming.

Your idea of checking the stops on the lift arm rod is good. One of the recent threads I came upon was on fram oil filters, and this has one on it. I will be getting a genuine ordered tomorrow.

Thanks.
Glad to hear you are proceeding with caution.

Recently, I was trying to help a guy with two nearly identical Kubotas. A 2500 and a 2600. He took the loader and hydraulics (valves, block, etc.) off the 2600 and installed them on the 2500.

Now neither tractor worked properly and he was going nuts. He started disassembling valves......

Finally, I suggested he remove the FEL hydraulics from the 2500 and return the tractor to its former hydraulic circuit condition and then, at that point, I would help him figure out how to install the FEL hydraulics with power beyond for the power steering..

Things are so messed up he cannot even get back to an operating 2500 tractor as it was before he started this project
Springs, balls, you name it ........

Post some pictures of the rear and hydraulic lift valve area of your tractor and something may jump out at me.

Dave
 

torch

Well-known member

Equipment
B7100HSD, B2789, B2550, B4672, 48" cultivator, homemade FEL and Cab
Jun 10, 2016
2,595
838
113
Muskoka, Ont.
The issue is, the 3 point lift only works from the all the way down position up to 3". Anything after that It sounds like its maxed out - like the hydraulic pump is whining on the stops.
It sounds to me like the hitch is making it to the top of its travel or something else (like front mount blower linkages) is physically limiting it so the relief valve is kicking in.

I wonder if it is really starting from all the way down, or is the stop on the rod just kicking out before the cylinder bottoms out? How low is low and how high is high? Also, which set of holes in the arms are the lift rods attached to? The forward set will provide greater travel (but less force) at the attachment. I'll get some measurements from my own B7100 for you tomorrow for comparison.
 

85Hokie

Moderator
Staff member
Lifetime Member

Equipment
BX-25D ,PTB. Under Armor, '90&'92-B7100HST's, '06 BX1850 FEL
Jul 13, 2013
10,358
2,174
113
Bedford - VA
It sounds to me like the hitch is making it to the top of its travel or something else (like front mount blower linkages) is physically limiting it so the relief valve is kicking in.

I wonder if it is really starting from all the way down, or is the stop on the rod just kicking out before the cylinder bottoms out? How low is low and how high is high? Also, which set of holes in the arms are the lift rods attached to? The forward set will provide greater travel (but less force) at the attachment. I'll get some measurements from my own B7100 for you tomorrow for comparison.
I am with Torch - check this first!:)
 

D2Cat

Well-known member
Lifetime Member

Equipment
L305DT, B7100HST, TG1860, TG1860D, L4240
Mar 27, 2014
13,027
4,395
113
40 miles south of Kansas City
I agree, it sounds like the linkage is out of adjustment. Pretty easy place to start checking. The bypassing squeal is the clue.
 

torch

Well-known member

Equipment
B7100HSD, B2789, B2550, B4672, 48" cultivator, homemade FEL and Cab
Jun 10, 2016
2,595
838
113
Muskoka, Ont.
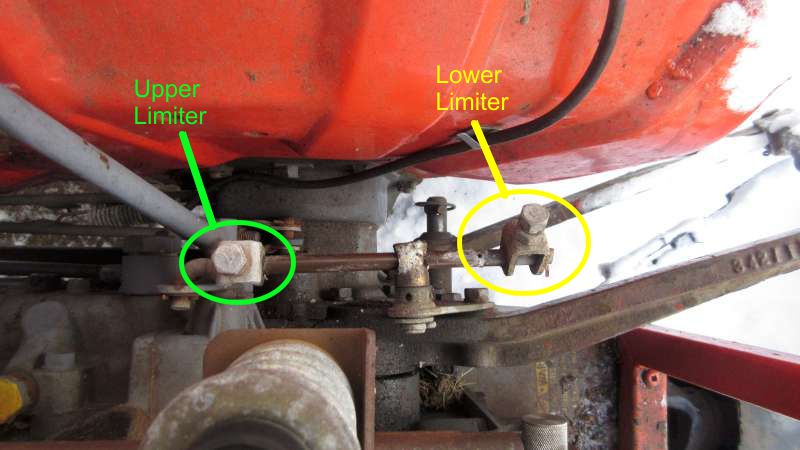
I have the blower frozen onto the 3ph right now, so I couldn't get an absolute measurement of the minimum height, but my lift rods are set to the outer holes in the arms and IIRC, the centre of the lift points at the ends of the arms drop down to around 3" or 4" above the ground. The upper limit is about 25" above the ground and looks like this:


The range of motion depends not only on which holes the lift arms engage, but also the limit stops on the rod under the right hand edge of the seat as set by the operator. The maximum lift is set by loosening the bolt of the forward (green in this picture) stop to re-position it. It is shown here in the maximum height position, moving it rearward would reduce the maximum height.

Similarly, the lower limit is set with the rearward (yellow) stop. Set all the way to the back of the rod (as shown) effectively allows it to float at all times, as the limit will never be reached. But moving it forward restricts how low the arms can drop -- when the arms get down to that point, they hit the stop which returns the lever to neutral, closing the valve.


Now, look at the rod, just forward of the lower limit stop in that picture. There's a hole to accommodate a cotter pin. I had to move the cotter pin to the other hole at the rear of the rod to get my lower limiter all the way back to the float position. As delivered to me, it was preventing the 3ph from dropping all the way to the end of it's travel.

Note that a bit of dry silicon, graphite or teflon lube on the shaft ensured that it does not bind as the hitch raises or lowers. Any binding (from dirt, corrosion or a bent rod) will act like a limit stop and return the lever to neutral.
 

tlcfj6082

New member

Equipment
B7100 HST , B2550
Nov 19, 2017
21
0
0
MI
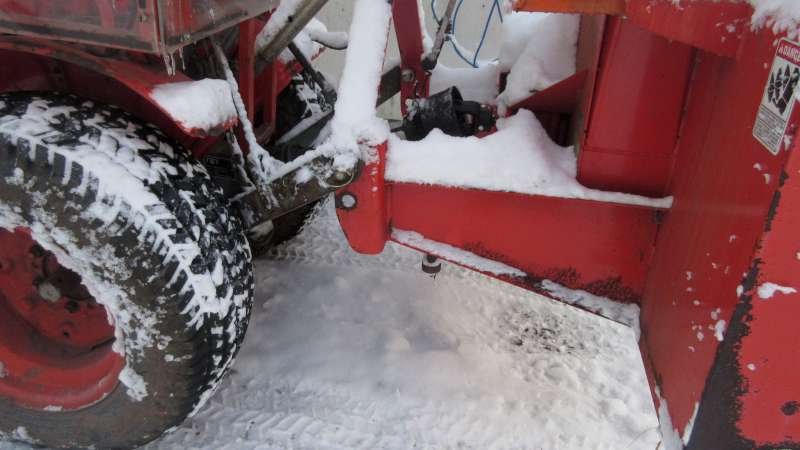
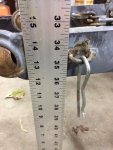
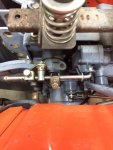
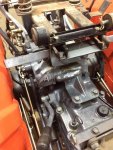
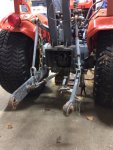
1. Rear view - this is as far as the arms will raise up.
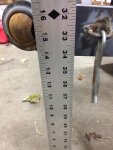
2. This is where the pump starts whining - not touching the adjustable locks.

Side note: there is no load on this in the front either.

I think something is wrong in the relief valve area the way it sounds now.
 

Attachments

Last edited:

tlcfj6082

New member

Equipment
B7100 HST , B2550
Nov 19, 2017
21
0
0
MI
Yah, looking at your picture Torch, your arms are way higher then mine.

Thanks for the input.
 

kubotasam

Well-known member

Equipment
B2410, B7100dt, B7500,Woods BH750,Landpride 2660RFM, Tiller, B2781 Snowblower
Apr 26, 2010
1,200
125
63
Alfred Maine
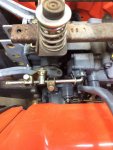
Your picture #4 shows the problem. The adjustable stops on the feedback rod are to close. Look at the difference from your pict to the one Torch posted.
 

100 td

Active member

Equipment
B21TLB (B21, TL421 & BT751) Toyota SDK4 T116 Bobcat
Aug 29, 2015
1,776
8
38
ɹǝpunuʍop
The adjustable stops on the feedback rod are to close.
Which is also limiting the rotation of the control valve exacerbating the problem I expect.
I'm guessing you've rechecked the fluid level as well? Once you open the stops up and get the valve actuating, you may need to cycle a few times to expel air since you've changed fluid and filters, hang an implement off the back to assist with weight if you can
 
Last edited:

tlcfj6082

New member

Equipment
B7100 HST , B2550
Nov 19, 2017
21
0
0
MI
Your picture #4 shows the problem. The adjustable stops on the feedback rod are to close. Look at the difference from your pict to the one Torch posted.

Yep that was the trick. ;) not sure why they were set too close, but that was the winner.

Thanks for the awesome feedback. This is why I waited to tear down, just to make sure it wasn't something stupid like having your lock nuts too close. :)
 

torch

Well-known member

Equipment
B7100HSD, B2789, B2550, B4672, 48" cultivator, homemade FEL and Cab
Jun 10, 2016
2,595
838
113
Muskoka, Ont.
Compare the position of the limiters in your pictures to mine. Yours are much closer together and would severely limit both the upper and lower limits no matter what else might be going on. Just for sh!+$ and giggles, why not separate them as much as possible? It might not have any effect, but it wouldn't take long, cost anything or hurt anything.

EDIT: Ooops, nevermind. I didn't see the second page where you found the problem. :eek:
 
Last edited:

tlcfj6082

New member

Equipment
B7100 HST , B2550
Nov 19, 2017
21
0
0
MI
Compare the position of the limiters in your pictures to mine. Yours are much closer together and would severely limit both the upper and lower limits no matter what else might be going on. Just for sh!+$ and giggles, why not separate them as much as possible? It might not have any effect, but it wouldn't take long, cost anything or hurt anything.

EDIT: Ooops, nevermind. I didn't see the second page where you found the problem. :eek:

Thanks Torch for the comparison picture. That was my ah ha moment (and a 2x4 upside the head). I don't know why I was trying to overthink the whole situation but that's what we do. :)
 

torch

Well-known member

Equipment
B7100HSD, B2789, B2550, B4672, 48" cultivator, homemade FEL and Cab
Jun 10, 2016
2,595
838
113
Muskoka, Ont.
I've had days like that too ;)

I wonder what the previous owner was trying to accomplish by severely restricting the travel like that.
 

D2Cat

Well-known member
Lifetime Member

Equipment
L305DT, B7100HST, TG1860, TG1860D, L4240
Mar 27, 2014
13,027
4,395
113
40 miles south of Kansas City
I've had days like that too ;)

I wonder what the previous owner was trying to accomplish by severely restricting the travel like that.
Torch, my guess is one of the nuts came loose so (the previous owner) they tightened it! Then they couldn't figure what the problem was with the 3pt. And apparently just put up with it as it was, or played with it some and made it worse!
 

torch

Well-known member

Equipment
B7100HSD, B2789, B2550, B4672, 48" cultivator, homemade FEL and Cab
Jun 10, 2016
2,595
838
113
Muskoka, Ont.
The silver lining in this cloud is that they probably discounted the price of the tractor accordingly :)

All in all, the entire episode reinforces my belief that the #1 rule of troubleshooting is to check the simplest possibilities first, because they are cheap and easy to check and they are usually the problem anyway.
 

Dave_eng

Well-known member
Lifetime Member

Equipment
M7040, Nuffield 465
Oct 6, 2012
5,128
933
113
Williamstown Ontario Canada
The silver lining in this cloud is that they probably discounted the price of the tractor accordingly :)

All in all, the entire episode reinforces my belief that the #1 rule of troubleshooting is to check the simplest possibilities first, because they are cheap and easy to check and they are usually the problem anyway.
I have this vague recollection that years ago the move to front mounted blowers or plows on smaller tractors utilized the rear 3 pt hitch with cables and pulleys to lift either a front blade or plow. People did not want to spend the money on power beyond blocks, control valves and cylinders.

The amount of lift needed by these front mounted implements was minimal and the 3 pt travel was restricted to accomplish this.

This may all be a dream as I cannot come up with more specifics and dates.

Dave