What did you do to or on your Kubota today?
- Thread starter gurn
- Start date
Awesome! i Really want stay in Michigan, but it’s hard when it’s snowing like that over there!Thanks! In the Flathead Valley, about 30 minutes from Glacier National Park. It's still snowing!!

They make good fencing!
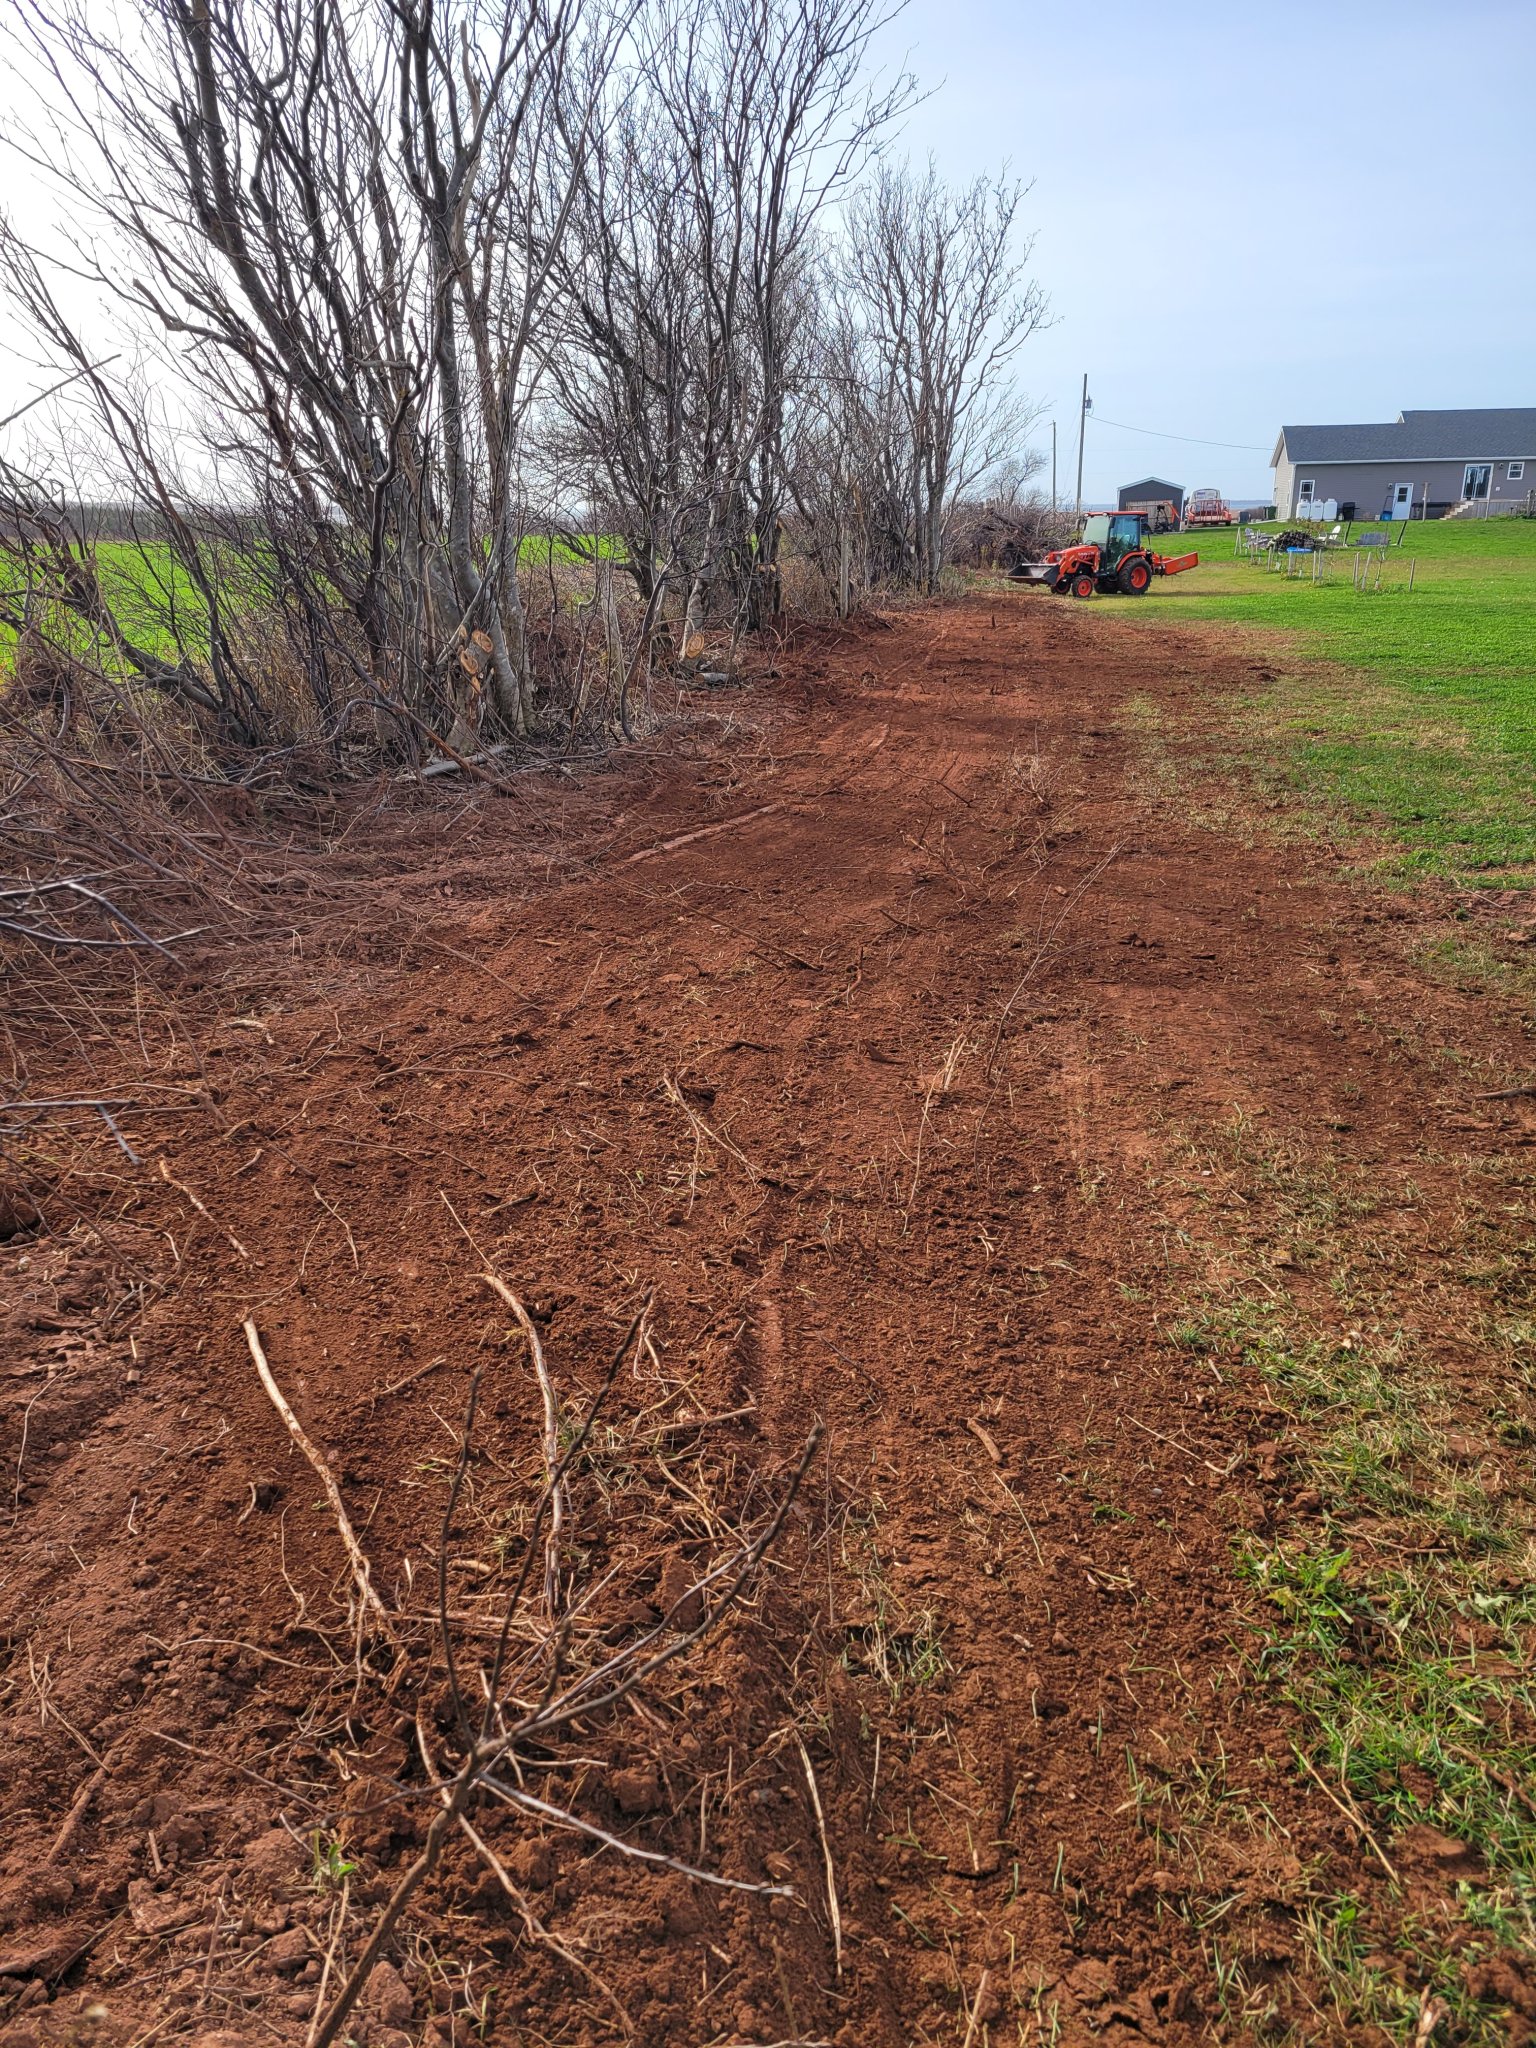
Used the grading scraper to level some soil off.
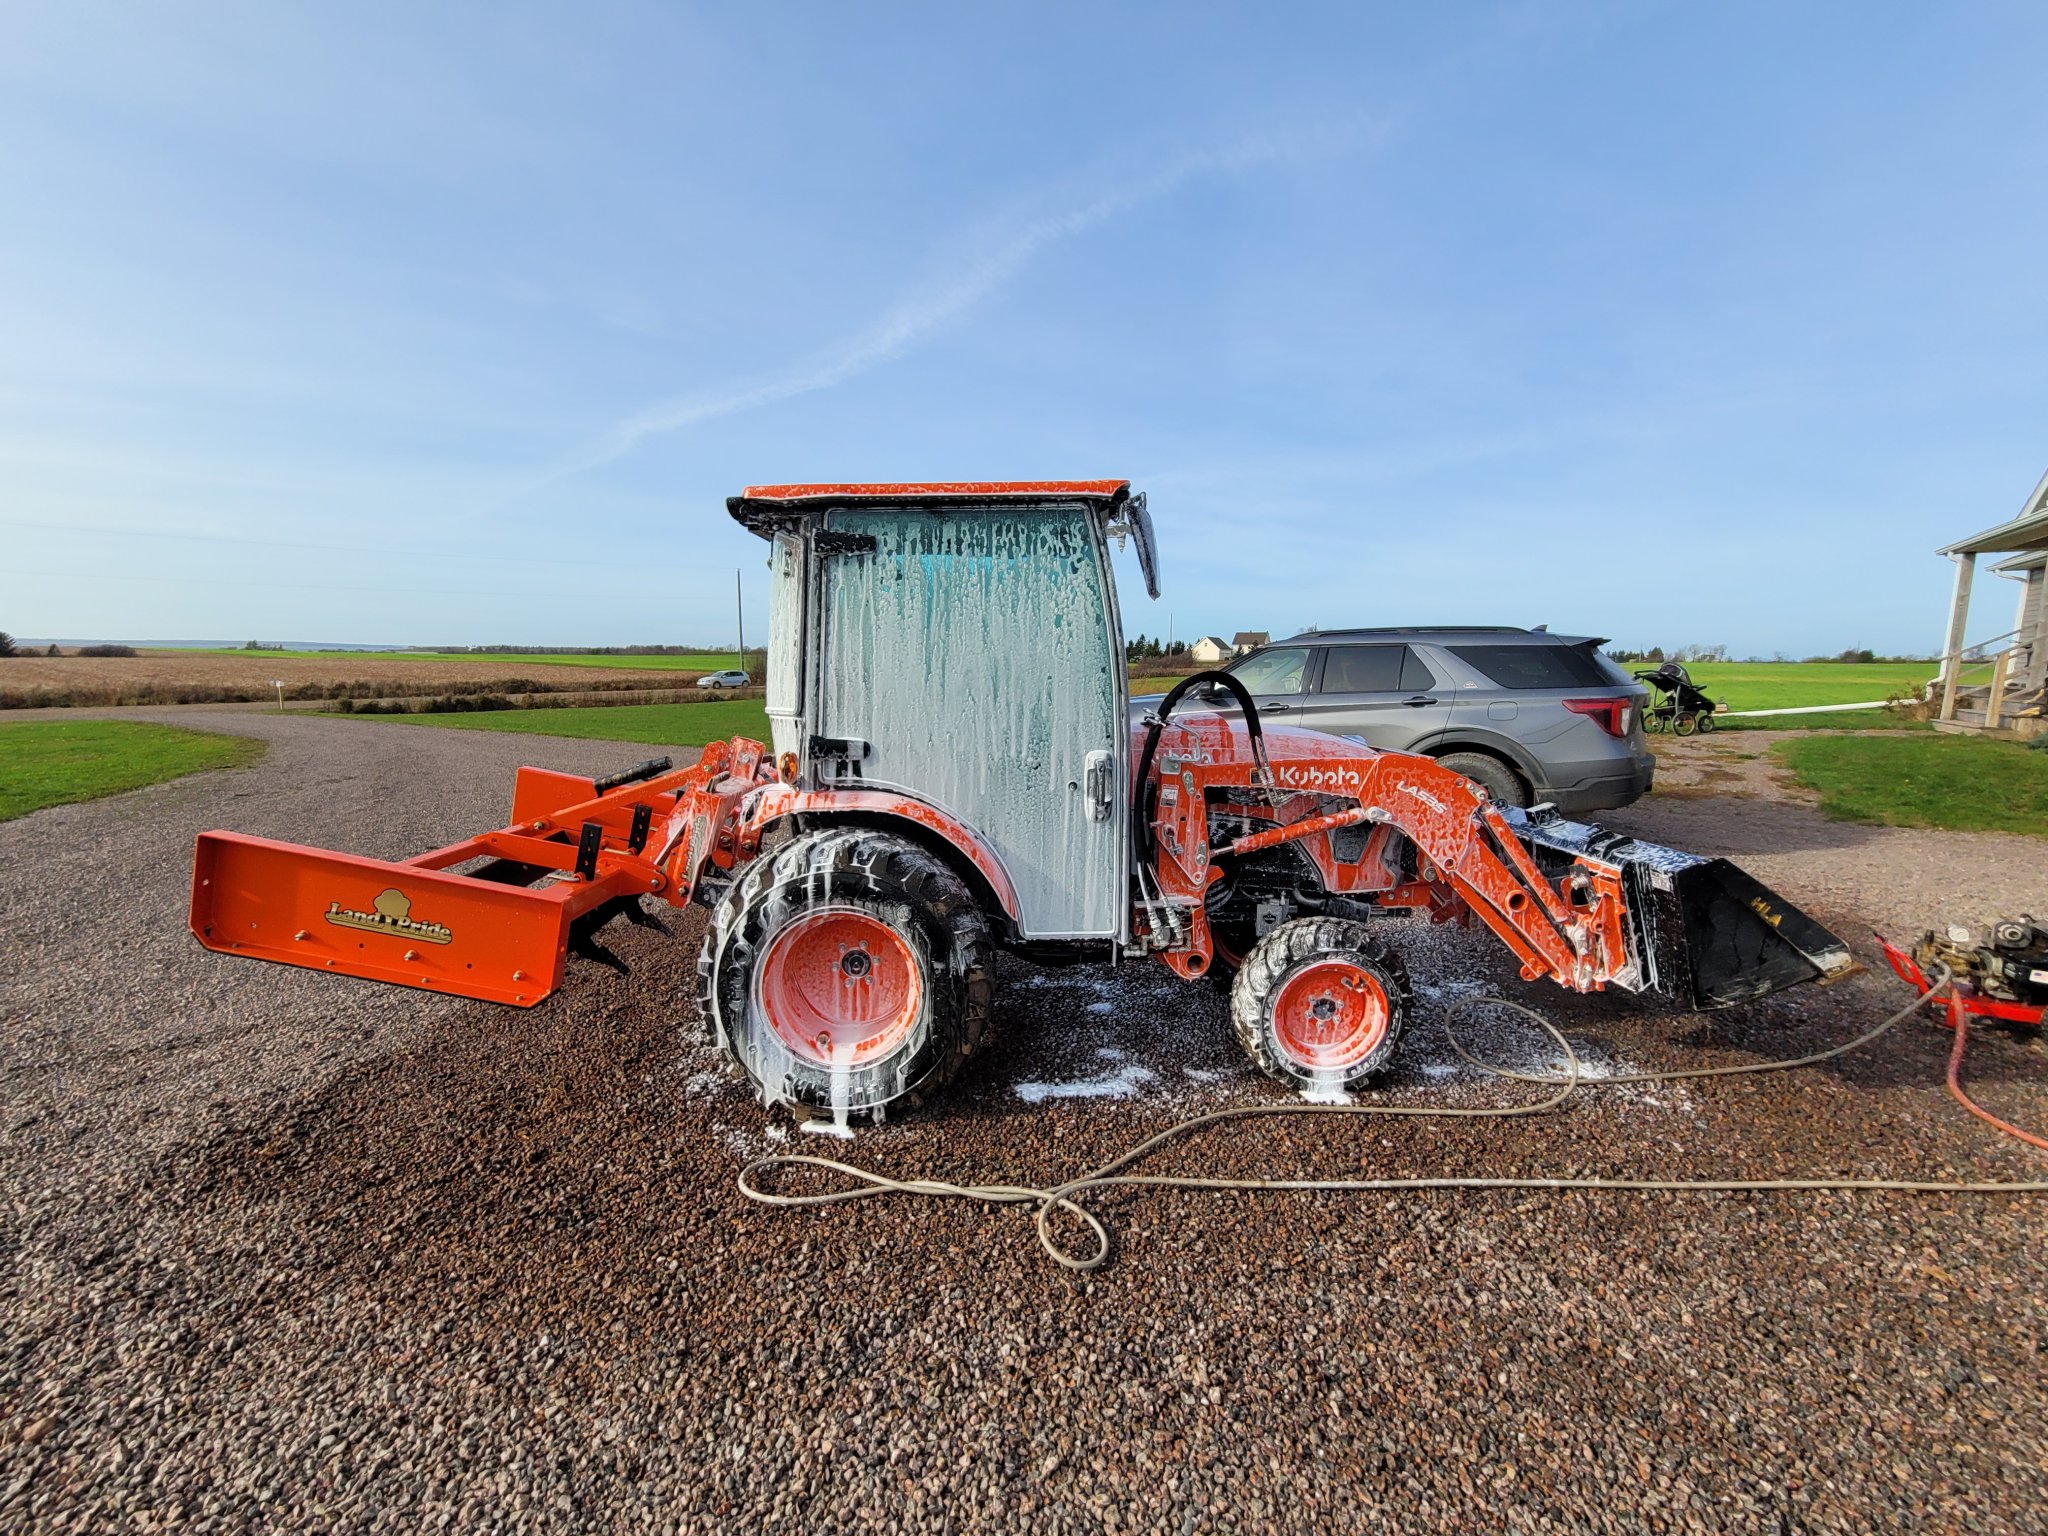
And a quick bath. Windows were filthy so may as well do the whole tractor.
And a quick bath. Windows were filthy so may as well do the whole tractor.
Last edited:
Pulled off the BH77 backhoe, and the FEL, and put on the 3PT hitch, pine needle rake, and on the front, the snowblower. Pretty much ensures it won't snow now..
You are either delirious or humorous.....Pulled off the BH77 backhoe, and the FEL, and put on the 3PT hitch, pine needle rake, and on the front, the snowblower. Pretty much ensures it won't snow now..
")
Not so sure Dusty. . . since I serviced and put my blower on nothing but record setting high temps every day. . . should be 75 today - wtf?You are either delirious or humorous.....
Some last last opportunity Garden chores (it’s an unbelievable 68 degree F and sunny in November?)
Attachments
-
 999.3 KB Views: 258
 -
 1.1 MB Views: 235
Indian SummerNot so sure Dusty. . . since I serviced and put my blower on nothing but record setting high temps every day. . . should be 75 today - wtf?
A beautiful, sunny but cold morning with a low of 16F at the house this morning, and it's going to get a lot colder this coming week. Not a lot of snow but enough to justify blowing and plowing about 400 yards of driveway. Seriously, virtually no HST whine in low range (maybe even none that I can hear) and the engine in this little beast just purrs. What a perfect tractor for this sort of work. Both the snow blade and snow blower are set up "perfectly" for my needs.
I want to run the M6060 this winter too rather than let it sit, and was thinking of running the snow blade on the M along with a Herd 750 seeder/gritter on the back, but the MX is just really good at this winter work, and running one tractor and one block heater might be the best solution. I don't know ... I'll see how it goes. One thing for sure though, I don't have a rear wiper on the M so running the snow blower on that tractor would be problematic unless I installed a rear wiper which I'll probably do next year.
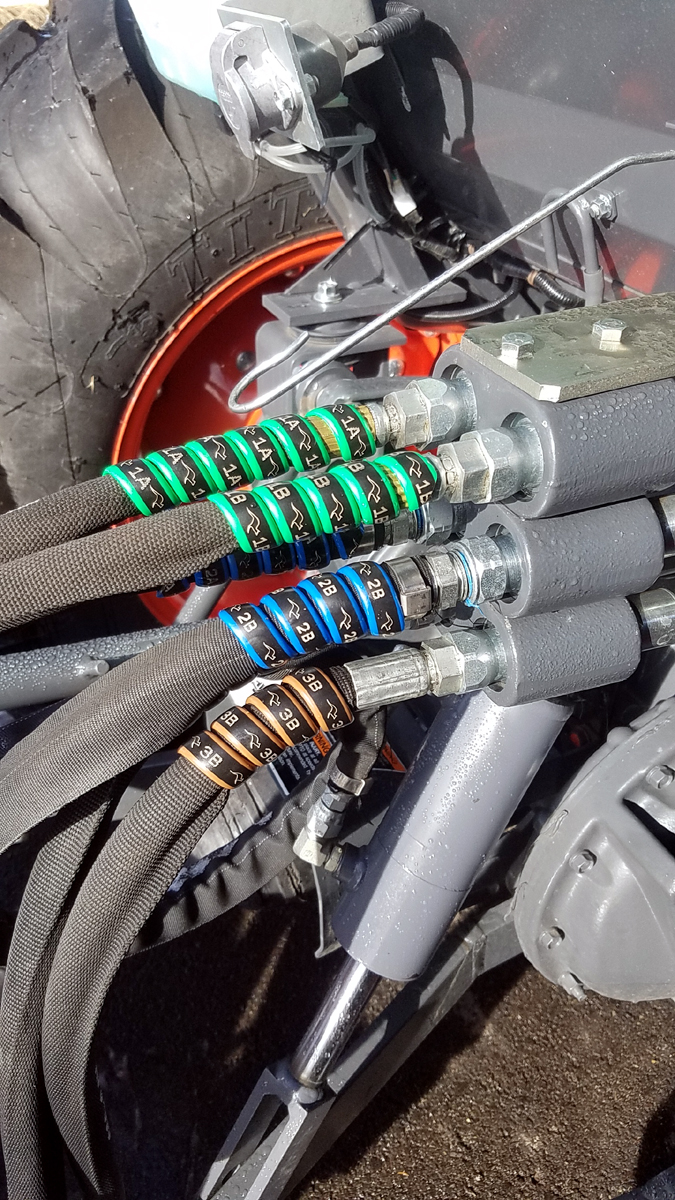
Oh, I added another set of Outback hose markers to the snow blower chute rotation and deflection hoses to avoid the inevitable " eeny, meeny, miny, moe" routine ever year. I'm steadily getting all of the hydraulic hoses marked this way and I like it.
I want to run the M6060 this winter too rather than let it sit, and was thinking of running the snow blade on the M along with a Herd 750 seeder/gritter on the back, but the MX is just really good at this winter work, and running one tractor and one block heater might be the best solution. I don't know ... I'll see how it goes. One thing for sure though, I don't have a rear wiper on the M so running the snow blower on that tractor would be problematic unless I installed a rear wiper which I'll probably do next year.
Oh, I added another set of Outback hose markers to the snow blower chute rotation and deflection hoses to avoid the inevitable " eeny, meeny, miny, moe" routine ever year. I'm steadily getting all of the hydraulic hoses marked this way and I like it.
Last edited:
Always hard to tell in a picture, but looks like you have a little bit of a grade…do you do anything for traction? Or you have enough weight that there no troubles? (How’s the MX with ice on your road/drive?)A beautiful, sunny but cold morning with a low of 16F at the house this morning, and it's going to get a lot colder this coming week. Not a lot of snow but enough to justify blowing and plowing about 400 yards of driveway. Seriously, virtually no HST whine in low range (maybe even none that I can hear) and the engine in this little beast just purrs. What a perfect tractor for this sort of work. Both the snow blade and snow blower are set up "perfectly" for my needs.
I want to run the M6060 this winter too rather than let it sit, and was thinking of running the snow blade on the M along with a Herd 750 seeder/gritter on the back, but the MX is just really good at this winter work, and running one tractor and one block heater might be the best solution. I don't know ... I'll see how it goes. One thing for sure though, I don't have a rear wiper on the M so running the snow blower on that tractor would be problematic unless I installed a rear wiper which I'll probably do next year.
Oh, I added another set of Outback hose markers to the snow blower chute rotation and deflection hoses to avoid the inevitable " eeny, meeny, miny, moe" routine ever year. I'm steadily getting all of the hydraulic hoses marked this way and I like it.
View attachment 90088
View attachment 90089
View attachment 90090
Creeping up on 50hrs with my L3302 so did some little maintenance stuff before weather gets cold here. Cleaned the air filter, checked the tires, checked fluids…oh oh. Front axle case was low by 2L of the 4.5L required. I know it’s been posted here before about others having the same problem, and I checked my last tractor when I got it, but somehow I missed checking this one (probably because there’s no dip stick on this one). I could kick myself. I think I’m okay though, I didn’t do too much in front drive.
That great post really deserves it's own thread so it can better help others in the future.Finished the install of the Summit 3FV
jyoutz
Well-known member
Premium Member
Equipment
MX6000 HST open station, FEL, 6’ cutter, forks, 8’ rear blade, 7’ cultivator
Ran the cutter over the frost killed garden to cut and chop the vegetation. Then removed the cutter and stored it away for winter. Attached my rear blade, and just like that summer turns into winter.
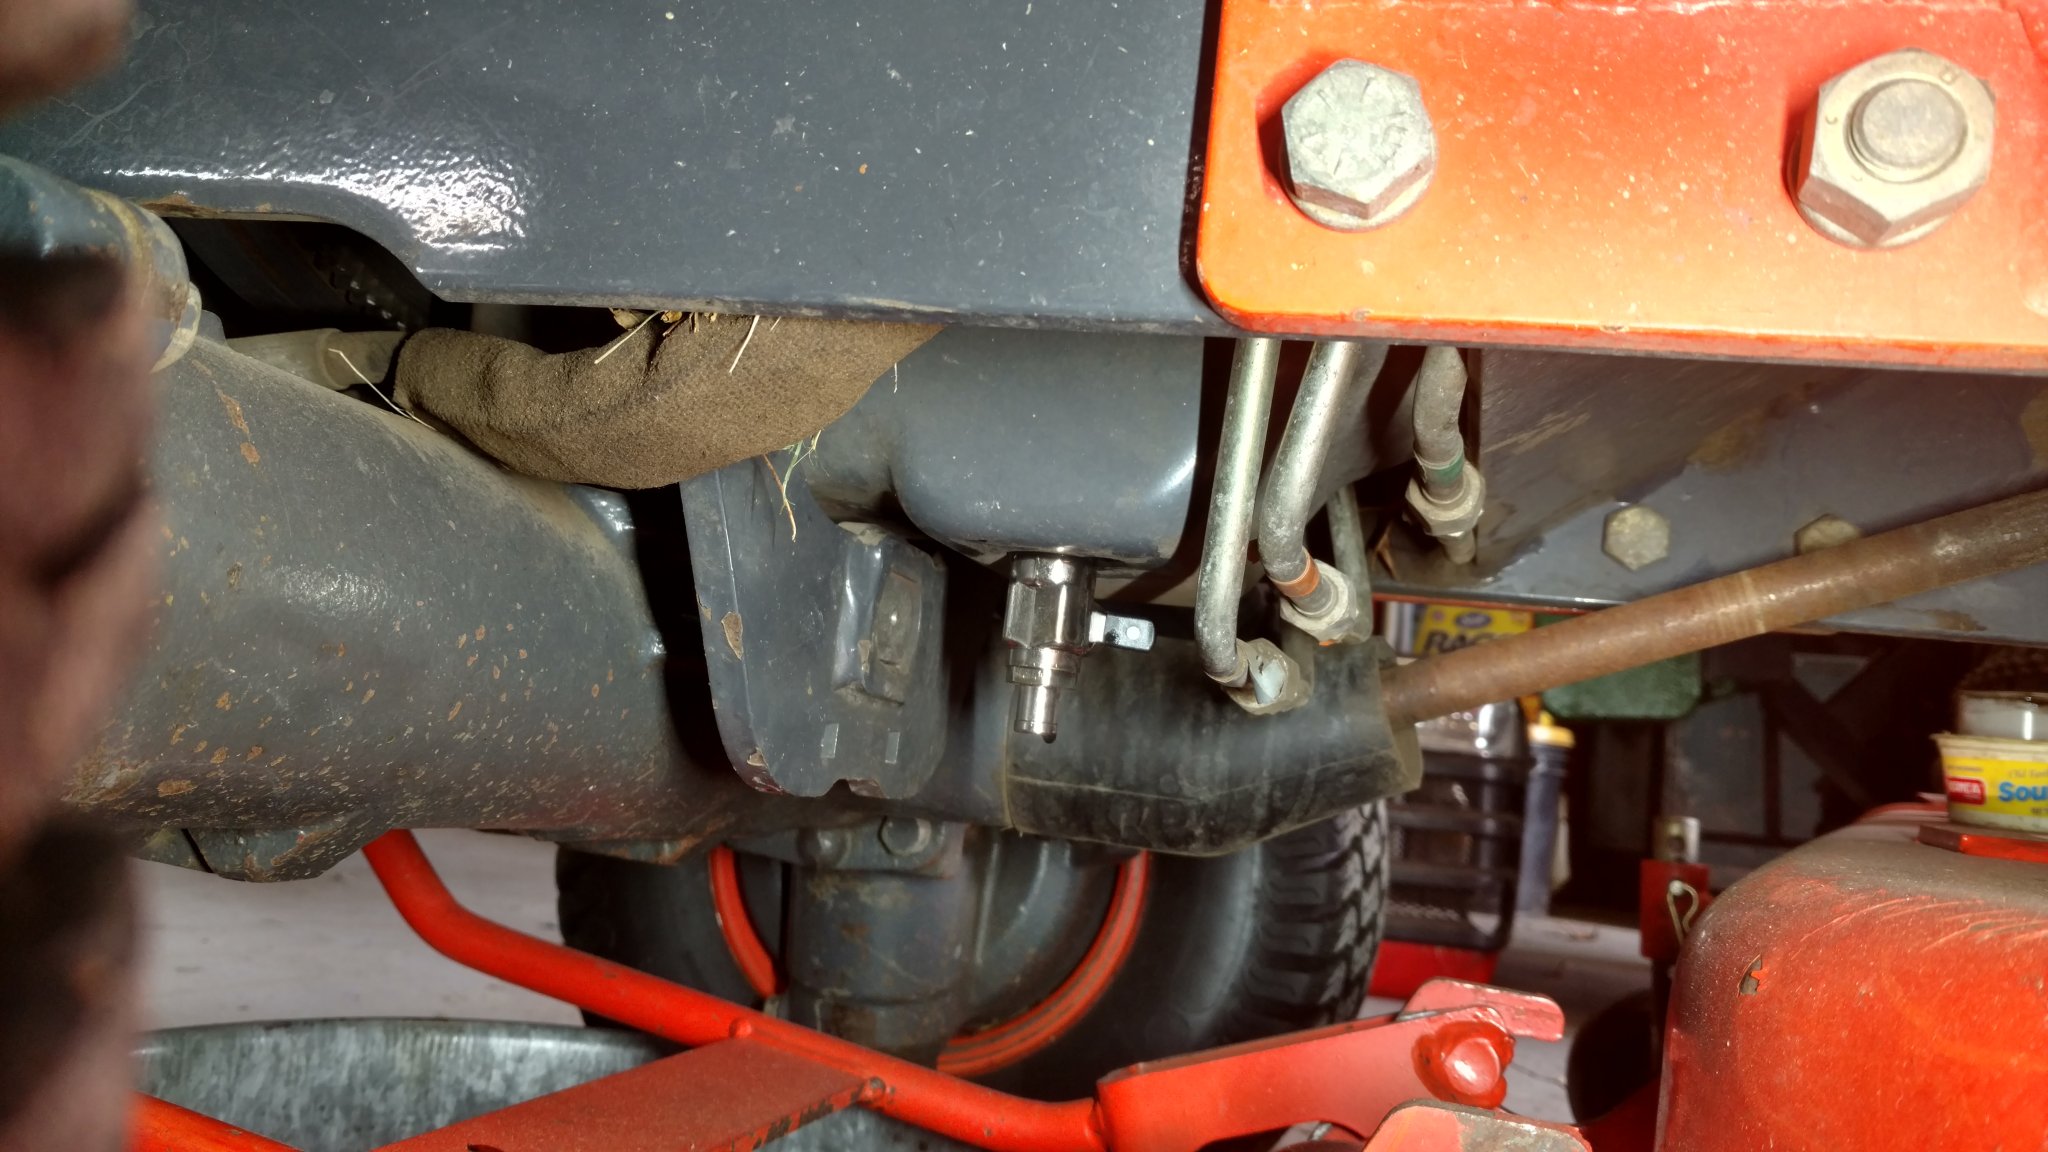
Yesterday was warm but VERY windy, so I decided to do the annual end of mowing season service on my BX. Drained the oil, changed the oil filter, air filter and the fuel filter on the engine. After the oil had drained, I installed a quick drain valve, which should eliminate a lot of the oil mess when the drain plug is removed. It screwed right in and I snugged it up, should work just fine. My only concern though is that it doesn't have a very good flow as the bore is rather small, but as long as the oil is pretty warm, it should be okay.
I also checked the hydraulic/HST oil, coolant, mower gearbox oil, front axle oil. and greased the mower deck, PTO shaft u-joints, gauge wheels and FEL. I wish the front drive shaft had zerks on the u-joints, but it doesn't.
Here is a picture of the quick drain valve installed.
I also checked the hydraulic/HST oil, coolant, mower gearbox oil, front axle oil. and greased the mower deck, PTO shaft u-joints, gauge wheels and FEL. I wish the front drive shaft had zerks on the u-joints, but it doesn't.
Here is a picture of the quick drain valve installed.
Never seen or heard of this product before. Thanks for the heads up... https://outbackwrap.com/collections/hydraulic-hose-markersA beautiful, sunny but cold morning with a low of 16F at the house this morning, and it's going to get a lot colder this coming week. Not a lot of snow but enough to justify blowing and plowing about 400 yards of driveway. Seriously, virtually no HST whine in low range (maybe even none that I can hear) and the engine in this little beast just purrs. What a perfect tractor for this sort of work. Both the snow blade and snow blower are set up "perfectly" for my needs.
I want to run the M6060 this winter too rather than let it sit, and was thinking of running the snow blade on the M along with a Herd 750 seeder/gritter on the back, but the MX is just really good at this winter work, and running one tractor and one block heater might be the best solution. I don't know ... I'll see how it goes. One thing for sure though, I don't have a rear wiper on the M so running the snow blower on that tractor would be problematic unless I installed a rear wiper which I'll probably do next year.
Oh, I added another set of Outback hose markers to the snow blower chute rotation and deflection hoses to avoid the inevitable " eeny, meeny, miny, moe" routine ever year. I'm steadily getting all of the hydraulic hoses marked this way and I like it.
View attachment 90088
View attachment 90089
View attachment 90090
Quick
Well-known member
Equipment
B2601, LA435, BH70, LP SGC0554 Grapple, LP RB1672 Rear Blade, King Kutter 60" BB