BX1800 Rehabilitation

jetattblue

Member

Equipment
BX1800; L2550
Mar 14, 2018
103
0
16
Arlington, TX
As some of you know, I purchased a severely neglected BX1800 and a similarly neglected L2550 a month or so ago. This thread is about the BX1800. I posted some pictures and questions about its engine in the "Odd Colored Piston Head" thread.

I really enjoy reading about and seeing folks work on their tractors, so I thought that I would make a full thread regarding the rehabilitation process here. Please note, I am a total rookie at this! I purchased this tractor knowing it needed lots of work, but it was a perfect opportunity for me to learn about engines and tractors. So, this is not necessarily intended as a teaching thread; but, perhaps, folks can learn from my mistakes along the way.

Here we go.

When I first got the BX1800, I moved it into my barn and removed its faded hood, broken grill and under skirts, and the hood support. I will be able to repaint the hood; it's just faded. The plastic parts under the hood? Well, they are cracked in some places, broken in others, and not really usable. I will need to replace these at some point. Please let me know if you have any!

Then, I started taking various parts off of the engine preparatory to removing it. This included the muffler and exhaust manifold, the starter (to be tested later), etc. I also unbolted the engine from the mounts and disconnected the radiator from the frame. Not long after, I successfully removed the engine!

BX Engine Still In.jpg

BX Engine In No Supps.jpg

BX Engine Removal.jpg

Today, I removed the floor, which Kubota calls the step. The rubber mat was cracked and brittle; I'll need to replace that. The step had some rust spots on it, which is consistent with this tractor living outside for many years. But, I'll sand those off, spray some rust converter on it, then re-finish it in Kubota Orange. Given the cost of replacing this piece, I am very happy it is salvageable.

BX Floor.jpg

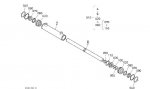
I also began de-greasing and cleaning the frame. There was a ton of oily buildup around the steering cylinder, which is disconcerting. I cannot tell where it came from. I am hoping to clean really well around it so that I will be able to detect any leaks from the hoses later. To do this, can I disconnect the hydraulic hoses? Or, are they under pressure? It would make it much easier to clean them and remove some rust spots from the frame without them attached.

BX Front Frame Clean.jpg
 
Last edited:

Newlyme

Active member
Lifetime Member

Equipment
M4900 w/loader, finish mower, tiller, auger, rake. BX24 w/loader, backhoe
May 27, 2015
634
67
28
Nelson Ohio USA
Just my opinion.
There my be a, “little”, pressure. Nothing that I would call a safety issue. If there was any significant pressure on one side of the cylinder it would push the wheels one way or the other. Just be prepared to catch the oil that may drain out.
 

North Idaho Wolfman

Moderator
Staff member
Lifetime Member

Equipment
L3450DT-GST, Woods FEL, B7100 HSD, FEL, 60" SB, 743 Bobcat with V2203, and more
Jun 9, 2013
28,948
5,293
113
Sandpoint, ID
No pressure, just fluid, and if you turn the steering wheel and or the wheels fluid will spit out. ;)
 

jetattblue

Member

Equipment
BX1800; L2550
Mar 14, 2018
103
0
16
Arlington, TX
Thank you! As a quick note, the front will require a little work anyway. The boots on the tie rod ends are completely gone on one side, and they were barely hanging on the other side. Is the actual cylinder serviceable? I'm not sure how to test it or even inspect it really.
 

North Idaho Wolfman

Moderator
Staff member
Lifetime Member

Equipment
L3450DT-GST, Woods FEL, B7100 HSD, FEL, 60" SB, 743 Bobcat with V2203, and more
Jun 9, 2013
28,948
5,293
113
Sandpoint, ID
Yes the steering cylinder is 100% serviceable on that model (some aren't).

You haven't looked here have you?
https://apps.kubotausa.com/illustrated-parts/

It will give you a parts breakdown of the entire tractor and the part numbers that are up to date to get new parts.

Your cylinder internals:


Attachments

jetattblue

Member

Equipment
BX1800; L2550
Mar 14, 2018
103
0
16
Arlington, TX
That's great to hear. I saw the parts diagram, but I just wasn't sure how difficult it was to disassemble, etc. I'll check my WSM and see if it details how to do that.
 

jetattblue

Member

Equipment
BX1800; L2550
Mar 14, 2018
103
0
16
Arlington, TX
Attached are a few pictures of the BX1800 as it sits today. Yesterday, I removed the step and began cleaning years of accumulated dirt, leave, and general muck from underneath it.

I was hoping to get a good idea of whether there are any rust issues on the frame. So far, there are a few spots of surface rust, but nothing to invasive. I'll take care of those over the next week or so as I'm working on the engine.

I am also hoping to clean and maintain some of the pedal linkages underneath the step. They are certainly easier to get to now!

BX Front No Floor.jpg

BX No Floor 1.jpg

BX No Floor 2.jpg
 

jetattblue

Member

Equipment
BX1800; L2550
Mar 14, 2018
103
0
16
Arlington, TX
Today, it was super cold and wet outside, so I decided to assemble my new pistons.

First, here are pictures of the old pistons. These are the pistons from the Front and Back cylinders. As you can see, they have some pretty massive chunks cracked off of the piston lands. When I removed them from the cylinders, the chunks were still I place, but as soon as I removed them and wiped them off, the chunks fell into my rag. As you may recall, the Middle piston didn't have any damage to it.

Broken Lands 1.jpg

Broken Lands 2.jpg

Broken Lands 3.jpg
 

jetattblue

Member

Equipment
BX1800; L2550
Mar 14, 2018
103
0
16
Arlington, TX
On Friday, I received a box of parts from Messick's. The parts included my new piston assemblies.

First, I honed the cylinders, and they look pretty good. The flex hone was not difficult to use. I spent most of my time cleaning the cylinders before and after the honing. The cylinders were really smooth in some spots before honing, and I believe the hone made a difference in removing these glazed looking areas. If I had to do it again, I might use a little coarser grit. I used 320, and it seemed to work pretty well, but I would have liked to have seen the difference with something a little rougher.

Following the WSM, I attached the pistons to the old connecting rods with the wrist pins; this was fairly easy, although I installed two of them the wrong directly because I was not paying attention to the marks on the piston and the connecting rod. According to the manual, the arrow on the piston head needs to point the same direction as the numbers marking the side of the connecting rod.

Next, I installed the new rings. This was not very difficult at all. Although it was easy, nobody would pay me by the hour to do this! I was taking my time, and it took me a while, but I enjoyed it.

I am picking up my piston ring compressor today, and I hope to install the pistons into the cylinders this week.

New Rings.jpg

Fully Assembled Pistons.jpg
 

greeno

Member

Equipment
B2710 w/LA402 FEL, BL4690 hoe, RB1560, GS1560, Haban 5' sickle bar, 5' JD RC
Jul 14, 2018
187
2
18
Big Lake MN
jetaattblue - thanks for posting this, i love learning about other peoples projects. Keep these posts coming!

I used to rehab (not restore, just get going again) snowmobiles and that was a lot of fun. But with clear evidence of climate change in my area i'm done with sleds. I'm looking forward to rehabilitating an old Kubota in my new shop, all I need now is:

1. A new shop
2. An old Kubota
 

North Idaho Wolfman

Moderator
Staff member
Lifetime Member

Equipment
L3450DT-GST, Woods FEL, B7100 HSD, FEL, 60" SB, 743 Bobcat with V2203, and more
Jun 9, 2013
28,948
5,293
113
Sandpoint, ID
Did you put the rings on right?
They are directional.
 

jetattblue

Member

Equipment
BX1800; L2550
Mar 14, 2018
103
0
16
Arlington, TX
I did. The middle and top rings have a symbol that faces up; and, the middle ring has an undercut that faces down. I haven't clocked them yet, though. I will need to remember that when I install them.
 

Newlyme

Active member
Lifetime Member

Equipment
M4900 w/loader, finish mower, tiller, auger, rake. BX24 w/loader, backhoe
May 27, 2015
634
67
28
Nelson Ohio USA
First, I honed the cylinders, and they look pretty good. The flex hone was not difficult to use. I spent most of my time cleaning the cylinders before and after the honing. The cylinders were really smooth in some spots before honing, and I believe the hone made a difference in removing these glazed looking areas. If I had to do it again, I might use a little coarser grit. I used 320, and it seemed to work pretty well, but I would have liked to have seen the difference with something a little rougher.
When you were honing did you run across any areas in the cylinders that the hone did not touch or had to give an area extra attention?
 

jetattblue

Member

Equipment
BX1800; L2550
Mar 14, 2018
103
0
16
Arlington, TX
I don't recall any issues like that. But, I'll check the cylinders and see if the honing marks are evenly distributed across each cylinder.
 

Russell King

Well-known member

Equipment
L185F, Modern Ag Competitor 4’ shredder, Rhino tiller, rear dirt scoop
Jun 17, 2012
4,720
1,017
113
Austin, Texas
When you were honing did you run across any areas in the cylinders that the hone did not touch or had to give an area extra attention?

Would a flex hone leave any spot untouched? My understanding of a flex hone is something akin to a brush with balls attached at the ends of the bristles. The balls can move out at will. They are not flat plates like a “normal” cylinder hone with three arms that flex in or out.

Which did OP use?


Sent from my iPad using Tapatalk
 

jetattblue

Member

Equipment
BX1800; L2550
Mar 14, 2018
103
0
16
Arlington, TX
I used a flex hone with the individual abrasive balls on it. I feel like it did a really good job, and the cylinder measured within spec before I used it.
 

jetattblue

Member

Equipment
BX1800; L2550
Mar 14, 2018
103
0
16
Arlington, TX
I don't have any big updates to add because it has been busy at work and with holiday stuff. I am hopeful to start re-assembling the engine this week if things slow down.

In the meantime, I cleaned the old head gasket material off of the head, and I generally cleaned up and visually inspected the head. Interestingly, the gasket looked to be in great condition when I removed it.

I am still not sure what may have caused the previous owner to use ether on it and destroy the pistons. My current theory is that he neglected it and let it sit for months outside, then he used ether when it didn't immediately start. Does letting it sit mess with the injectors? In other words, would letting it sit result in something hardening or gumming up their nozzles? At any rate, I'm still guessing about the cause, but given the condition of everything else, I am fairly certain that general neglect is a cause (if not the cause) of the hard start issue.

I also removed the thermostat housing and thermostat. I have already ordered a new one, but the original one looks pretty good.

I am also going to work on some items under the step area since it is exposed now. The boots on the output shaft look ripped and worn out, so I am going to replace those. I am also going to change the gear oil in the front axle and service the front axle drive shaft. Given the overall neglected nature of the tractor, I am just assuming that nothing was serviced ... ever.

Any other items that I should take a look at while it's partly disassembled?

Head 1.jpg

Head 2.jpg

Therm Housing.jpg
 

D2Cat

Well-known member
Lifetime Member

Equipment
L305DT, B7100HST, TG1860, TG1860D, L4240
Mar 27, 2014
13,082
4,441
113
40 miles south of Kansas City
For a small fee you can have the head magnafluxed (at a machine shop) and determine for sure there are no problems before assembling. Sure wouldn't want to put it all together and realize you have a head with a crack.