B7200 hydraulic steering

Paul Allwood

Well-known member
Lifetime Member

Equipment
Kubota B7200HSTD, homemade FEL, front flail mower, forks & ballast box, tiller
Jul 8, 2025
913
1,738
93
Baranduda, Victoria, Australia
Here's a sketch of the hydraulic schematic for the steering. Have I missed anything ? Is there anything you would change ?

PXL_20261021_065103564.MP~2.jpg
 
Last edited:
  • Haha
Reactions: 1 user

imarobot

Well-known member

Equipment
5740HSTC-3, FDR2584 Finish Mower, BH92 Backhoe, L2195A Snowblower, LA854 FEL, +
Apr 18, 2025
457
356
63
NH
  • Haha
Reactions: 1 user

Paul Allwood

Well-known member
Lifetime Member

Equipment
Kubota B7200HSTD, homemade FEL, front flail mower, forks & ballast box, tiller
Jul 8, 2025
913
1,738
93
Baranduda, Victoria, Australia
Good progress a couple of days ago and today with getting the steering control valve mounted. It was pretty unusual that my first idea that I built actually appears to have worked.

Now I'm waiting on hose and fittings so I can connect everything. Also a little bit to do modifying the pump mount if needed for alignment, making mounts for the filters, and covers to clean up the holes in the day.

Here's the "finished" item....

PXL_20261022_065846059.MP~2.jpg

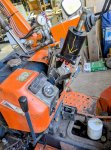
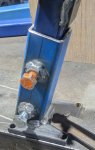
I made this bit to bolt to the nice solid base where the old steering box was bolted down. It gets bolted in first.
PXL_20261022_073112649~2.jpg

And this bit to slide into it and mount the steering valve.

PXL_20261022_064455446.MP~2.jpg

PXL_20261022_064502360.MP~2.jpg

When they slide together the inner tube is secured in place by the two M14 that can be accessed from the side. Plenty of space for hoses straight off the bottom of the valve and down through openings in the existing brackets.

PXL_20261022_073101147~2.jpg

PXL_20261022_070634955.MP~3.jpg

PXL_20261022_071743394~2.jpg

PXL_20261022_064606896.MP~3.jpg

The front edge of the new steering wheel ended up about level with the original steering wheel and 40 mm higher - that was actually planned.

Here's a pic that shows the relative alignment of the steering wheels with the mounting bases lined up.

PXL_20261022_072931454~2.jpg

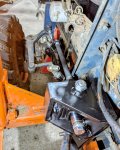
I cut a section out of the dash to clear the steering valve to allow the dash to be easily removed without needing to move the steering valve. This just needs me to remove and extra new panel on top of the dash first.

PXL_20261022_065246688.MP~3.jpg

I first looked at the brackets that secure the lower edges of the dash, but decided to mount from the same point as the original steering box for two reasons:
- Very solid. I could probably lift the tractor with the lower mount tube.
- It made it quite easy to get the location of the new steering wheel where I wanted it.

Pretty happy with how this worked out, even for a version 1.

 
  • Like
Reactions: 2 users

Russell King

Well-known member
Lifetime Member

Equipment
L185F, Modern Ag Competitor 4’ shredder, Rhino tiller, rear dirt scoop
Jun 17, 2012
8,086
3,184
113
Austin, Texas
That looks great!

Are you planning to wrap that in some type of cover where the hydraulic lines go or just put the fabric covers over the hoses?

If it springs a leak that could be a bit dangerous since there is a lot of body parts fairly close to the hydraulics (which may not be all that high pressure to worry about).
 
  • Like
Reactions: 1 user

Paul Allwood

Well-known member
Lifetime Member

Equipment
Kubota B7200HSTD, homemade FEL, front flail mower, forks & ballast box, tiller
Jul 8, 2025
913
1,738
93
Baranduda, Victoria, Australia
That looks great!

Are you planning to wrap that in some type of cover where the hydraulic lines go or just put the fabric covers over the hoses?

If it springs a leak that could be a bit dangerous since there is a lot of body parts fairly close to the hydraulics (which may not be all that high pressure to worry about).
Thanks Russell.

I've got the fabric covers that came with the original hoses that I'll use. I'll also put some sort of cover around the steering valve. I was thinking more of of cosmetics - hadn't thought of protection against a hydraulic leak.
 
Last edited:
  • Like
Reactions: 1 user

Paul Allwood

Well-known member
Lifetime Member

Equipment
Kubota B7200HSTD, homemade FEL, front flail mower, forks & ballast box, tiller
Jul 8, 2025
913
1,738
93
Baranduda, Victoria, Australia
Some more parts arrived today....

PXL_20261026_015645540.MP~2.jpg

Option 1: I end up with a tractor with hydraulic steering that works.

Option 2: I end up with a pipe of bits in a box and a tractor I can't use.

Here's hoping option 1 wins.
 
  • Like
Reactions: 1 users

Paul Allwood

Well-known member
Lifetime Member

Equipment
Kubota B7200HSTD, homemade FEL, front flail mower, forks & ballast box, tiller
Jul 8, 2025
913
1,738
93
Baranduda, Victoria, Australia
Big day - I put my first end on a hydraulic hose....ever. I'm using screw in replaceable fittings so I can do it myself without the complications that go with a crimper and I can measure hose lengths and adjust hose routing as I go.

PXL_20261026_031329938.MP~2.jpg

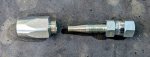
If you've never seen these fittings....

PXL_20261026_031443528.MP~2.jpg

The ferrule goes on first. It has a coarse left hand thread.

PXL_20261026_031503130.MP~2.jpg

The hose tail is next. It has a fine right hand thread that screws into the ferrule and forces it's way inside the hose, expanding the hose into the ribs of the coarse thread in the ferrule as it goes.

PXL_20261026_031528334~2.jpg

According to the supplier and online sources, the assembly is rated to the same working pressure as the hose.

These fittings match the 2-wire hose I bought. The fittings are different for 1-wire hose. I got all the bits from the same supplier to ensure compatibility - https://www.hydraulic.online.

This is not an endorsement of screw in re-usable fittings - I'm certainly not qualified for that. The way I see it, I'm using bits specified by the manufacturer and assembling per manufacturer's instructions - should mean I achieve manufacturer's specified performance. Do your own research and make your own decision.
 
Last edited:
  • Like
Reactions: 1 user

Runs With Scissors

Well-known member

Equipment
L2501 TLB , Grappel, Brush Hog, Box Blade, Ballast box, Forks, Tiller, PH digger
Jan 25, 2023
4,188
5,669
113
Michigan
Big day - I put my first end on a hydraulic hose....ever. I'm using screw in replaceable fittings so I can do it myself without the complications that go with a crimper and I can measure hose lengths and adjust hose routing as I go.

View attachment 180989

If you've never seen these fittings....

View attachment 180990

The ferrule goes on first. It has a coarse left hand thread.

View attachment 180991

The hose tail is next. It has a fine right hand thread that screws into the ferrule and forces it's way inside the hose, expanding the hose into the ribs of the coarse thread in the ferrule as it goes.

View attachment 180992

According to the supplier and online sources, the assembly is rated to the same working pressure as the hose.

These fittings match the 2-wire hose I bought. The fittings are different for 1-wire hose. I got all the bits from the same supplier to ensure compatibility - https://www.hydraulic.online.

This is not an endorsement of screw in re-usable fittings - I'm certainly not qualified for that. The way I see it, I'm using bits specified by the manufacturer and assembling per manufacturer's instructions - should mean I achieve manufacturer's specified performance. Do your own research and make your own decision.
Those fittings look interesting for sure!

I will be interested to see how you like them. I have been "fiddling" with my crimper for a few weeks now, and I think I am finally "getting the hang of it".

However; If it turns out to be a "failed experiment" (which approximately 45% of all my experiments are ;)) I am open too suggestions.
 
  • Like
Reactions: 1 users

Paul Allwood

Well-known member
Lifetime Member

Equipment
Kubota B7200HSTD, homemade FEL, front flail mower, forks & ballast box, tiller
Jul 8, 2025
913
1,738
93
Baranduda, Victoria, Australia
Those fittings look interesting for sure!

I will be interested to see how you like them. I have been "fiddling" with my crimper for a few weeks now, and I think I am finally "getting the hang of it".

However; If it turns out to be a "failed experiment" (which approximately 45% of all my experiments are ;)) I am open too suggestions.
I've been wondering how your crimping has been coming along.
 
  • Like
Reactions: 1 user

Chanceywd

Well-known member
Lifetime Member

Equipment
Kubota L2501DT BH77 VIRNIG URG60-CT 1950 8N WC-68
Mar 26, 2021
885
877
93
central ny
Big day - I put my first end on a hydraulic hose....ever. I'm using screw in replaceable fittings so I can do it myself without the complications that go with a crimper and I can measure hose lengths and adjust hose routing as I go.

View attachment 180989

If you've never seen these fittings....

View attachment 180990

The ferrule goes on first. It has a coarse left hand thread.

View attachment 180991

The hose tail is next. It has a fine right hand thread that screws into the ferrule and forces it's way inside the hose, expanding the hose into the ribs of the coarse thread in the ferrule as it goes.

View attachment 180992

According to the supplier and online sources, the assembly is rated to the same working pressure as the hose.

These fittings match the 2-wire hose I bought. The fittings are different for 1-wire hose. I got all the bits from the same supplier to ensure compatibility - https://www.hydraulic.online.

This is not an endorsement of screw in re-usable fittings - I'm certainly not qualified for that. The way I see it, I'm using bits specified by the manufacturer and assembling per manufacturer's instructions - should mean I achieve manufacturer's specified performance. Do your own research and make your own decision.
I think it is a great way to do what you are doing.
Your dash looks a little like my 8N when I cut it up to add electric power steering to that.
She is no garage queen she is a 1950 old girl that still works.
I used a few of them years ago at work. I remember they could be a bear to get in all the way.
It was best done at a vice after threading the ferrule.
Not a 2 wrench job, especially now with arthritic hands!
I had thought about having some hose and a few of them for emergency repairs.
Instead I went around the tractor and measured hose and fittings, adapters and got a few that might be too long but get me going to repair right another day.

Bill
 
  • Like
Reactions: 1 user

North Idaho Wolfman

Moderator
Staff member
Lifetime Member

Equipment
L3450DT-GST, Woods FEL, B7100 HSD, FEL, 60" SB, 743 Bobcat with V2203, and more
Jun 9, 2013
36,743
11,461
113
Sandpoint, ID
I plumbed my first B7100 and DYI loader with those fittings, still have them kicking around.
They work great, just a little bulky.
Put some grease on the threads and they go much easier.
Agree with use a vice or better yet a pipe vice to hold them when assembling.
 
  • Like
Reactions: 1 users

Paul Allwood

Well-known member
Lifetime Member

Equipment
Kubota B7200HSTD, homemade FEL, front flail mower, forks & ballast box, tiller
Jul 8, 2025
913
1,738
93
Baranduda, Victoria, Australia
I think it is a great way to do what you are doing.
Your dash looks a little like my 8N when I cut it up to add electric power steering to that.
She is no garage queen she is a 1950 old girl that still works.
I used a few of them years ago at work. I remember they could be a bear to get in all the way.
It was best done at a vice after threading the ferrule.
Not a 2 wrench job, especially now with arthritic hands!
I had thought about having some hose and a few of them for emergency repairs.
Instead I went around the tractor and measured hose and fittings, adapters and got a few that might be too long but get me going to repair right another day.

Bill
I've only assembled 1 so far and it was done in a vice. The last bit of screwing in the hose tail was hard, even with the vice.
 
  • Like
Reactions: 1 user

Paul Allwood

Well-known member
Lifetime Member

Equipment
Kubota B7200HSTD, homemade FEL, front flail mower, forks & ballast box, tiller
Jul 8, 2025
913
1,738
93
Baranduda, Victoria, Australia
I plumbed my first B7100 and DYI loader with those fittings, still have them kicking around.
They work great, just a little bulky.
Put some grease on the threads and they go much easier.
Agree with use a vice or better yet a pipe vice to hold them when assembling.
Thanks. I did use grease on the 1 that I've assembled - saw it on a YouTube video.
 
  • Like
Reactions: 1 user

Paul Allwood

Well-known member
Lifetime Member

Equipment
Kubota B7200HSTD, homemade FEL, front flail mower, forks & ballast box, tiller
Jul 8, 2025
913
1,738
93
Baranduda, Victoria, Australia
I took the steering cylinder mounting bits off a couple of days ago to paint them. Got them re-assembled and re-fitted this afternoon. It almost looks like it belongs.


I used the original ball joint that was part of the long drag link - cut it off, drilled and tapped to M14 x 1.5.

PXL_20261027_085834435.MP~2.jpg

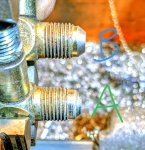
The fittings on the hydraulic cylinder straight off the donor BX tractor were 9/16" x 18 tpi with a 45 degrees flare. Same thread as a -6 JIC but wrong flare angle - in using all JIC. I mounted the fittings in the 4-jaw chuck in the lathe and turned the taper to 37 degrees.

'A' is the original 45 degrees flare. 'B' is the 37 degree flare after turning.

PXL_20261027_065827768.MP~4.jpg

Both done - now JIC.

PXL_20261027_070338611.MP~2.jpg

PXL_20261027_085942174.MP~2.jpg

PXL_20261027_090050616.MP~2.jpg

PXL_20261027_090003793.MP~2.jpg
 
  • Like
Reactions: 1 users

Paul Allwood

Well-known member
Lifetime Member

Equipment
Kubota B7200HSTD, homemade FEL, front flail mower, forks & ballast box, tiller
Jul 8, 2025
913
1,738
93
Baranduda, Victoria, Australia
The suction line is done - thanks @North Idaho Wolfman for the suggestion re where to connect it.

PXL_20261029_082203854~3.jpg

The suction and return filters are mounted, tucked up nicely in front of and to the side of the radiator, protected by the loader braces. I'll also be making a nice solid brush guard for the front to protect the filters from front impact and to work as a future grapple brush guard.

PXL_20261029_081748062~3.jpg

PXL_20261029_082213753~3.jpg

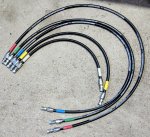
I finished routing, measuring and making hoses today too - it's a slow job. The colour coding is to help prevent me having to trace the hoses from end to end a dozen times to work out which one I've got.

PXL_20261029_081736877~2.jpg

Hopefully I'll get the hoses fitted tomorrow, bolt the steering cylinder in, then make a short shaft to go between the 2 Lovejoy fittings to connect the pump to the crankshaft.

I'm thinking I'll fill the filter elements with oil before I fire it up. Don't know if this is necessary, but seems like a good idea. I'll also to up the oil reservoir.

It's there anything else I should do before starting and testing it ?
 
  • Like
Reactions: 1 users

Paul Allwood

Well-known member
Lifetime Member

Equipment
Kubota B7200HSTD, homemade FEL, front flail mower, forks & ballast box, tiller
Jul 8, 2025
913
1,738
93
Baranduda, Victoria, Australia
Not much went to plan today. I didn't get any hoses connected and didn't get the steering valve bolted in.

Instead I made a dummy shaft that I fitted into the fixed half of the Lovejoy coupling on the crankshaft to check the alignment with the centre of the pump shaft. As a result I modified the pump mounting brackets to get it lined up better.

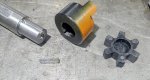
Next I made a shaft to fit between the Lovejoy coupling on the crankshaft pulley and the pump....twice. No idea how I did it, but I managed to make it 20 mm too short the first time.

PXL_20261030_055714506~3.jpg

I didn't have any 3/4" shaft - closest I had was 1" diameter so I turned each end down to 3/4 to fit the Lovejoys. Glad I checked the fit before milling the keyways.

I don't pick up my new (old) mill drill for a couple of days so I milled keyways at each end of the shaft in the lathe.


Next I didn't have any 3/16" key steel. Closest I've got is 1/4", so I milled this down in the lathe to make two 3/16 keys.

PXL_20261030_071410733.MP~3.jpg


Not the quickest way to do any of this, but I still enjoy it and find it therapeutic.

The Lovejoy couplings I've used allow a good amount of movement, so with one at the crankshaft and another on the pump shaft, I don't think I'll end up with any side load on the pump. The shaft length also allows for about 2 mm end play to ensure there's no end force on the pump shaft. Hopefully it's one happy little pump.


So at least I did manage to get something done - the pump and it's drive shaft is now in place.

PXL_20261030_081520996.MP~2.jpg

PXL_20261030_081715085~2.jpg

PXL_20261030_083057772.MP~2.jpg

PXL_20261030_083026291~2.jpg

I was distracted for a bit watching this snake waiting for the local snake catcher to come and get him out of my shed.

PXL_20261030_025641263.MP~2.jpg

PXL_20261030_033324052.MP~2.jpg
 
Last edited:
  • Like
Reactions: 1 user

Chanceywd

Well-known member
Lifetime Member

Equipment
Kubota L2501DT BH77 VIRNIG URG60-CT 1950 8N WC-68
Mar 26, 2021
885
877
93
central ny
Looking good Paul!

" therapeutic"
That is a good description of why I spend a lot of time working on things in my garage/shop and what brings me here!

Spent a bit of time yesterday there and then when a Vevor ladder stabilizer was delivered around noon I switched to using that to put snow guards on the 12 ft high metal roof edge.
The stabilizer solved the problem of putting the ladder against the gutters quite well.
I thought about making one but for $50 it was half the price of my insurance co pay for an Emergency Room visit!

Quite a snake!

Bill
 
  • Like
Reactions: 1 user

Paul Allwood

Well-known member
Lifetime Member

Equipment
Kubota B7200HSTD, homemade FEL, front flail mower, forks & ballast box, tiller
Jul 8, 2025
913
1,738
93
Baranduda, Victoria, Australia
Thanks Bill.

You make a good point. It's more than just making stuff in the shed. Being allowed into this forum, reading lots of stuff that others post, and being able to share what I've been up to with others who are interested (I hope ?)....it's a bit like chatting with your mates without having to go anywhere.
 
  • Like
Reactions: 1 user