Steering box
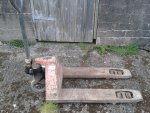
After fixing all the steering linkages and getting them play free the remaining play is in the steering box itself. I bought a second hand one to be able to work on it while using the tractor.
Disassembly
Remove the nut on the Pitman arm and pull off the arm. It is a tapered splined joint that most likely requires persuasion through heat, force, hammering and possibly swearing too.
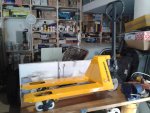
Then pry apart the two halves of the housing. Pull out the main shaft and the steering shaft.

Pull off the old bearings, the seal ring and the gear sector.

Assembly
Clean everything. Press in the new seal ring (17x30x7). Press in new bearings on the steering input shaft (17x35x10 6003 2RS). Slide gear sector over the output shaft and make sure the dot marks align. Press in the two bearings (20x42x12 6004 2RS).
Put in the output shaft and input shaft into the housing. Fill upper sector where the pinion gear is with grease. Insert the two alignment pins into the housing and push top part together with bottom part. The two parts are held together by the mounting bolts.
Push on Pitman arm so that the groove marks meet, insert washer and tighten nut.
Modifications
The play in the steering box is due to two parts: the first is the play in the splines of the gear sector and the other is the gear play.
The first I removed by glueing the sector onto the shaft. Due to the play I machined two Delrin parts that have a tapered nose that centers the sector on the shaft while the glue sets. I used Loctice high strength. The glueing of the shaft is no problem since the bearings can still be changed.


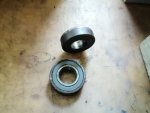
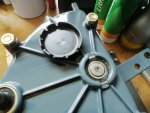
To get rid of the play of the gears I machined a bronze bushing which holds smaller bearings (17x30x7). Those smaller bearings are fitted off-centre allowing the play to be removed by turning the bushing.


The bearings are 1mm off the centre which is way too much I noticed. 0.5mm should be more than sufficient.
The bushing is turned with a tool having two pins that fit in the holes in the bushing at the bottom. It is then fixed by two grub screws.

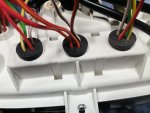
I added a grease nipple that allows to refresh the grease near the pinion. I will also make a cap to fit over the top of the output shaft. Water must have got in here; the bearings were rusted.
Assembly is otherwise the same as the original steering box.


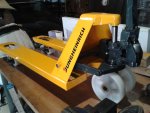
Looking forward fitting this modified steering box and finally enjoying a precise steering.
After fixing all the steering linkages and getting them play free the remaining play is in the steering box itself. I bought a second hand one to be able to work on it while using the tractor.
Disassembly
Remove the nut on the Pitman arm and pull off the arm. It is a tapered splined joint that most likely requires persuasion through heat, force, hammering and possibly swearing too.
Then pry apart the two halves of the housing. Pull out the main shaft and the steering shaft.
Pull off the old bearings, the seal ring and the gear sector.
Assembly
Clean everything. Press in the new seal ring (17x30x7). Press in new bearings on the steering input shaft (17x35x10 6003 2RS). Slide gear sector over the output shaft and make sure the dot marks align. Press in the two bearings (20x42x12 6004 2RS).
Put in the output shaft and input shaft into the housing. Fill upper sector where the pinion gear is with grease. Insert the two alignment pins into the housing and push top part together with bottom part. The two parts are held together by the mounting bolts.
Push on Pitman arm so that the groove marks meet, insert washer and tighten nut.
Modifications
The play in the steering box is due to two parts: the first is the play in the splines of the gear sector and the other is the gear play.
The first I removed by glueing the sector onto the shaft. Due to the play I machined two Delrin parts that have a tapered nose that centers the sector on the shaft while the glue sets. I used Loctice high strength. The glueing of the shaft is no problem since the bearings can still be changed.
To get rid of the play of the gears I machined a bronze bushing which holds smaller bearings (17x30x7). Those smaller bearings are fitted off-centre allowing the play to be removed by turning the bushing.
The bearings are 1mm off the centre which is way too much I noticed. 0.5mm should be more than sufficient.
The bushing is turned with a tool having two pins that fit in the holes in the bushing at the bottom. It is then fixed by two grub screws.
I added a grease nipple that allows to refresh the grease near the pinion. I will also make a cap to fit over the top of the output shaft. Water must have got in here; the bearings were rusted.
Assembly is otherwise the same as the original steering box.
Looking forward fitting this modified steering box and finally enjoying a precise steering.
Last edited:


 , I decided to replace the blades.


 . They fit but not very well, so I will order new ones. At 4 quid a piece not a major expense.


