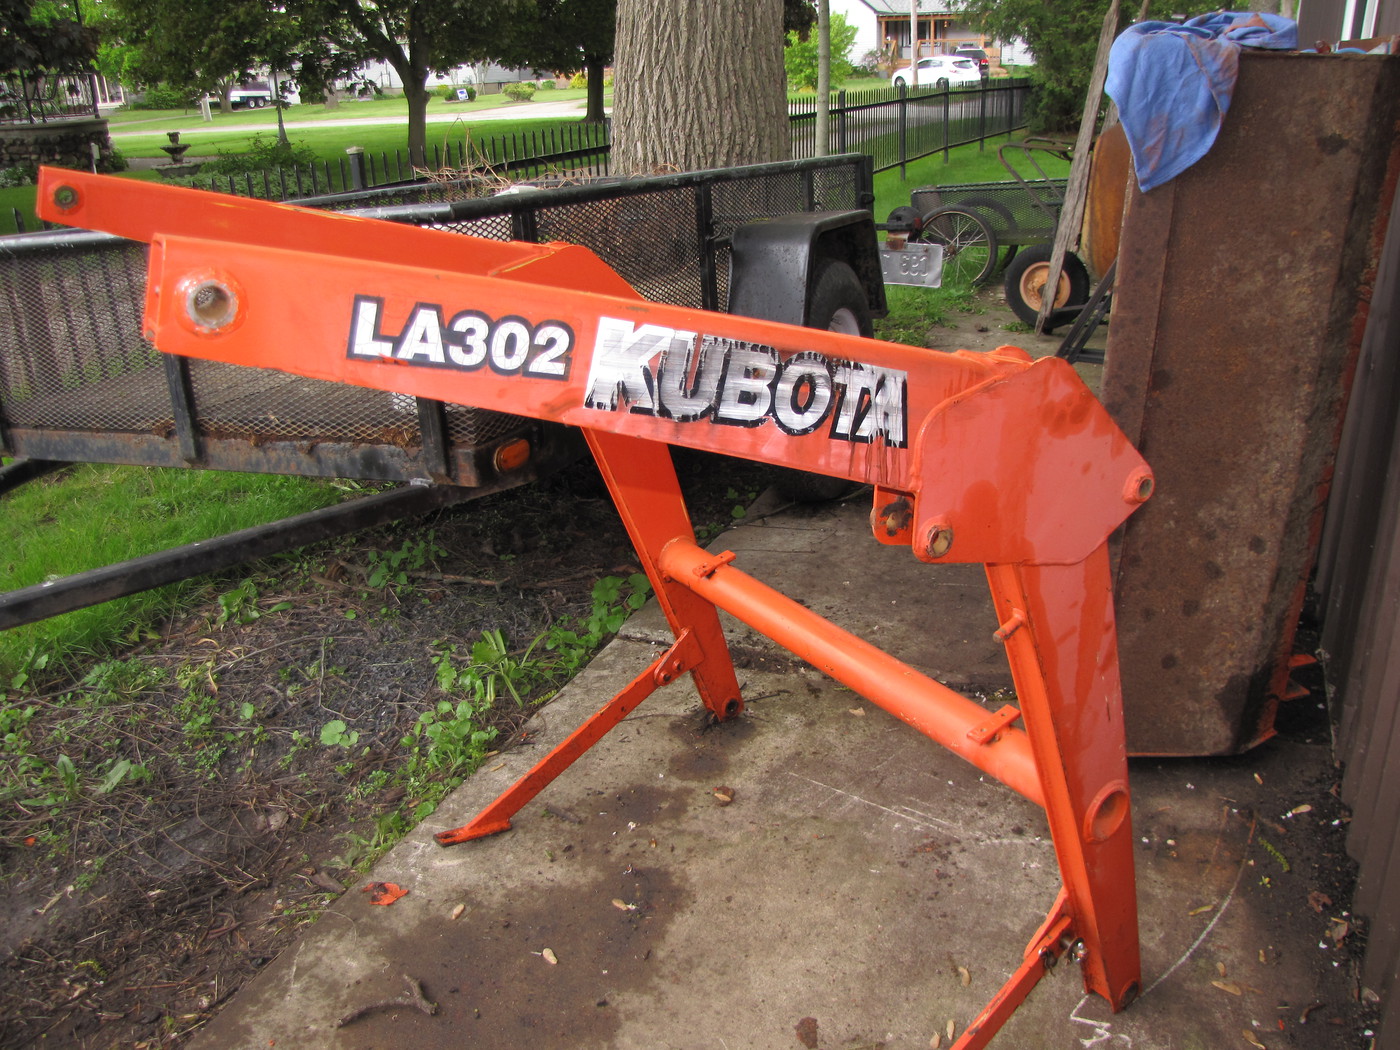
LA302 Front End Loader... breakdown,cleanup,repair + reassemble (PIC'S)
- Thread starter BobbyK
- Start date
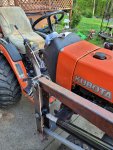
Put in a couple hr's after after work today.
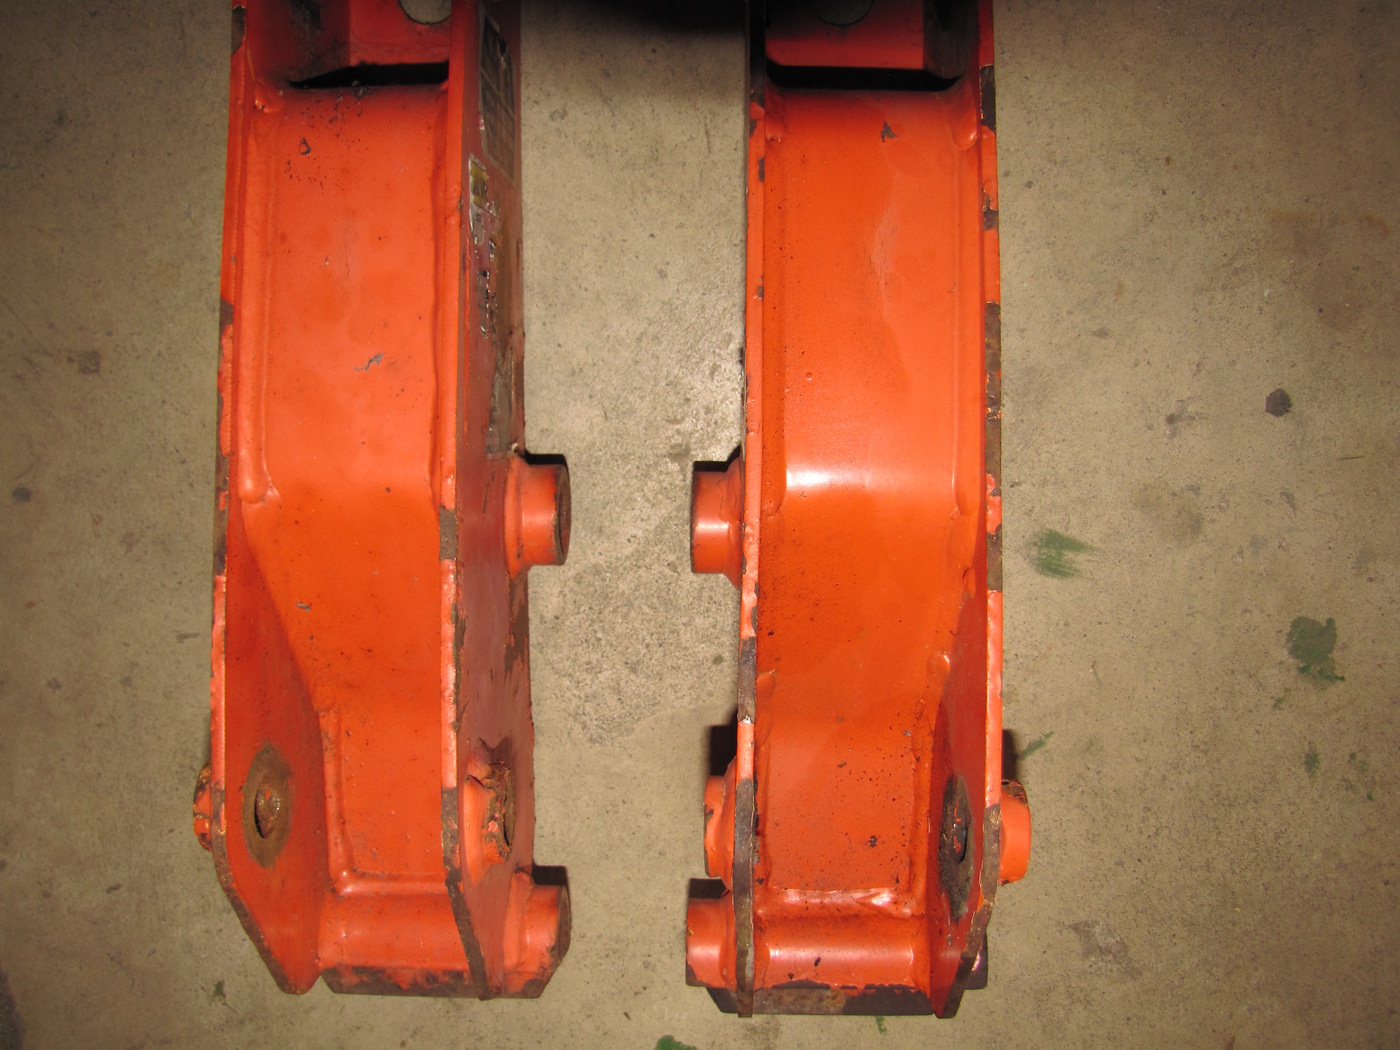
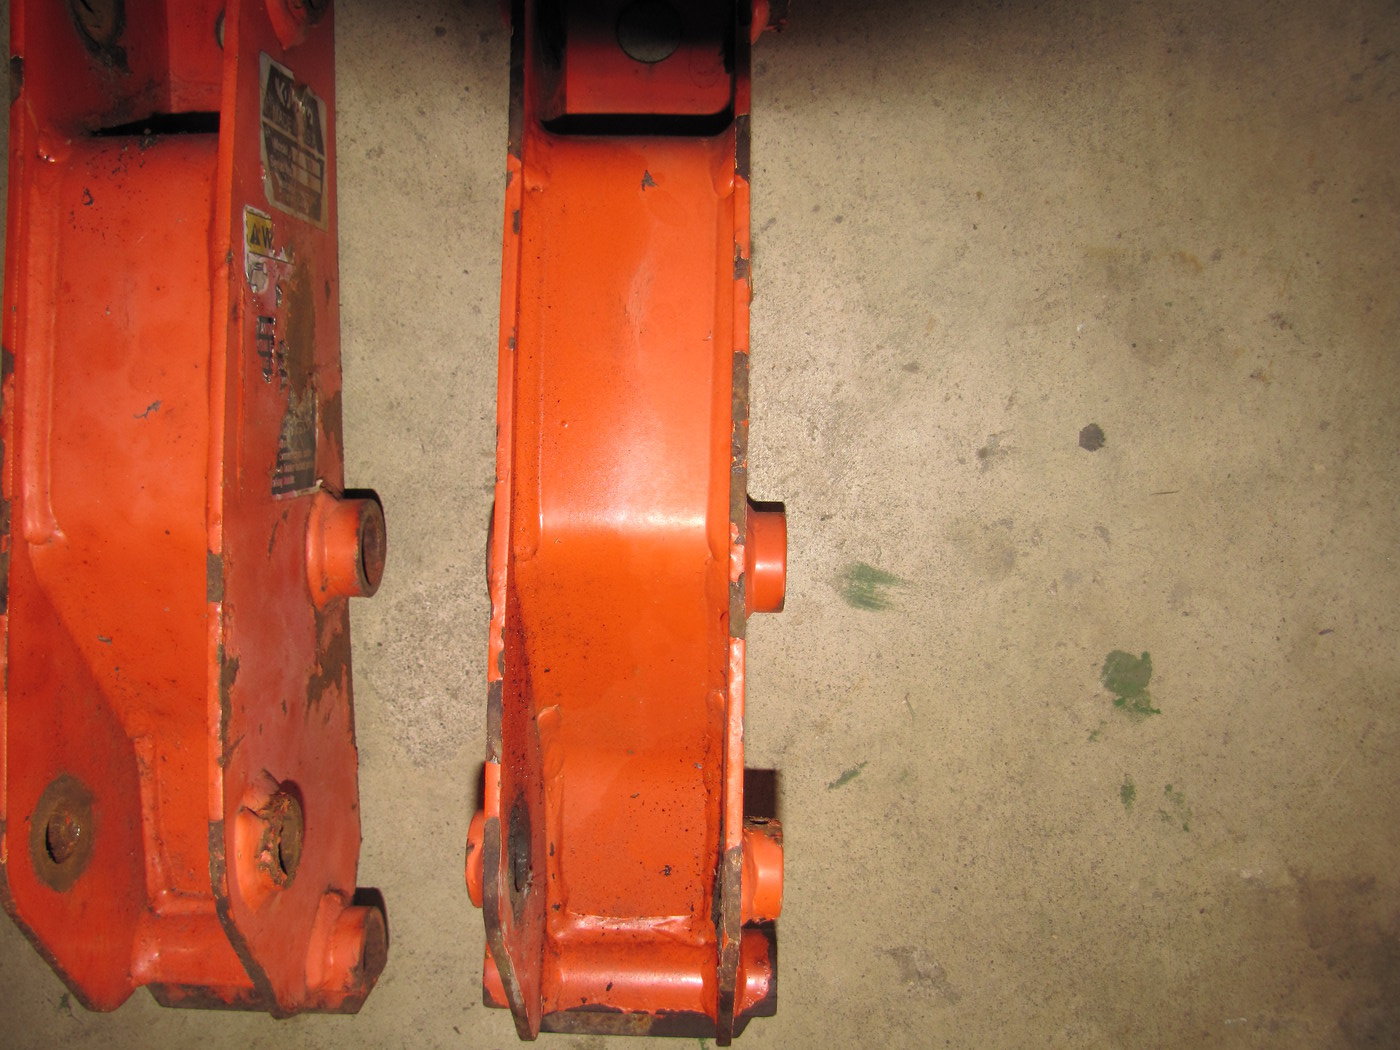
Sanded the lift arms and Sand blasted some area's.
I don't want to sand blast the whole lift arm assembly but there are some rusty+pitted area's I want to blast.
I used 120gt sand paper and my D/A sander for all the flat surfaces.
I tried my heat gun and a scraper to get the decal off.
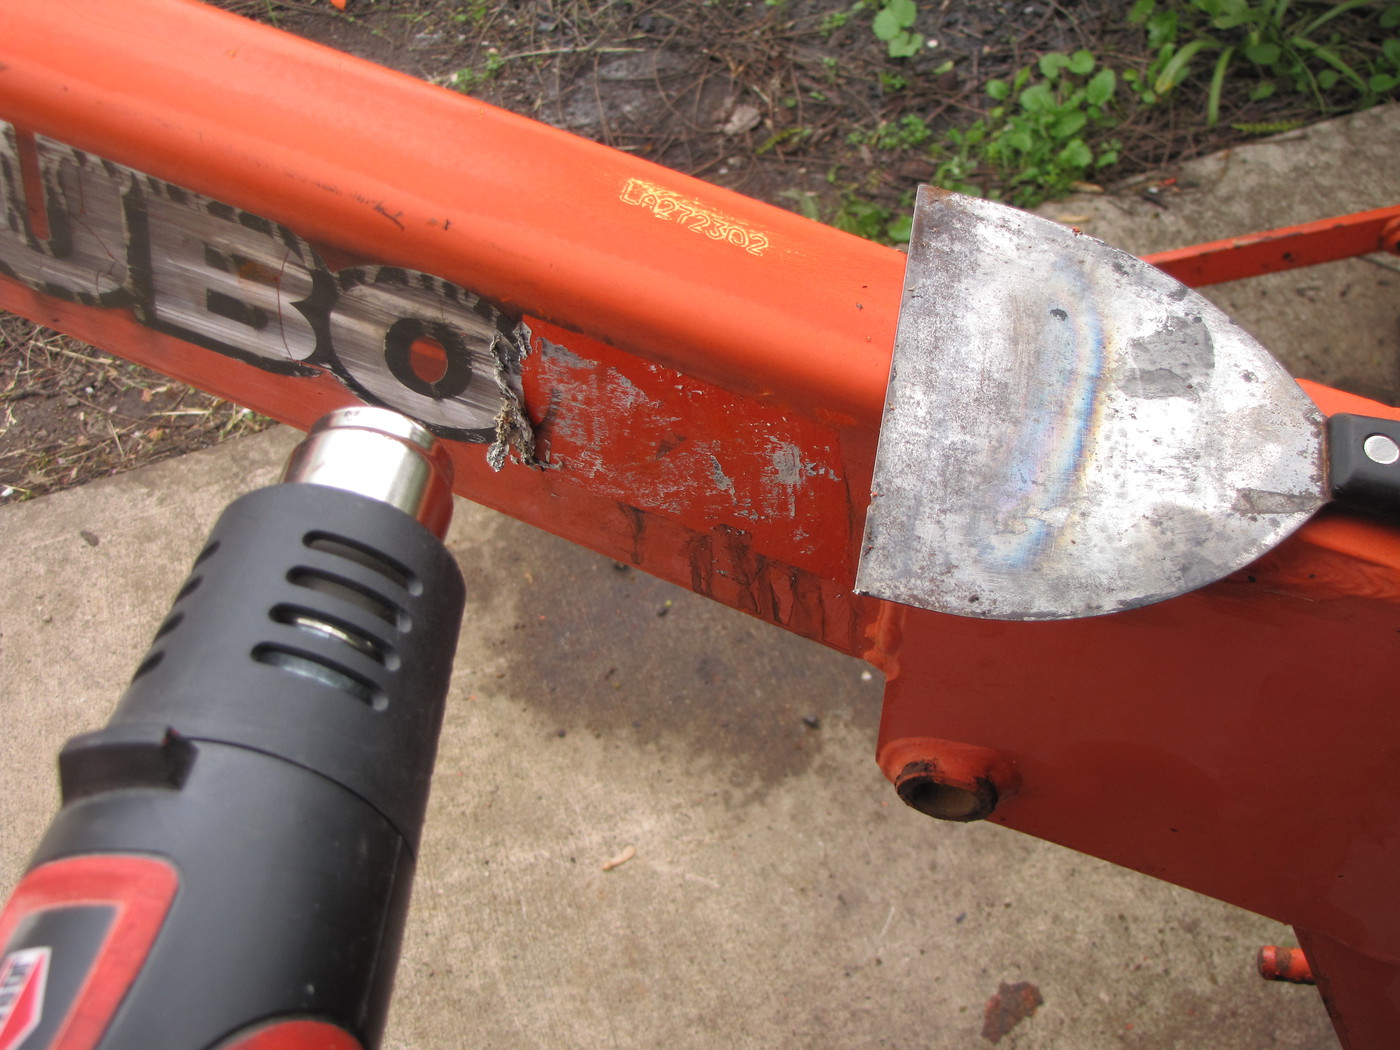
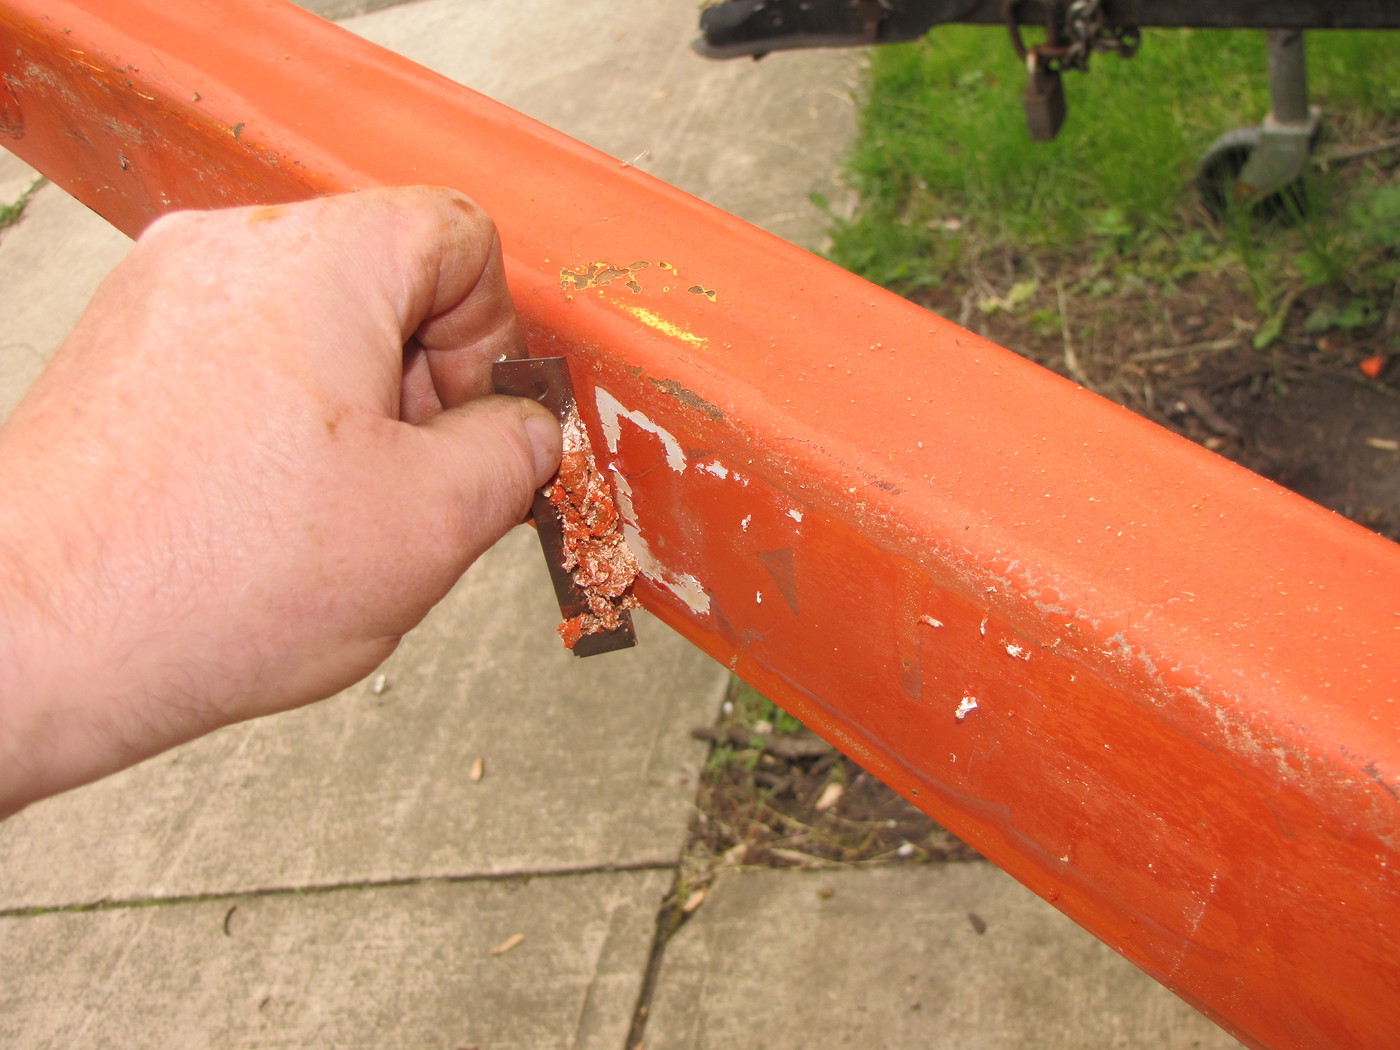
But lacquer thinner and a blade worked best. Sprayed the lacquer thinner, scraped, lacquer thinner, scraped...rinse + repeat.
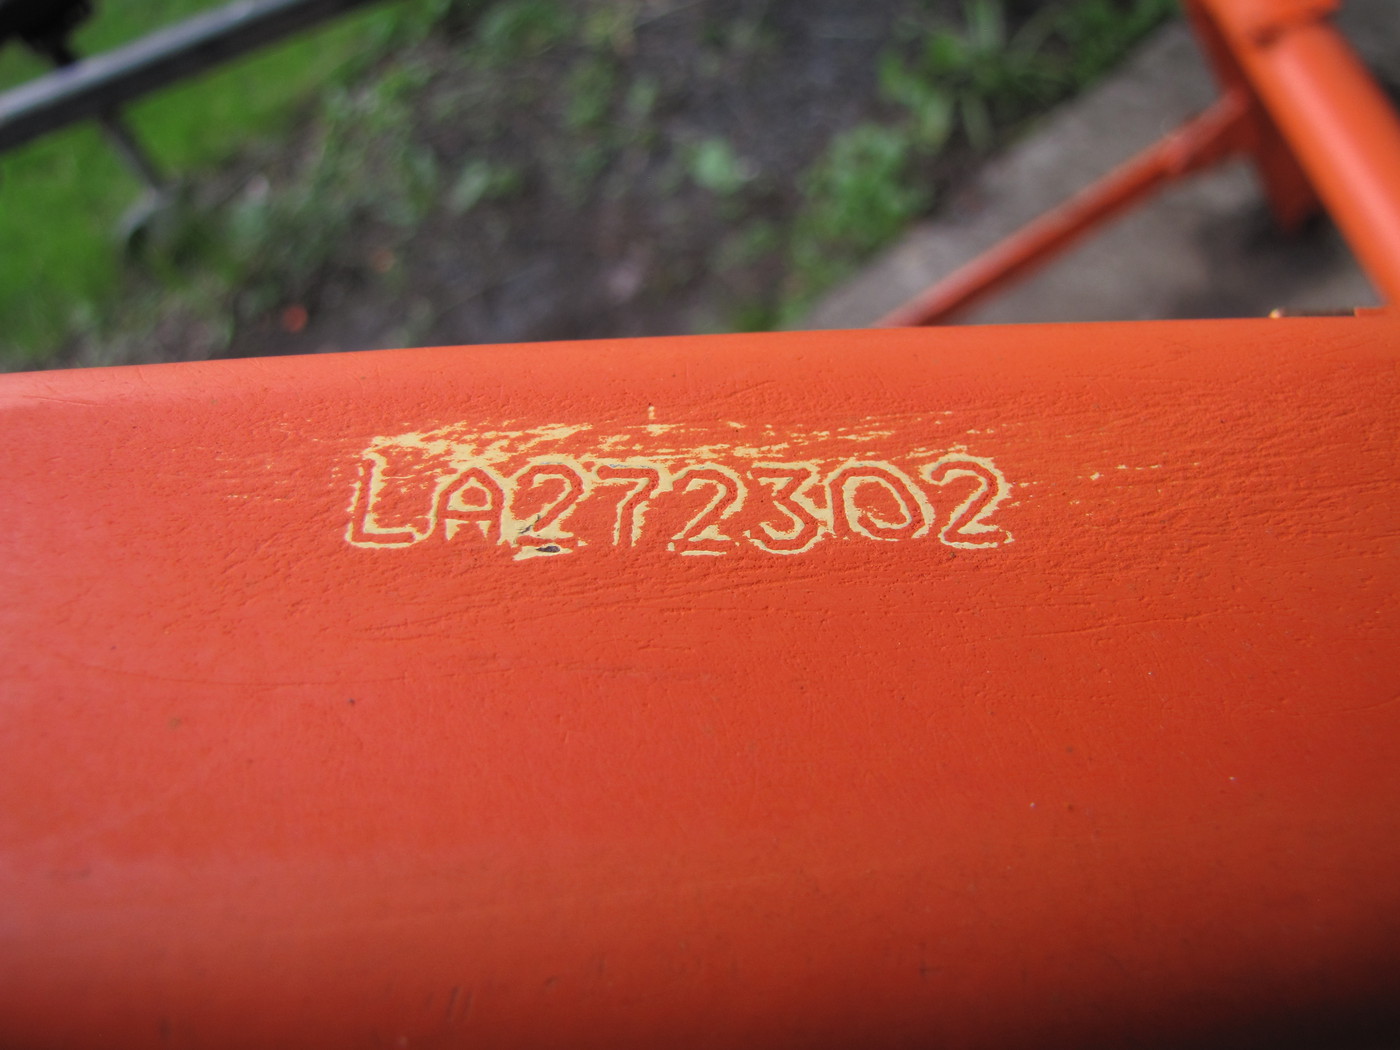
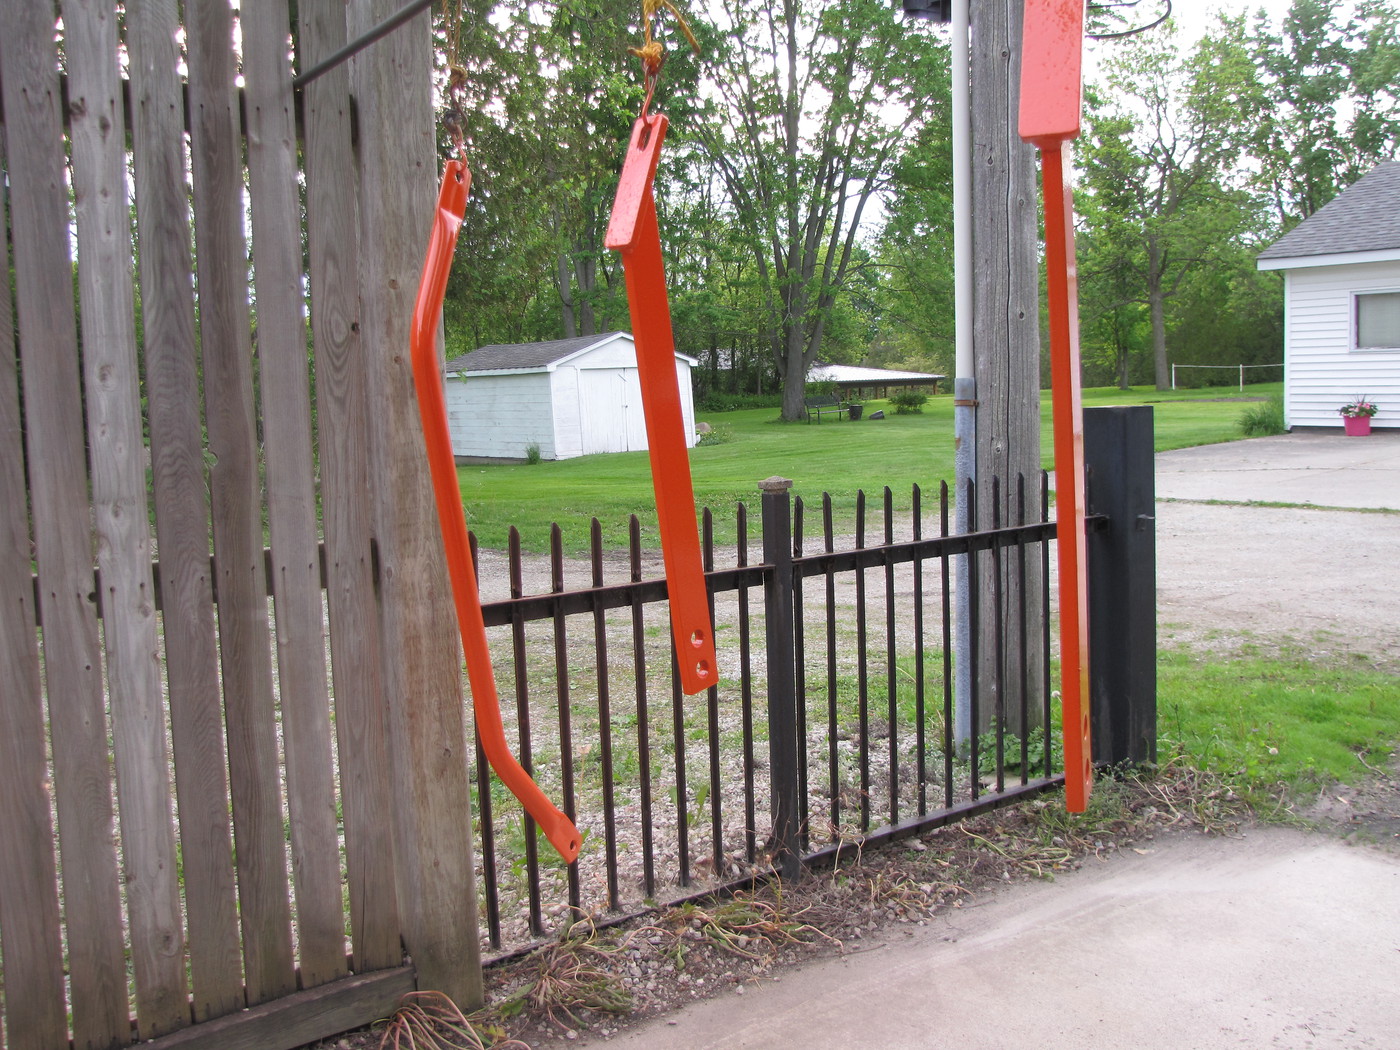
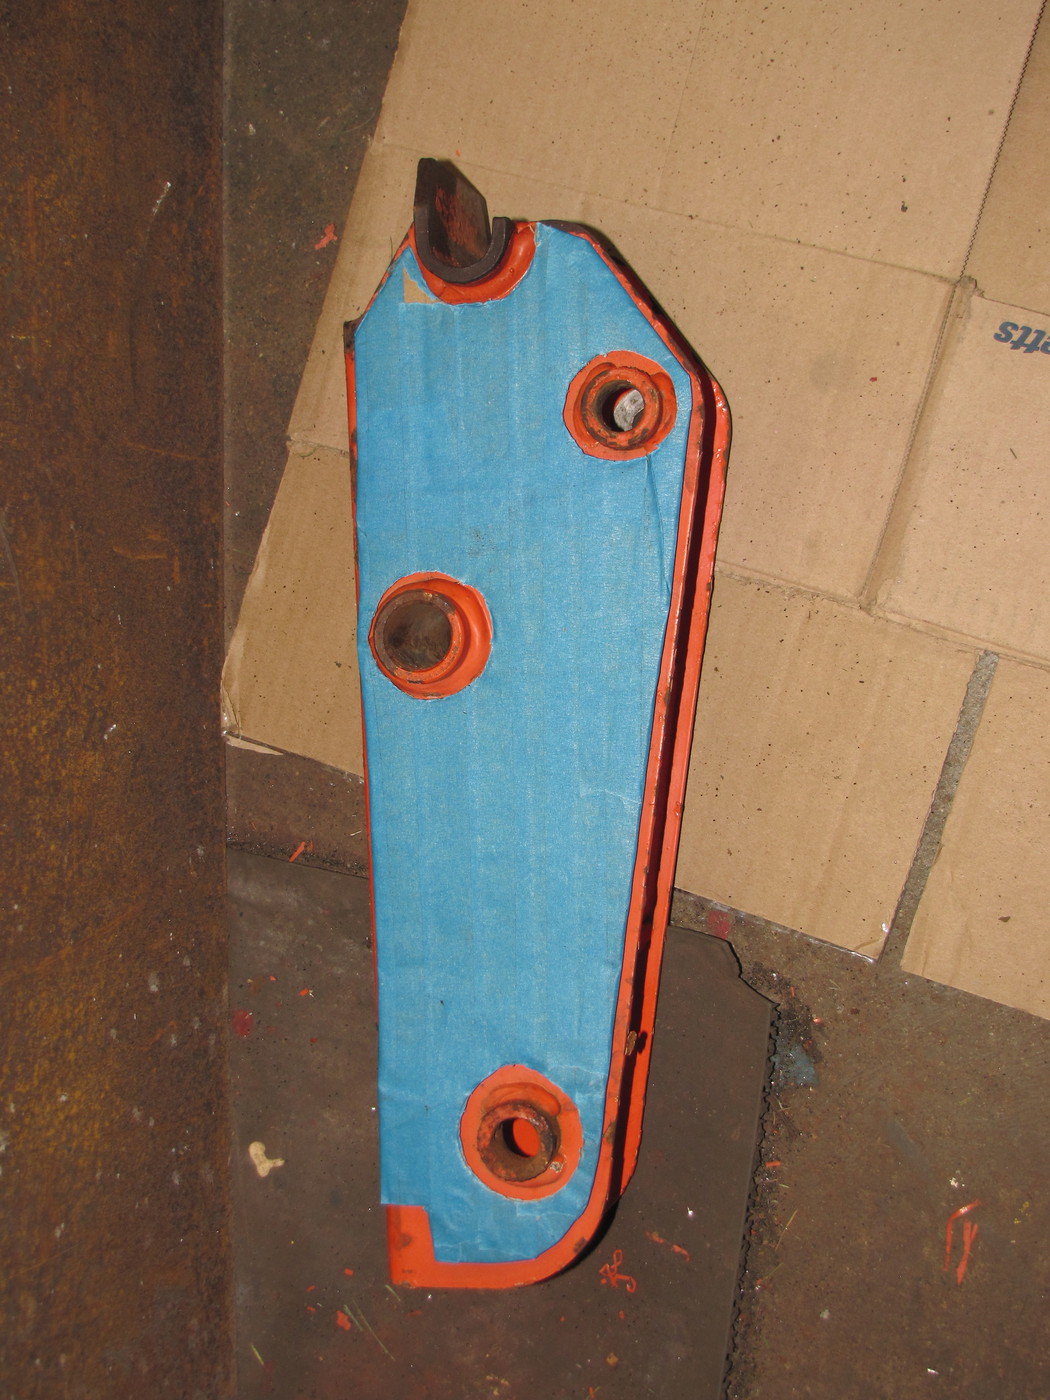
I did uncover these numbers under the paint. Any idea's.
Just a warning to anyone who uses lacquer thinner around decals, it ruins them.
I have this cheap spot blaster and used it to get the underside of the ram mounts.
Works ok, but you go through blast media real quick.
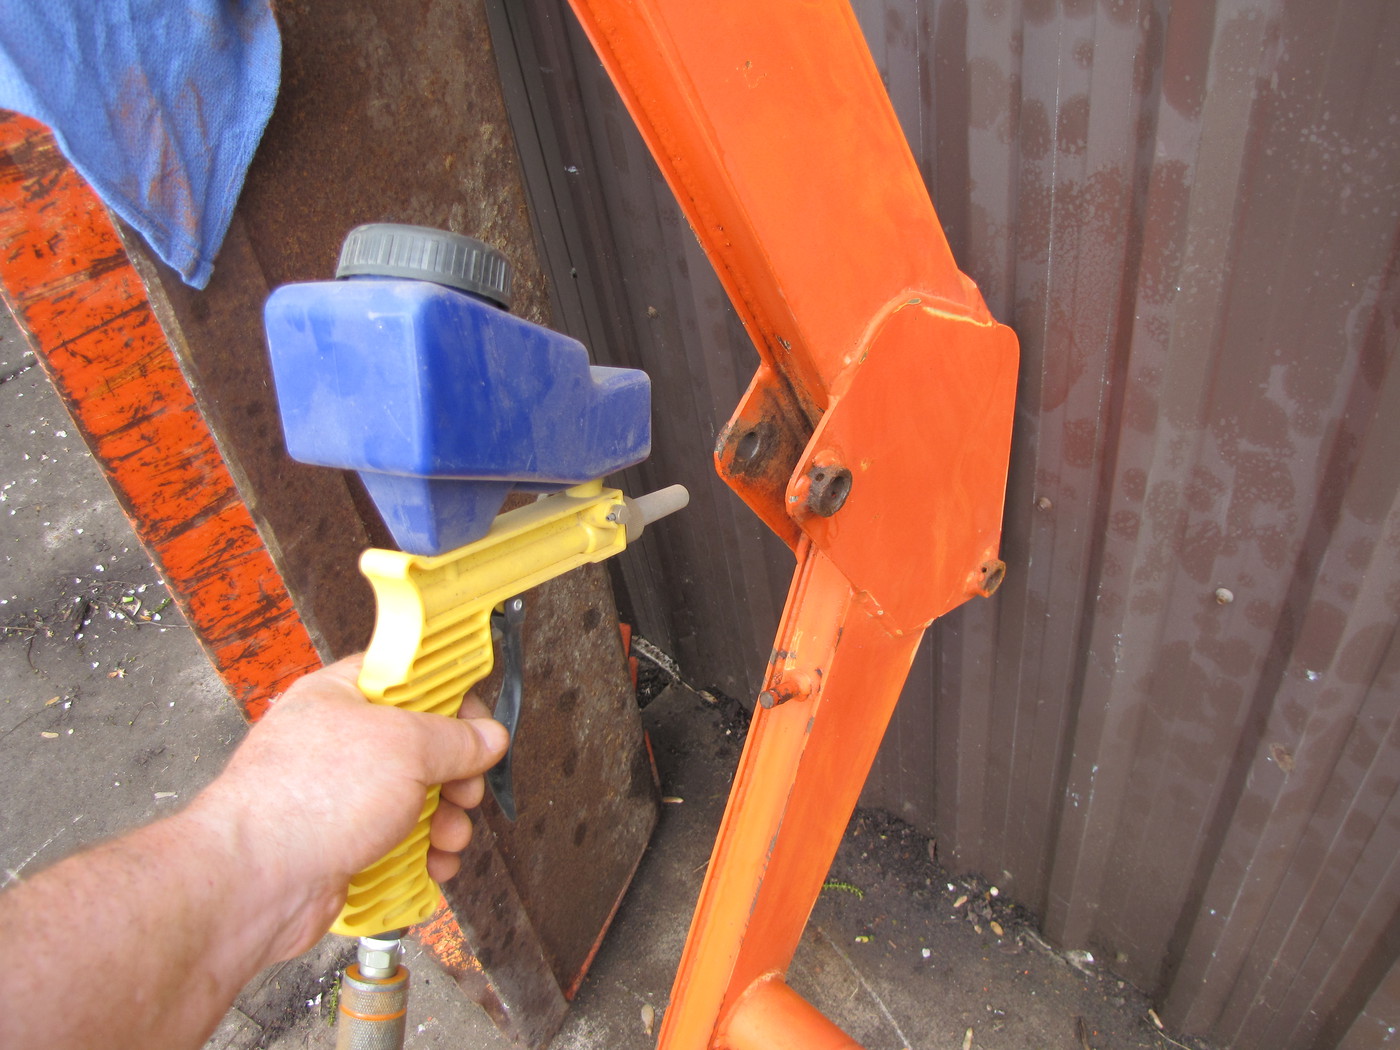
Then spray some black spray paint to protect the bare metal. I won't be ready to paint until the weekend.
Even though I don't want to, I'll prob. end up using my pot Blaster and sand blast the whole lift arm assembly.
.
Sanded the lift arms and Sand blasted some area's.
I don't want to sand blast the whole lift arm assembly but there are some rusty+pitted area's I want to blast.
I used 120gt sand paper and my D/A sander for all the flat surfaces.
I tried my heat gun and a scraper to get the decal off.
But lacquer thinner and a blade worked best. Sprayed the lacquer thinner, scraped, lacquer thinner, scraped...rinse + repeat.
I did uncover these numbers under the paint. Any idea's.
Just a warning to anyone who uses lacquer thinner around decals, it ruins them.
I have this cheap spot blaster and used it to get the underside of the ram mounts.
Works ok, but you go through blast media real quick.
Then spray some black spray paint to protect the bare metal. I won't be ready to paint until the weekend.
Even though I don't want to, I'll prob. end up using my pot Blaster and sand blast the whole lift arm assembly.
.
Last edited:

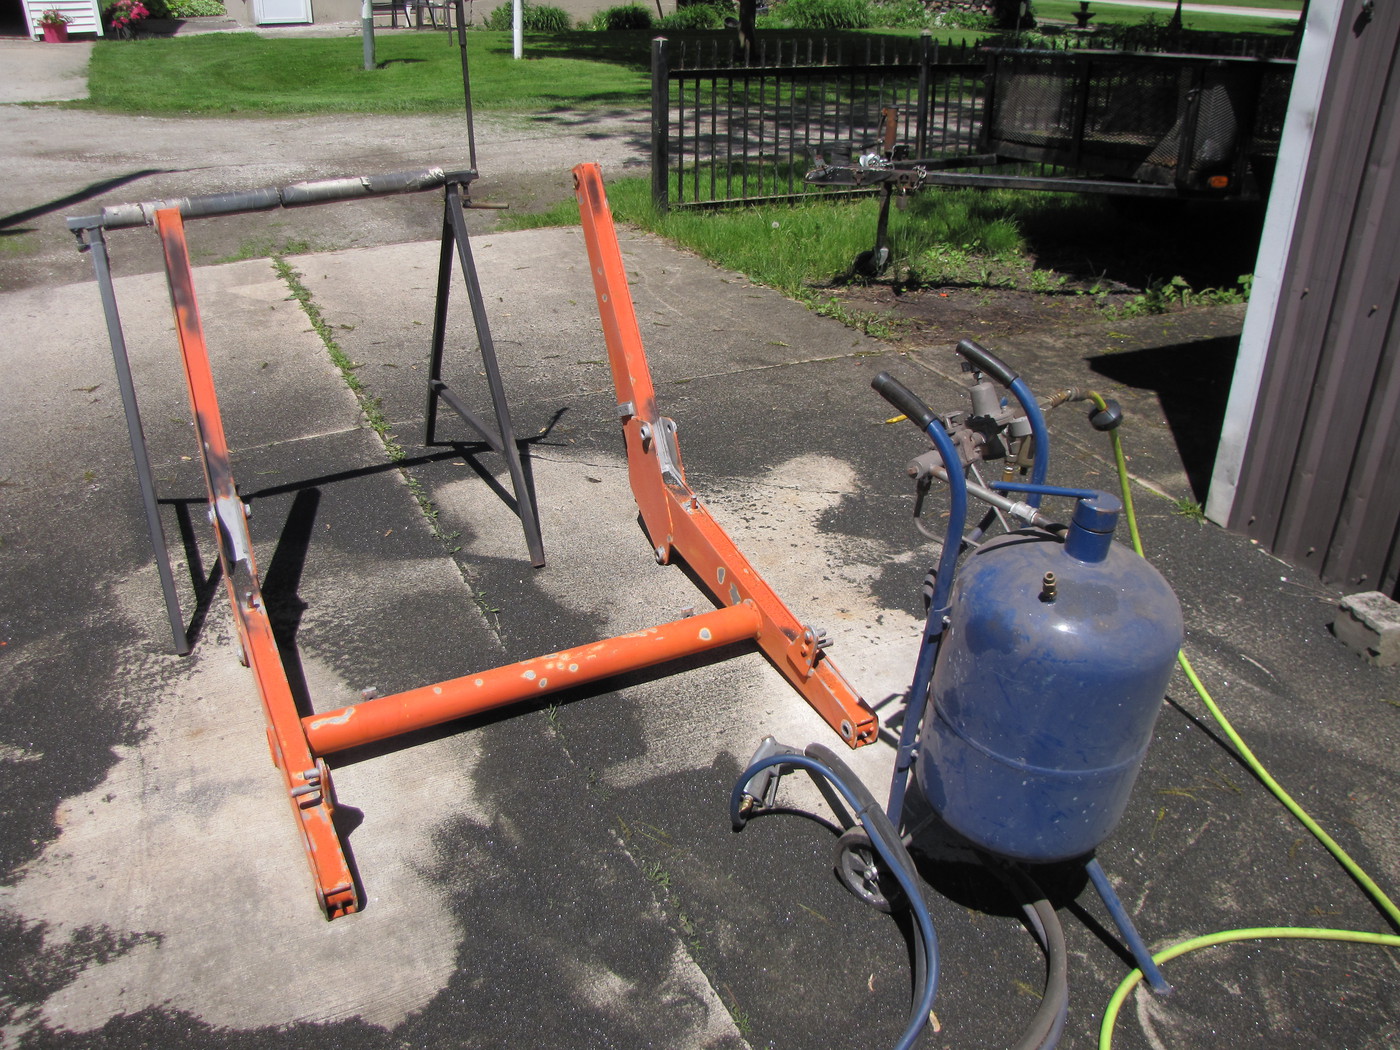
With great restraint I started my day sand blasting parts.
I say "great restraint" because as I stated in my last post that I would prob. end up blasting the whole lift arm assembly....well...I didn't, only because I didn't have enough blast media.
I spot blasted all the rusted areas on the Lift arms and used my blast cabinet for the small parts.
Then using the same formula the last time I painted I sprayed the Cross-brace and the Stands.
This is my Pot blaster setup.
It works real well but what a mess.
Then paint.
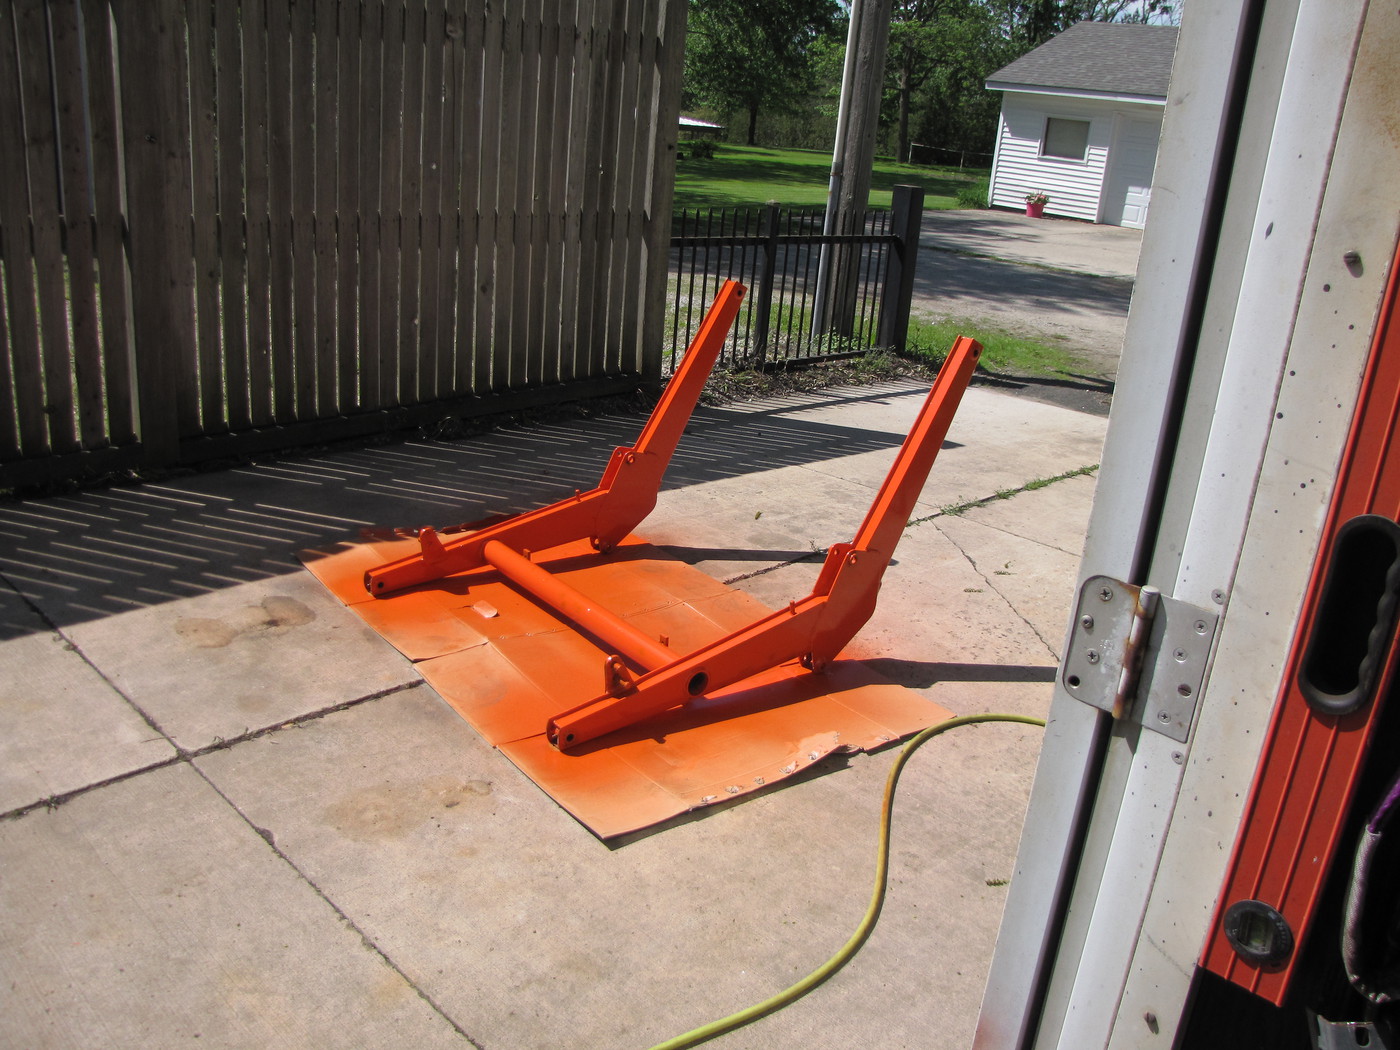
It was about 70F today with minimal wind.
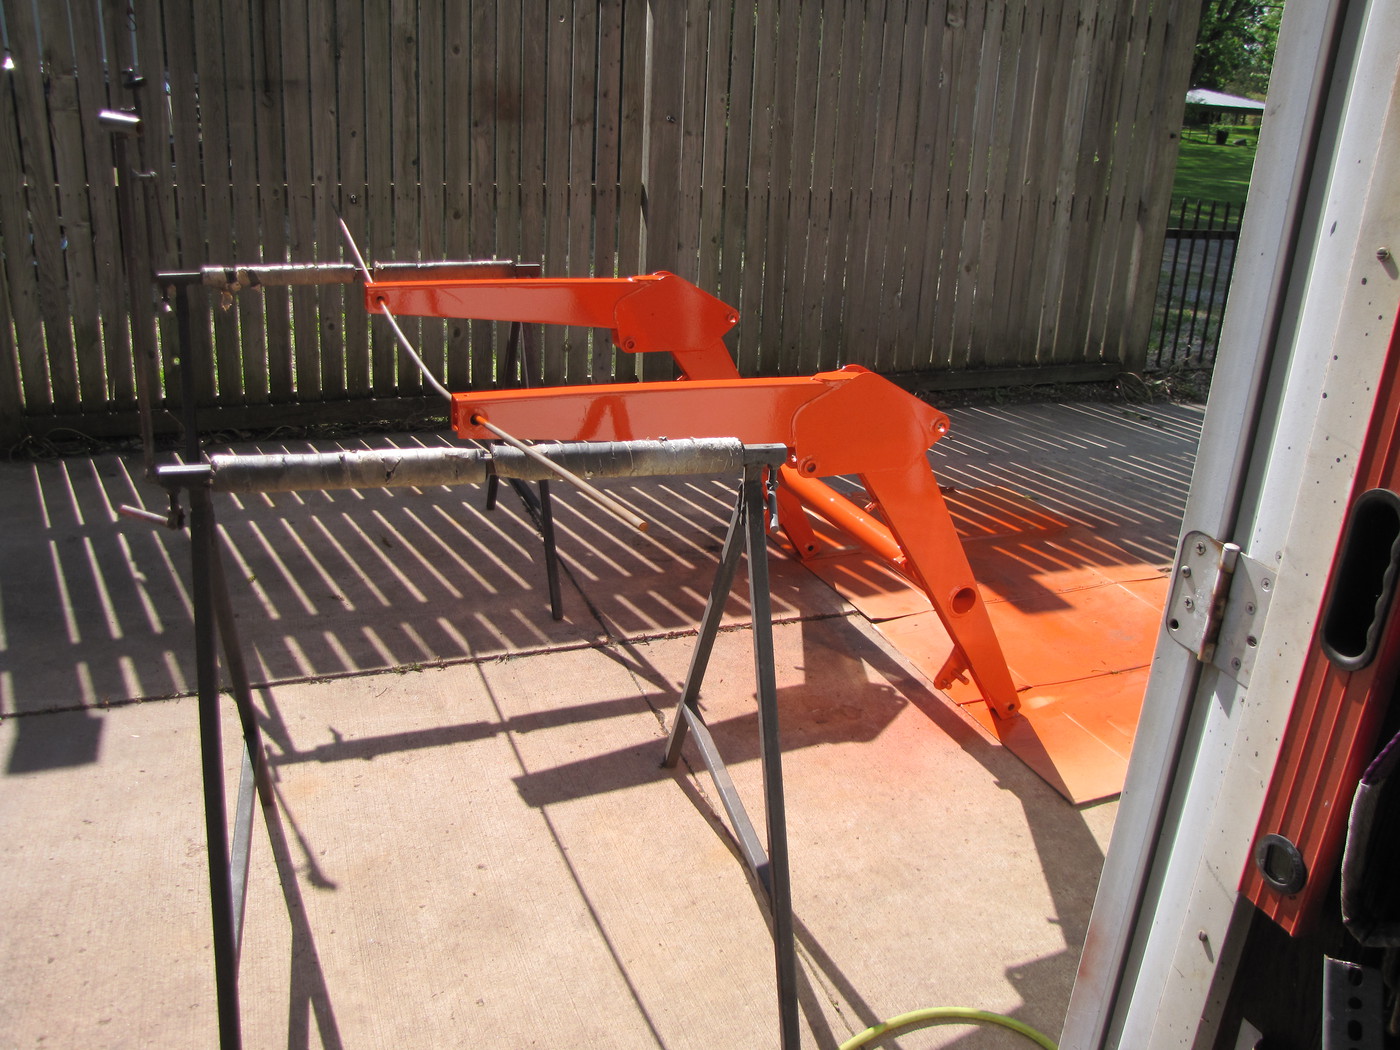
Then back into the garage to dry.
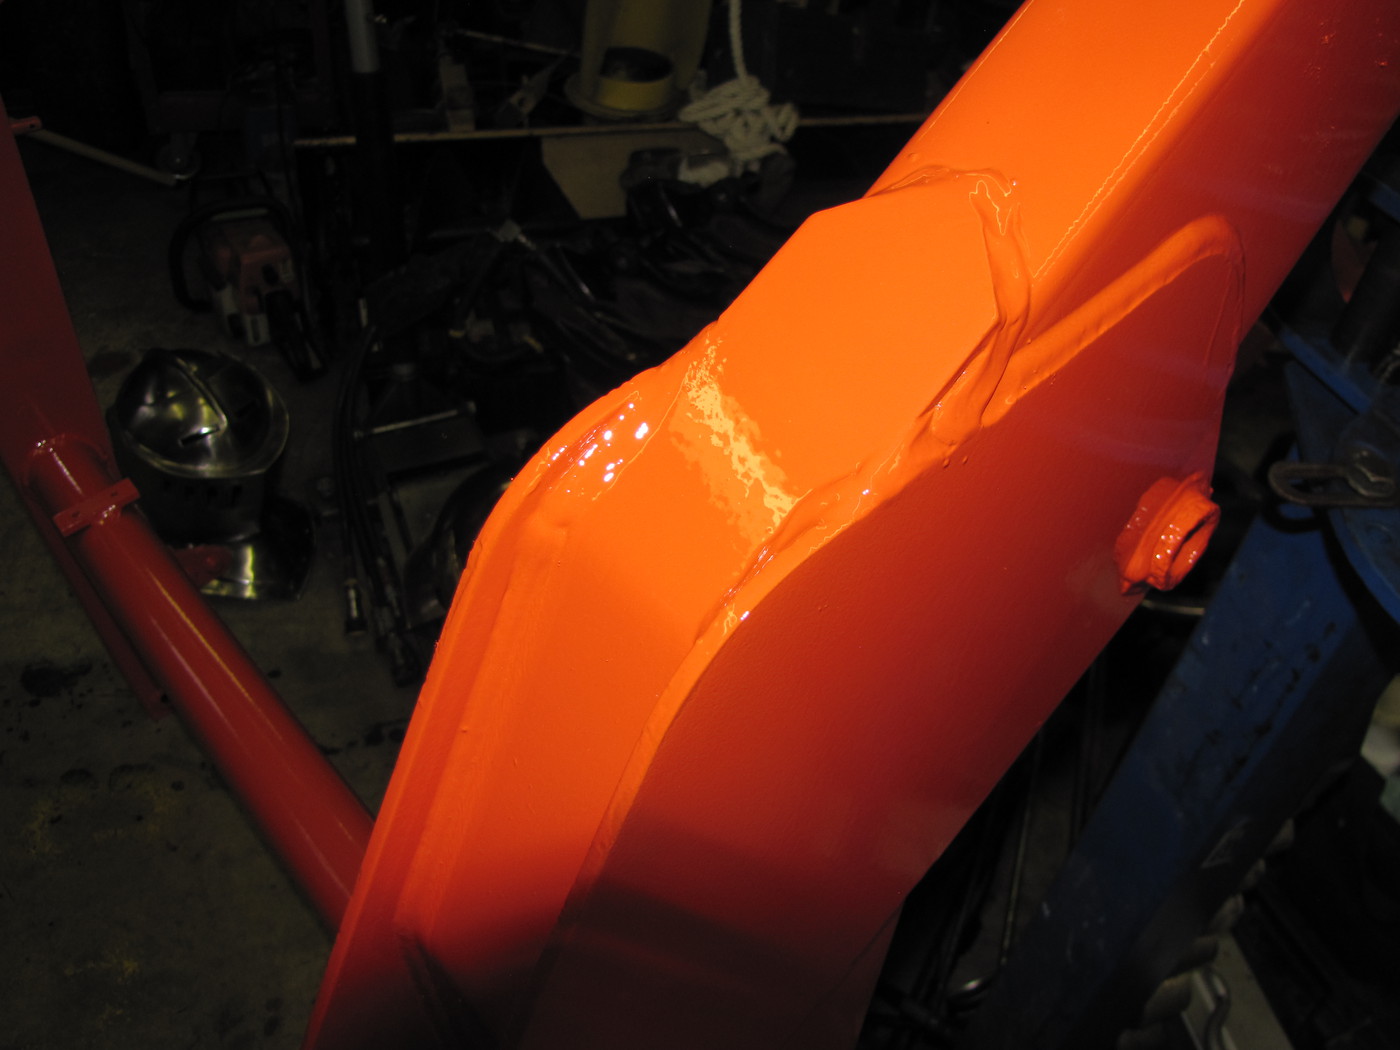
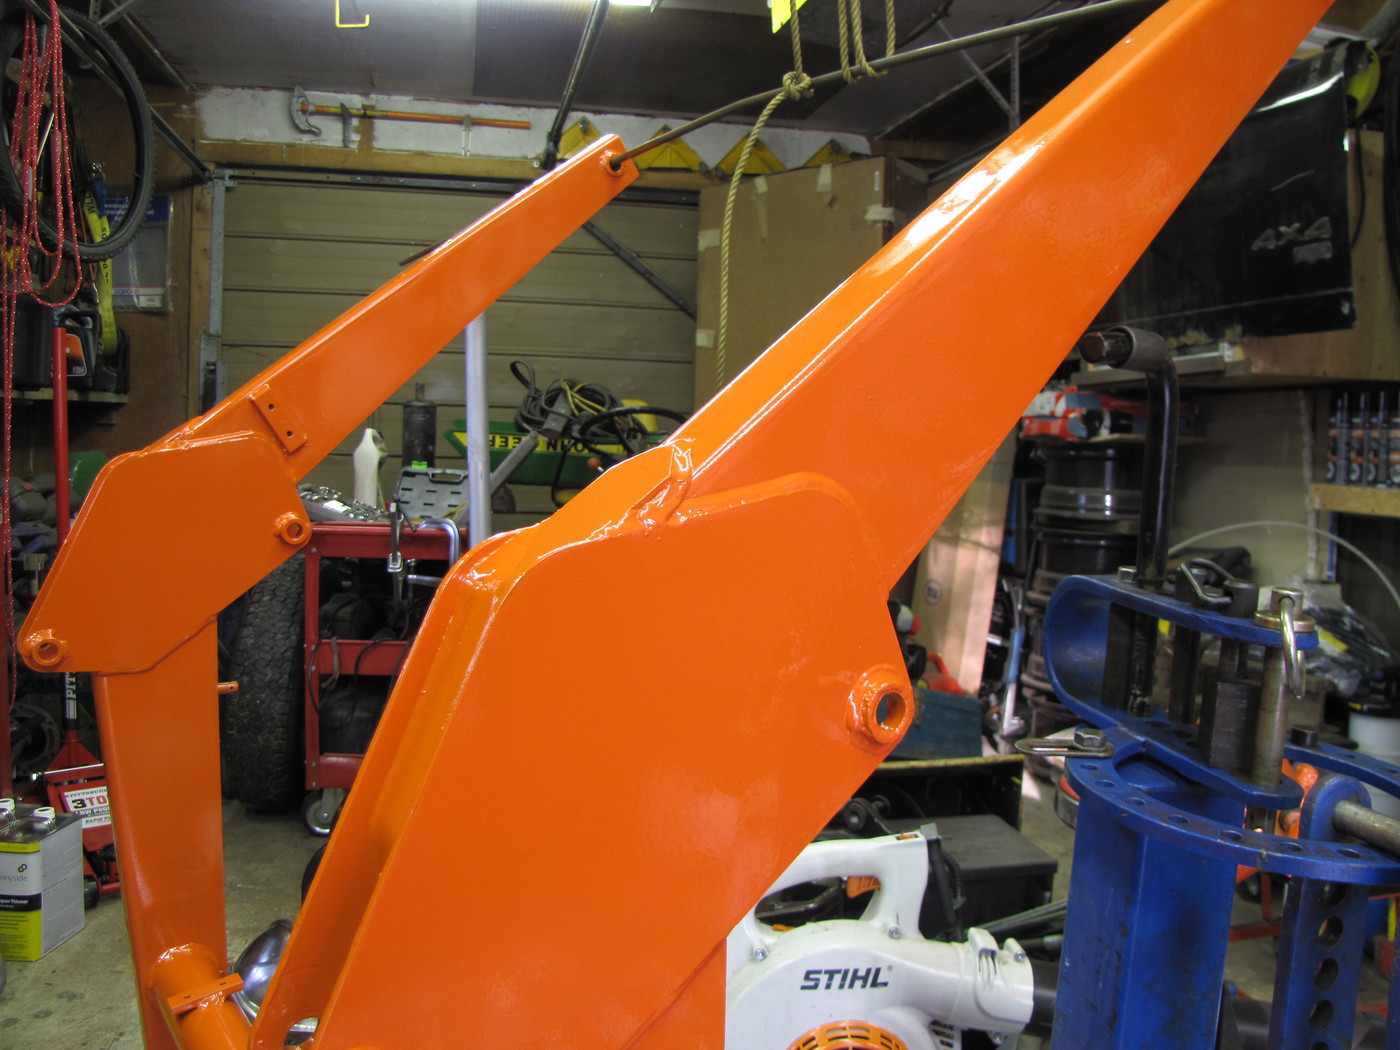
Paint laid nice and flat, turned out well.
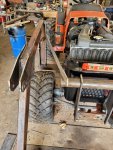
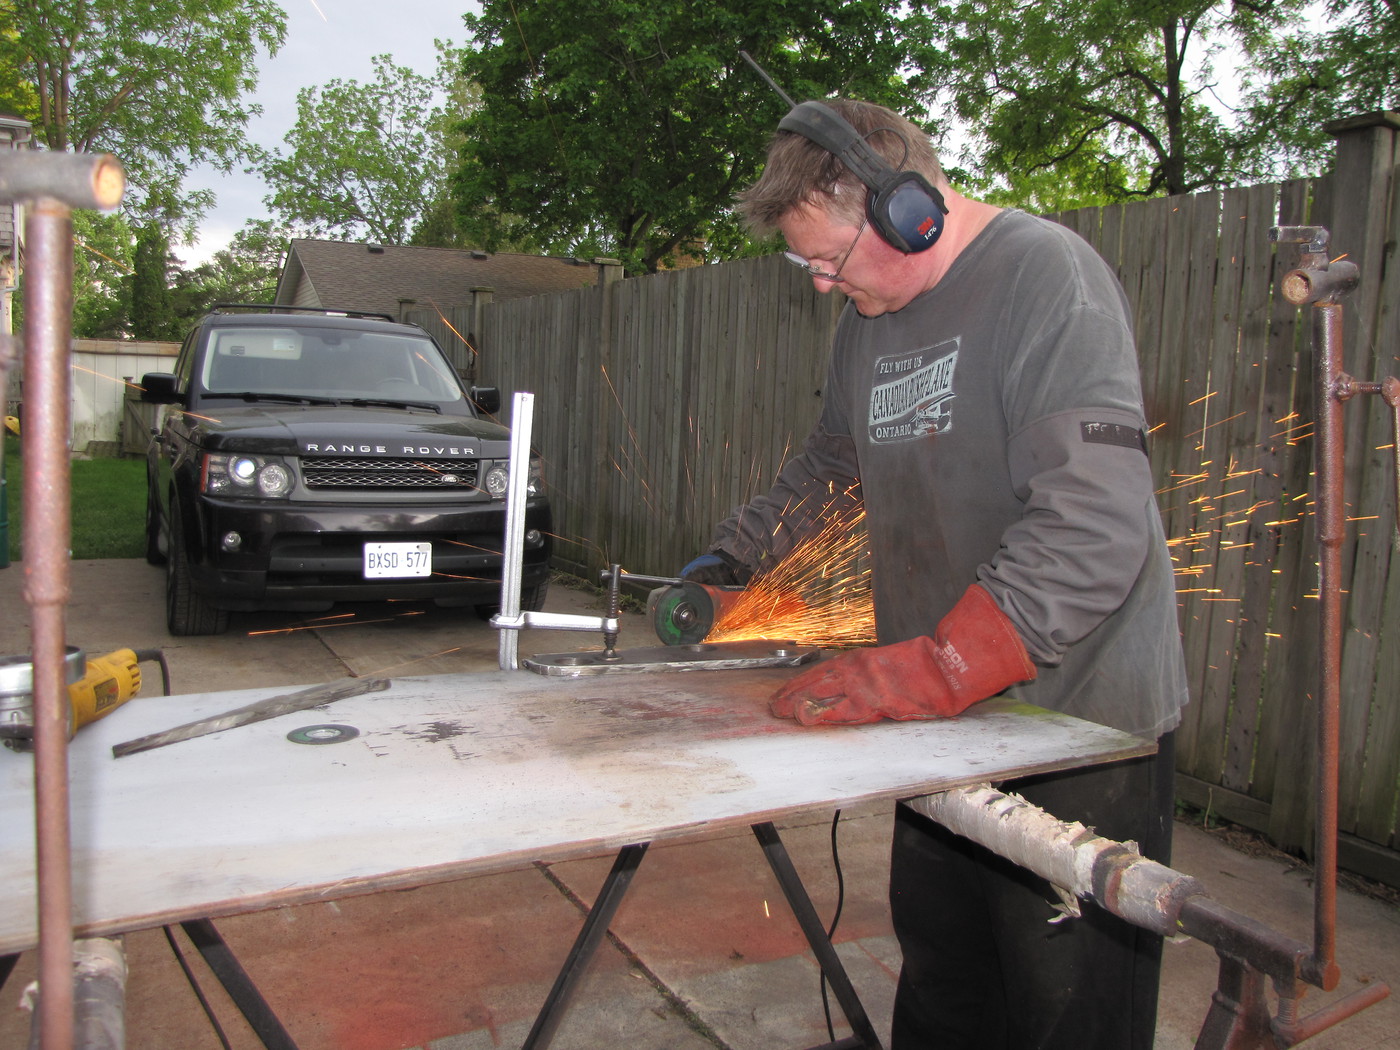
Ended the day straightening the sides of the bucket with a hammer + dolly.
Then the cutting edge had been rolled over in a few places, so I ground that smooth with my grinder and a 40 grit flap sanding disc. (no pic's)
.
I say "great restraint" because as I stated in my last post that I would prob. end up blasting the whole lift arm assembly....well...I didn't, only because I didn't have enough blast media.
I spot blasted all the rusted areas on the Lift arms and used my blast cabinet for the small parts.
Then using the same formula the last time I painted I sprayed the Cross-brace and the Stands.
This is my Pot blaster setup.
It works real well but what a mess.
Then paint.
It was about 70F today with minimal wind.
Then back into the garage to dry.
Paint laid nice and flat, turned out well.
Ended the day straightening the sides of the bucket with a hammer + dolly.
Then the cutting edge had been rolled over in a few places, so I ground that smooth with my grinder and a 40 grit flap sanding disc. (no pic's)
.
Congrats on finding a fel for your B. I ended up making the entire thing for mine... the lower frame isn't terrible to make imo. Did take a few days till it was figured out. I made mine a bit different then kubota. 4" C channel and 3/8" plate the hardest part was the 2 bolts toward the rear of the tractor. I ended up making a separate plate that slid under the forward/ mid section and bolted fast. Ended up working pretty well. I have it at my uncles shop waiting for some fittings to show up to plumb it. Here's a few pictures in its undone state. Still need to weld a few gussets in and box the uprights/ paint. I'm eager to see how you fab up your mounts.
Attachments
-
 874.6 KB Views: 220
 -
 761.9 KB Views: 215
 -
 669.7 KB Views: 228
 -
 776.9 KB Views: 223
Thanks for those pic's!
Nice to see other idea's.
I lay in bed at night thinking how I'm gonna make that Main Frame...then I fall asleep and forget everything.
.
Nice to see other idea's.
I lay in bed at night thinking how I'm gonna make that Main Frame...then I fall asleep and forget everything.
.
I don't know your time frame, but I'll try to swing by the shop and snap a few pics of the frame this week. It's not finished but you'll get the main idea of it.
Cheers.
Cheers.
Ya, that'd be great... no rush... I mainly work on this thing on the weekends anyway.
whitetiger
Moderator
Staff member
Equipment
Kubota tech..BX2370, RCK60, B7100HST, RTV900 w plow, Ford 1100 FWA
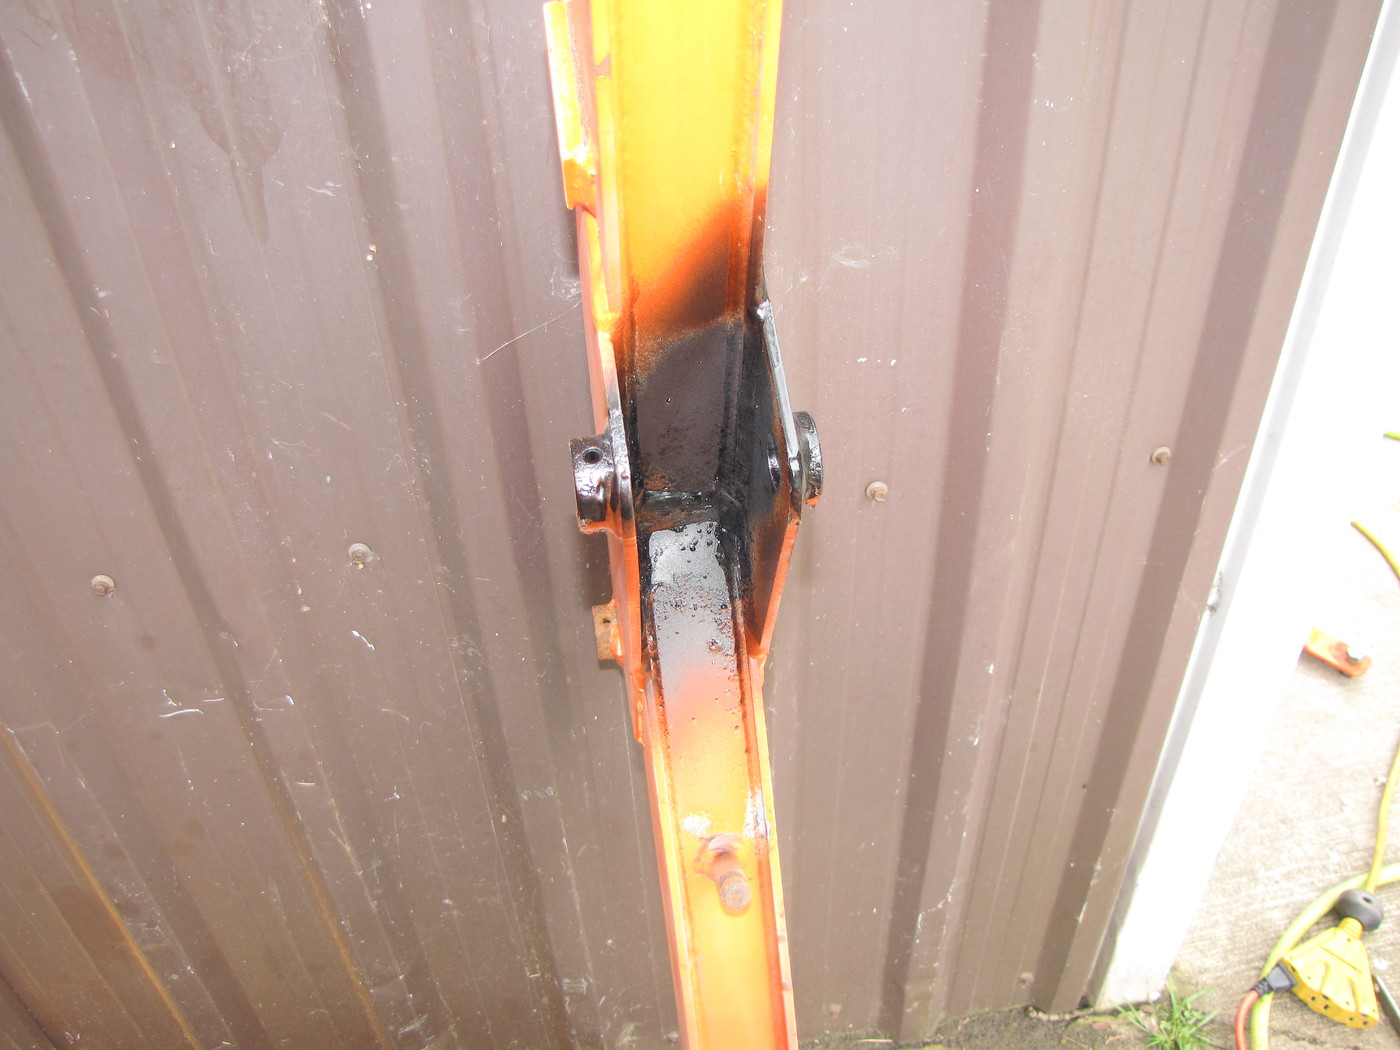
It tells us that the "Boom" is for a LA272 and LA302 loader.I did uncover these numbers under the paint. Any idea's.
ThanksIt tells us that the "Boom" is for a LA272 and LA302 loader.
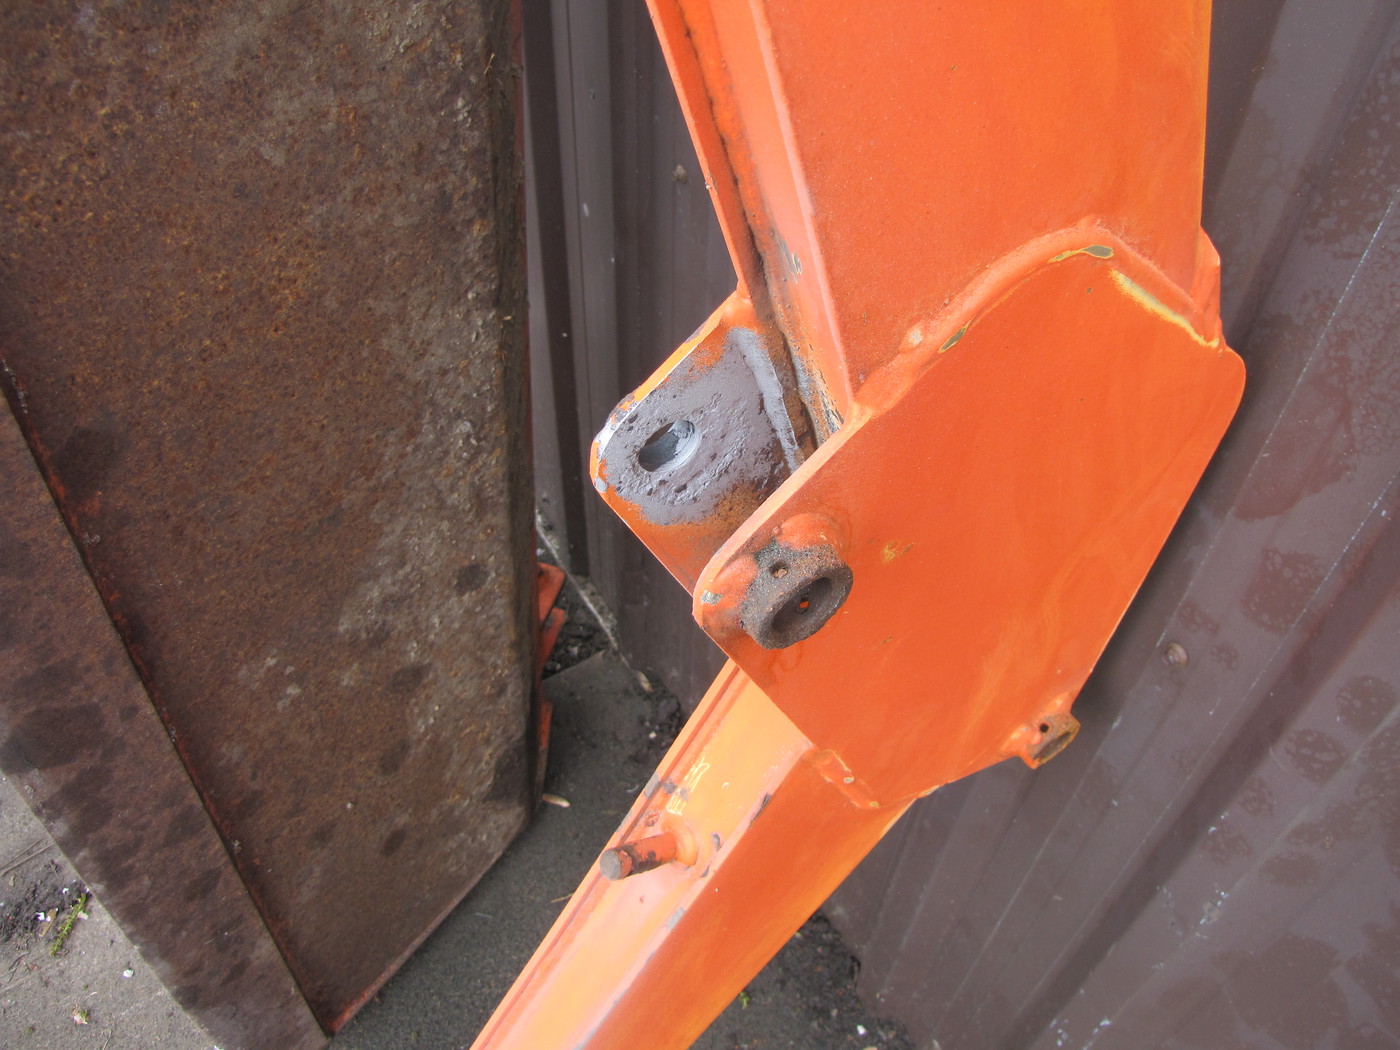
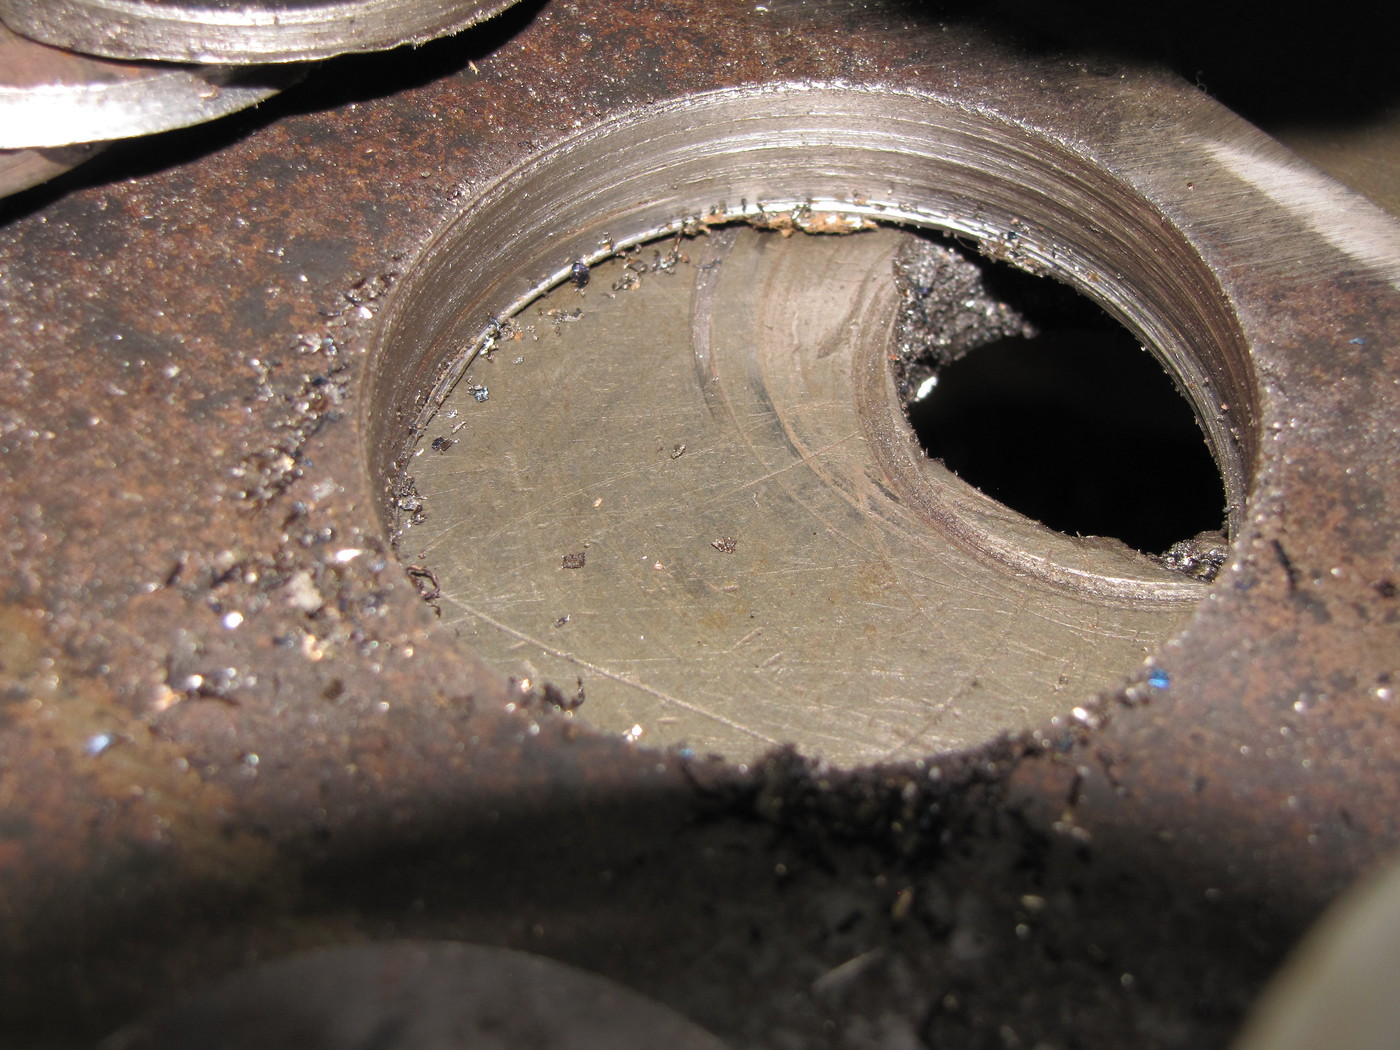
You should probably be a bit careful about how much paint gets into the holes for the pivot pins. It could cause some problems when you get ready to re-assemble everything.
Nothing a flap wheel wouldn't take right back out. Hazard of painting stuff lol.You should probably be a bit careful about how much paint gets into the holes for the pivot pins. It could cause some problems when you get ready to re-assemble everything.
Thanks, I'm going to clean out the Pin boss's before the Pin's go back in.You should probably be a bit careful about how much paint gets into the holes for the pivot pins. It could cause some problems when you get ready to re-assemble everything.
.
What a great day to be outside, monkeying around in the garage!
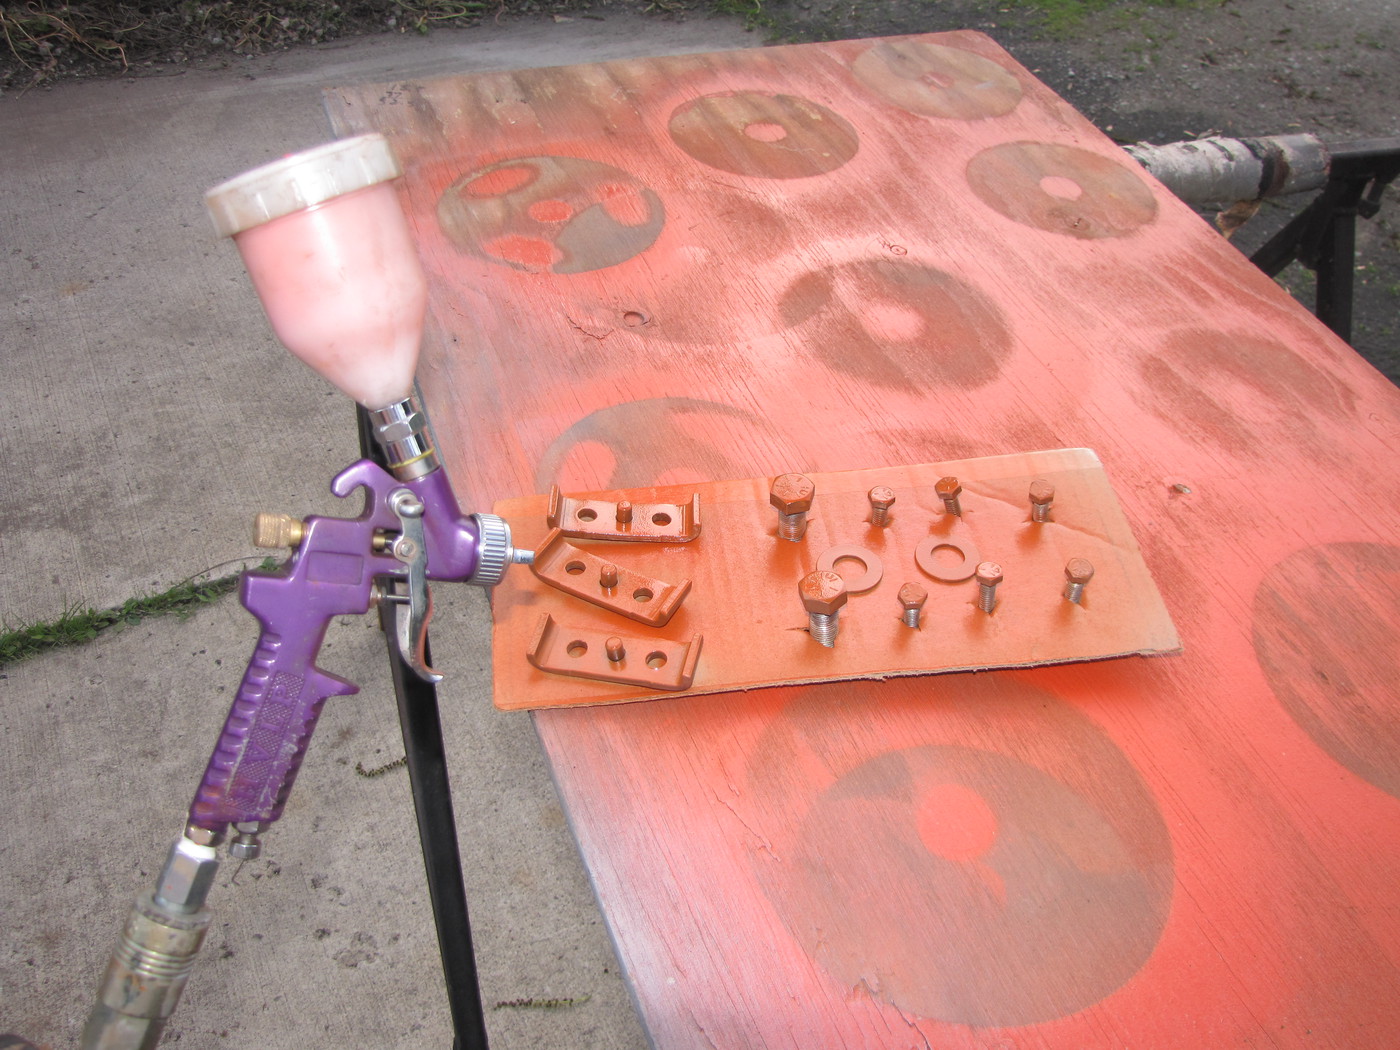
Started the day with some small parts painting.
Used my cheap Harbor Freight detail gun.
No idea what size tip this thing has but I'll guess maybe a 1mm tip.
If you know...let me know.
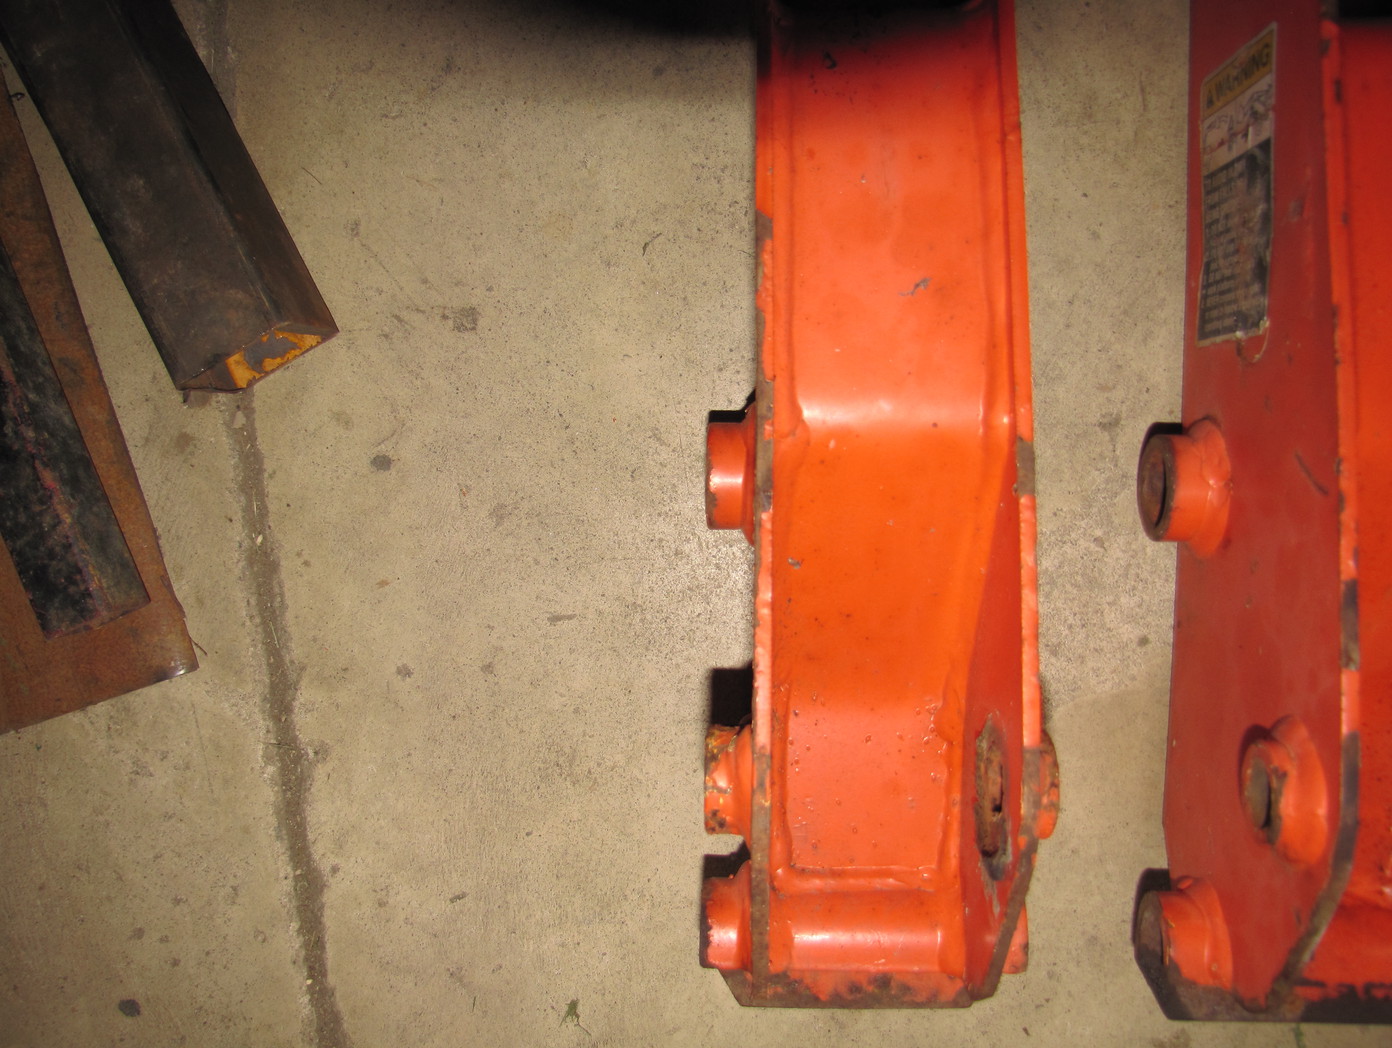
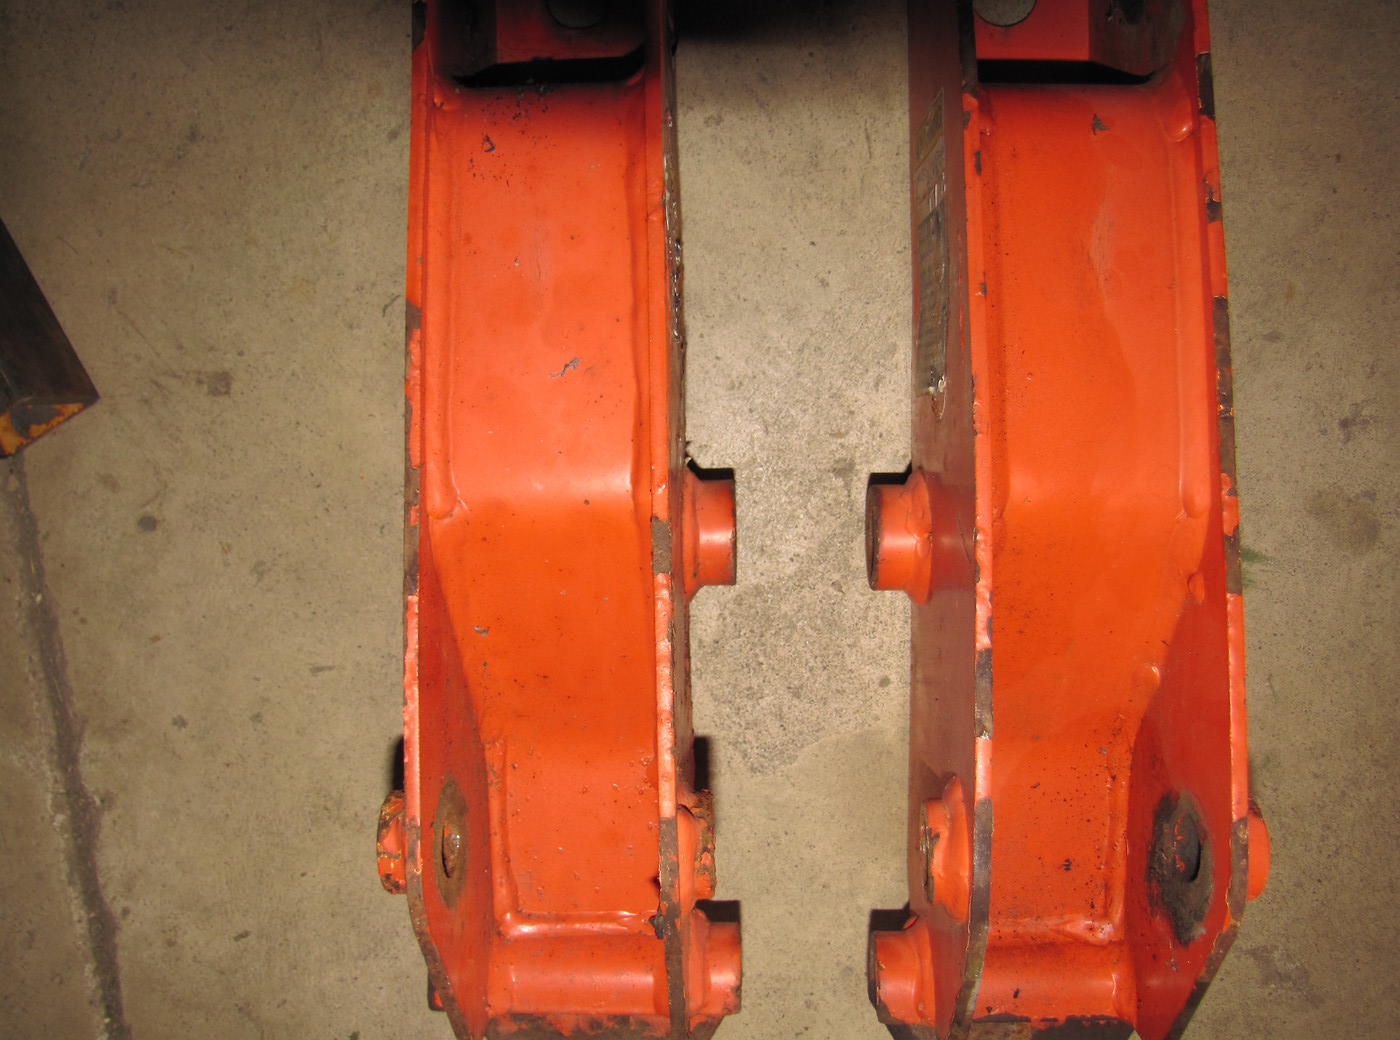
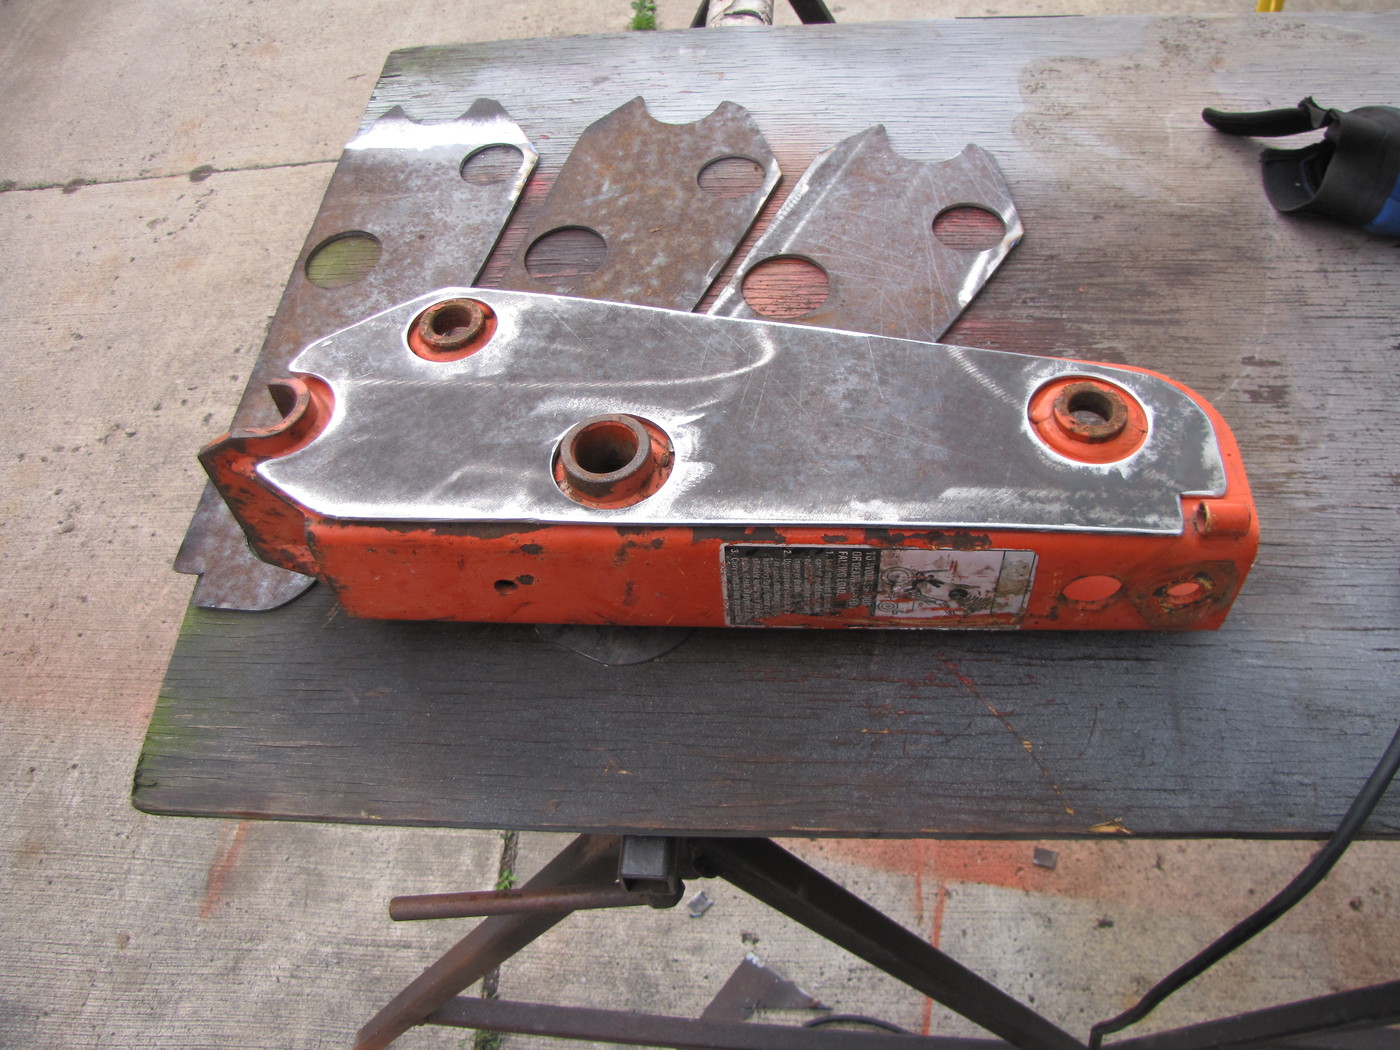
Then headed over to a friends to use his 20ton press.
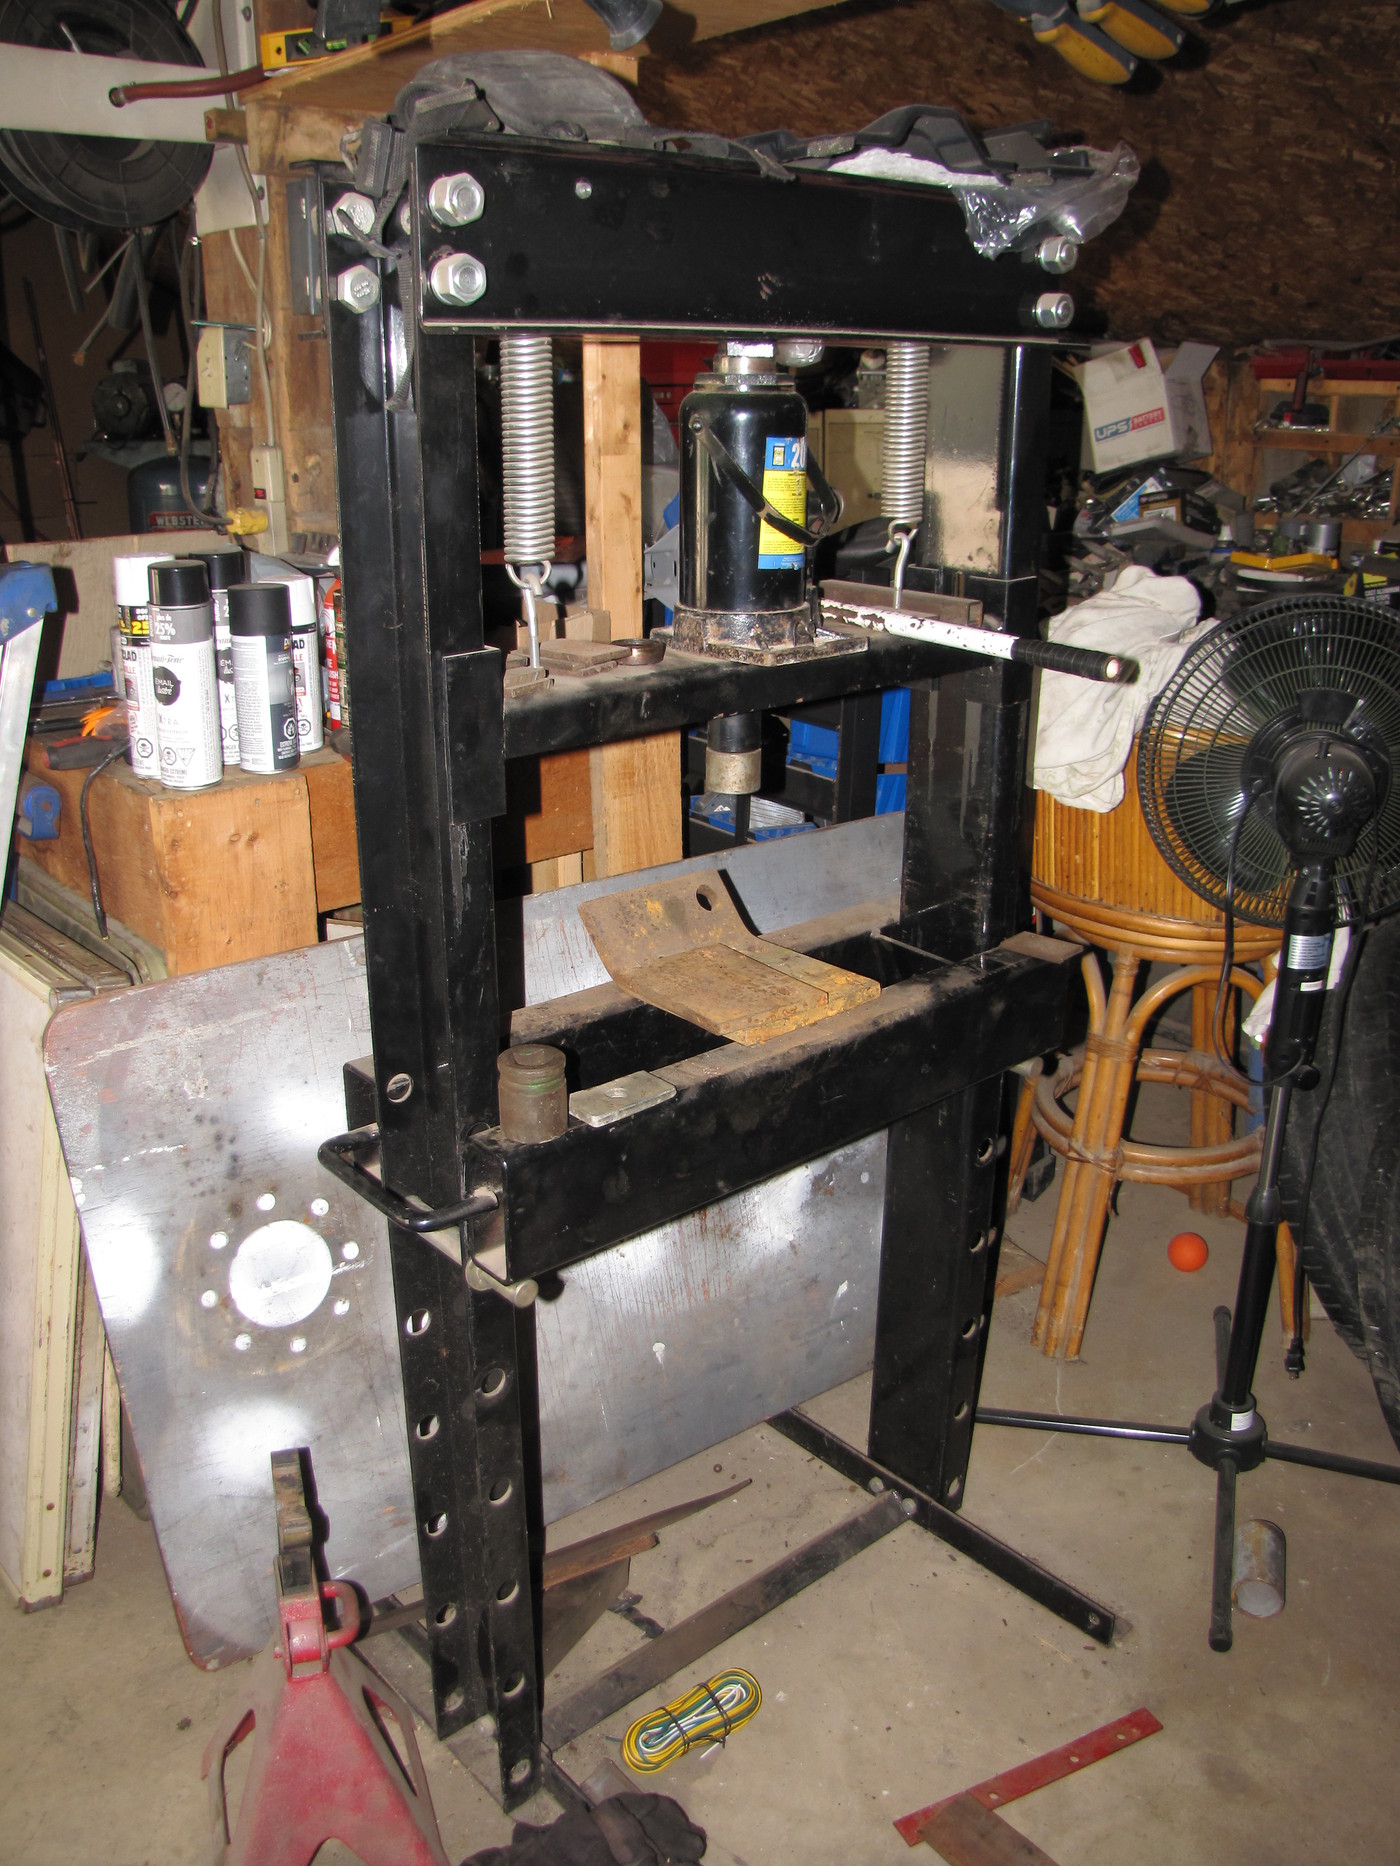
Had about an 1/8', maybe 3/16" to press back flat.
I used different sized scrap metal to shim the bracket "flat-ish"
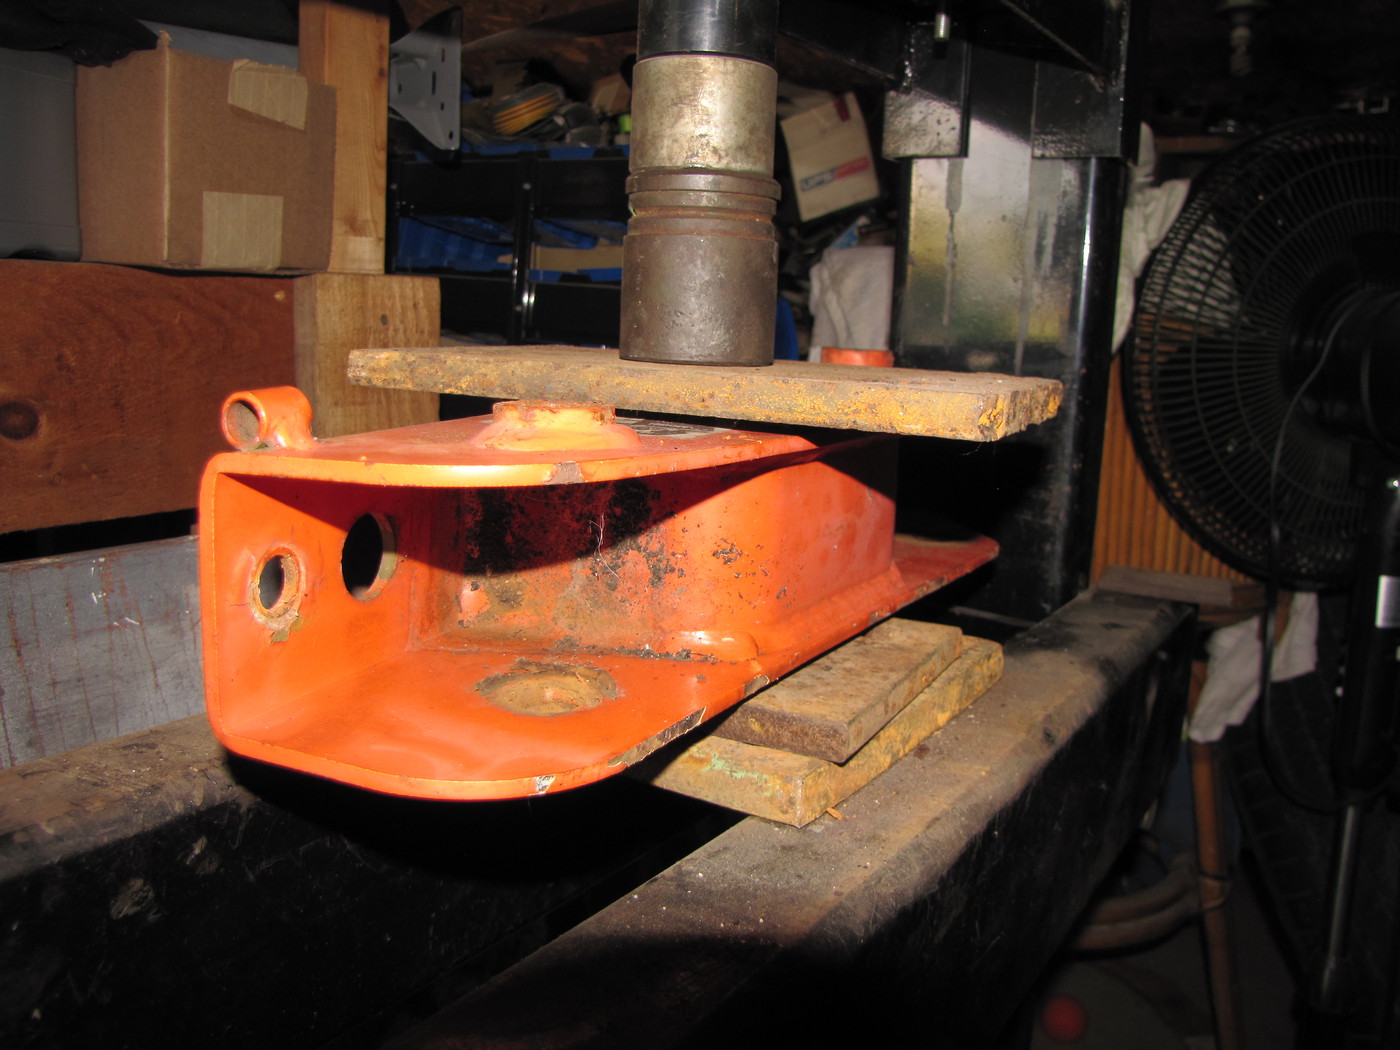
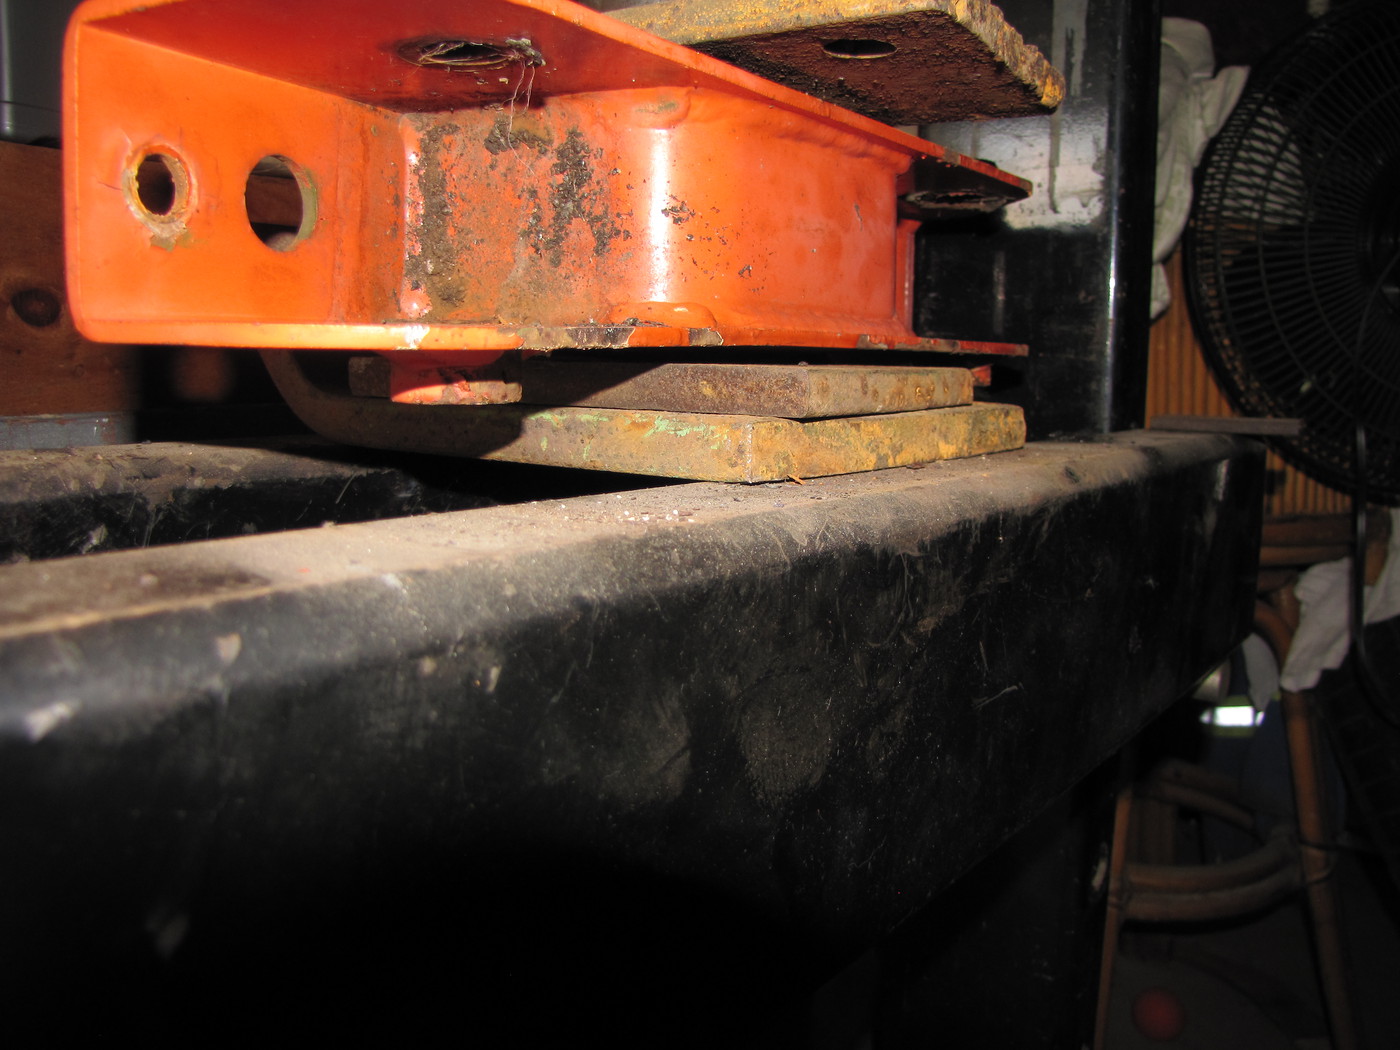
Took about 10 minutes to make the sides of the 2 brackets flat.
Then sat in my friends garage for 2.5hr's drinking beer...it was a productive day!
.
Started the day with some small parts painting.
Used my cheap Harbor Freight detail gun.
No idea what size tip this thing has but I'll guess maybe a 1mm tip.
If you know...let me know.
Then headed over to a friends to use his 20ton press.
Had about an 1/8', maybe 3/16" to press back flat.
I used different sized scrap metal to shim the bracket "flat-ish"
Took about 10 minutes to make the sides of the 2 brackets flat.
Then sat in my friends garage for 2.5hr's drinking beer...it was a productive day!
.
Chanceywd
Well-known member
Lifetime Member
Equipment
Kubota L2501DT BH77 VIRNIG URG60-CT 1950 8N WC-68
Put in a few hours after work today.
To make myself feel better I'm going to reinforce the Side Frames.
1st I made a template.
And then using some 1/8" plate I cut out some blanks to make the reinforcement plates.
The blanks are approx. 7"x20".
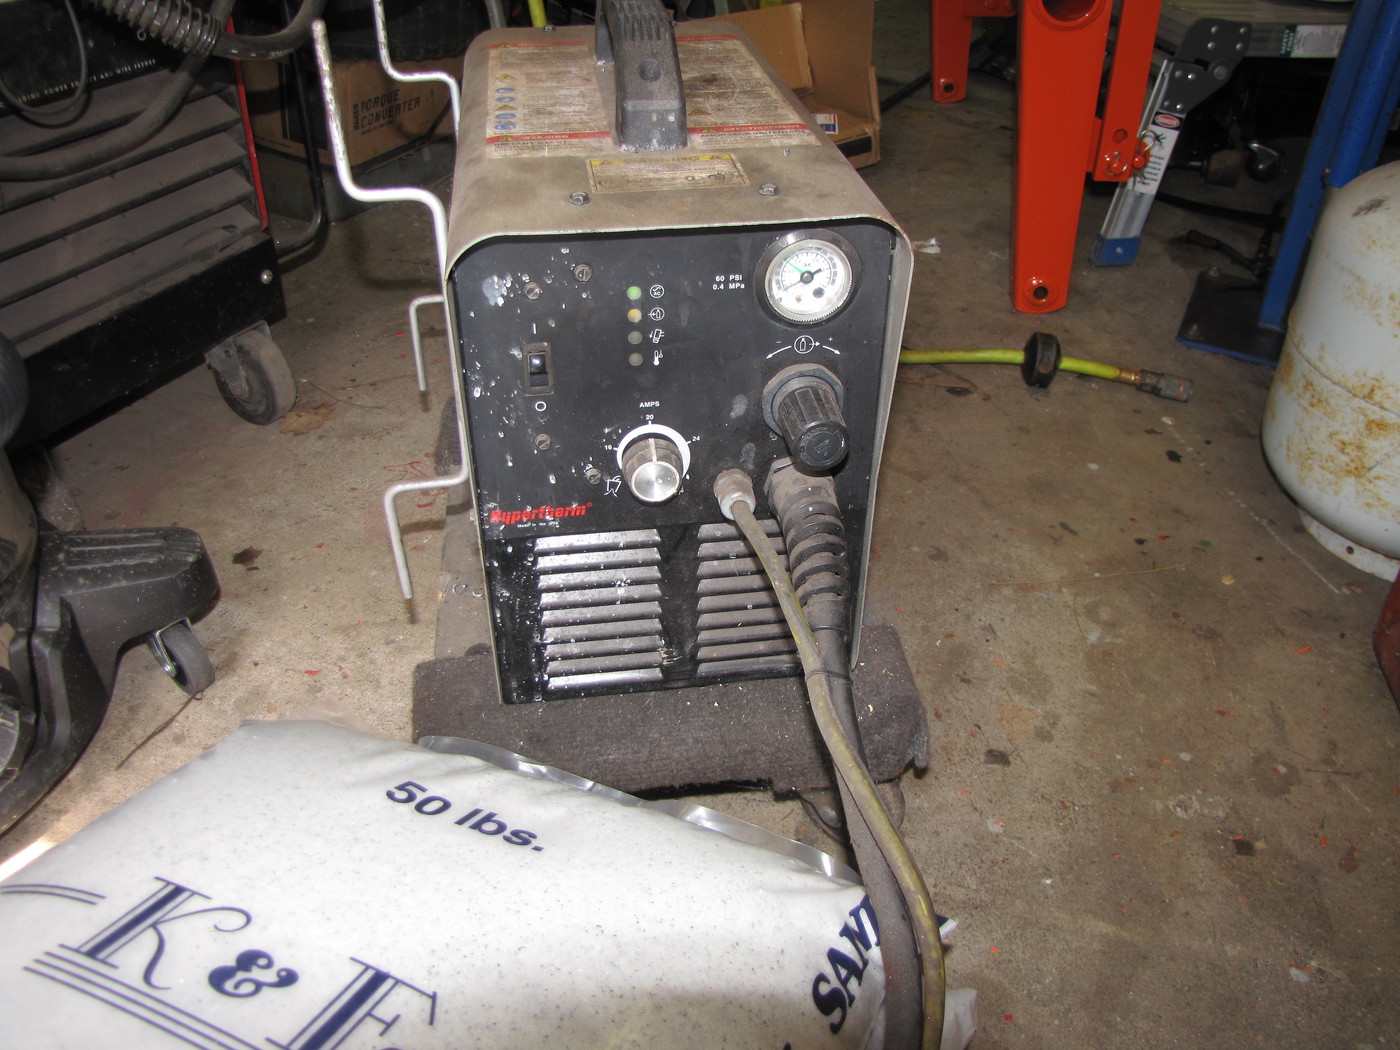
Cut the metal with my HyperTherm plasma torch.
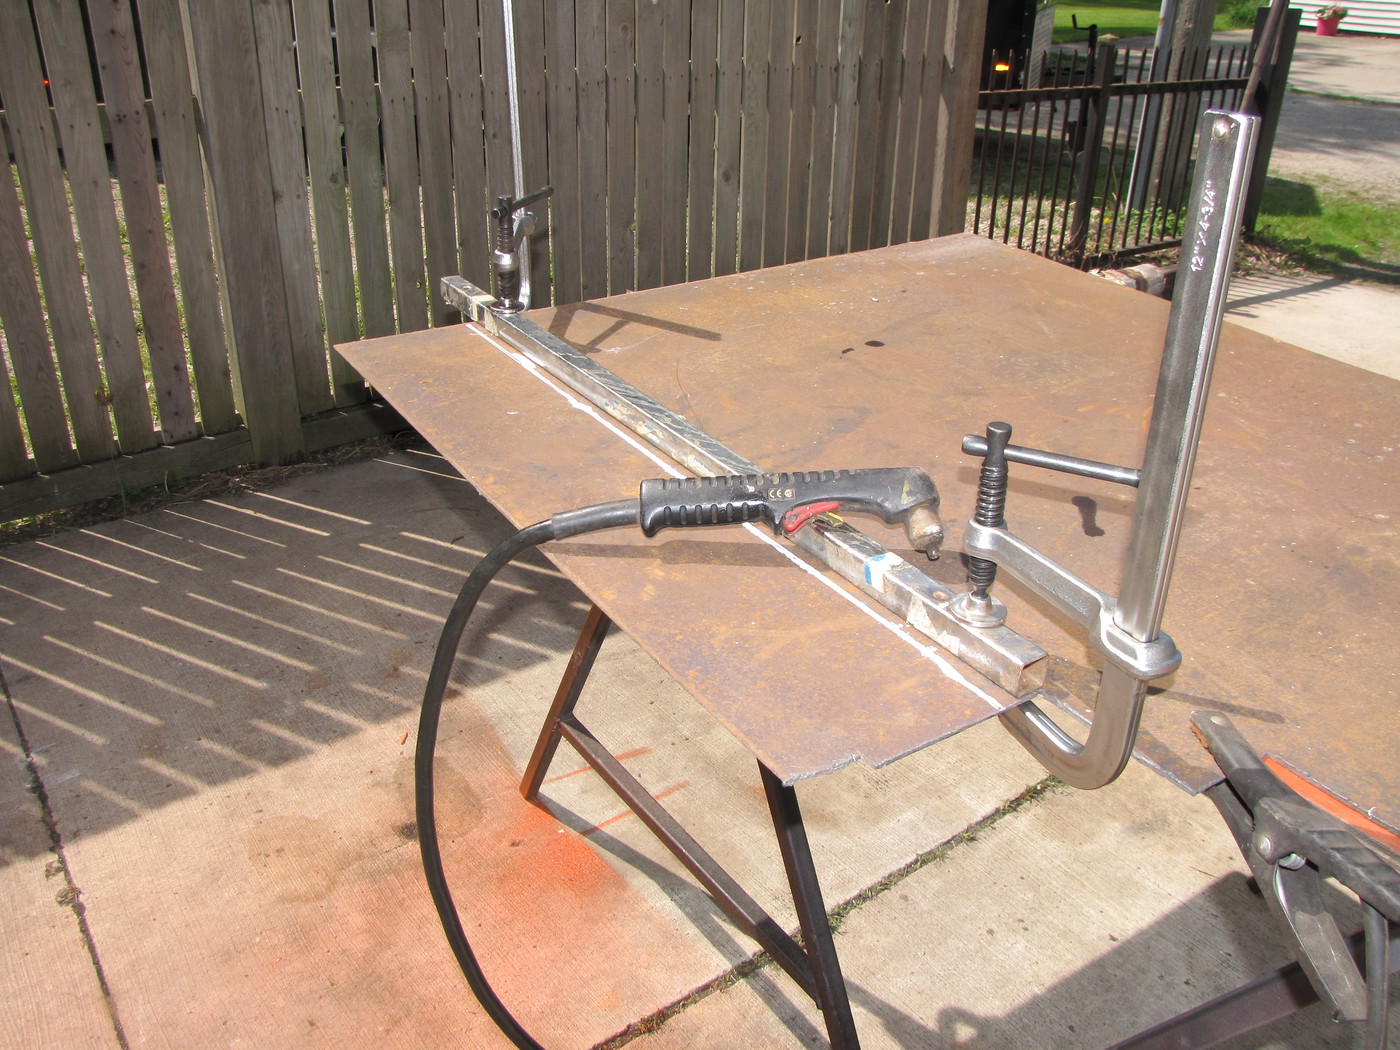
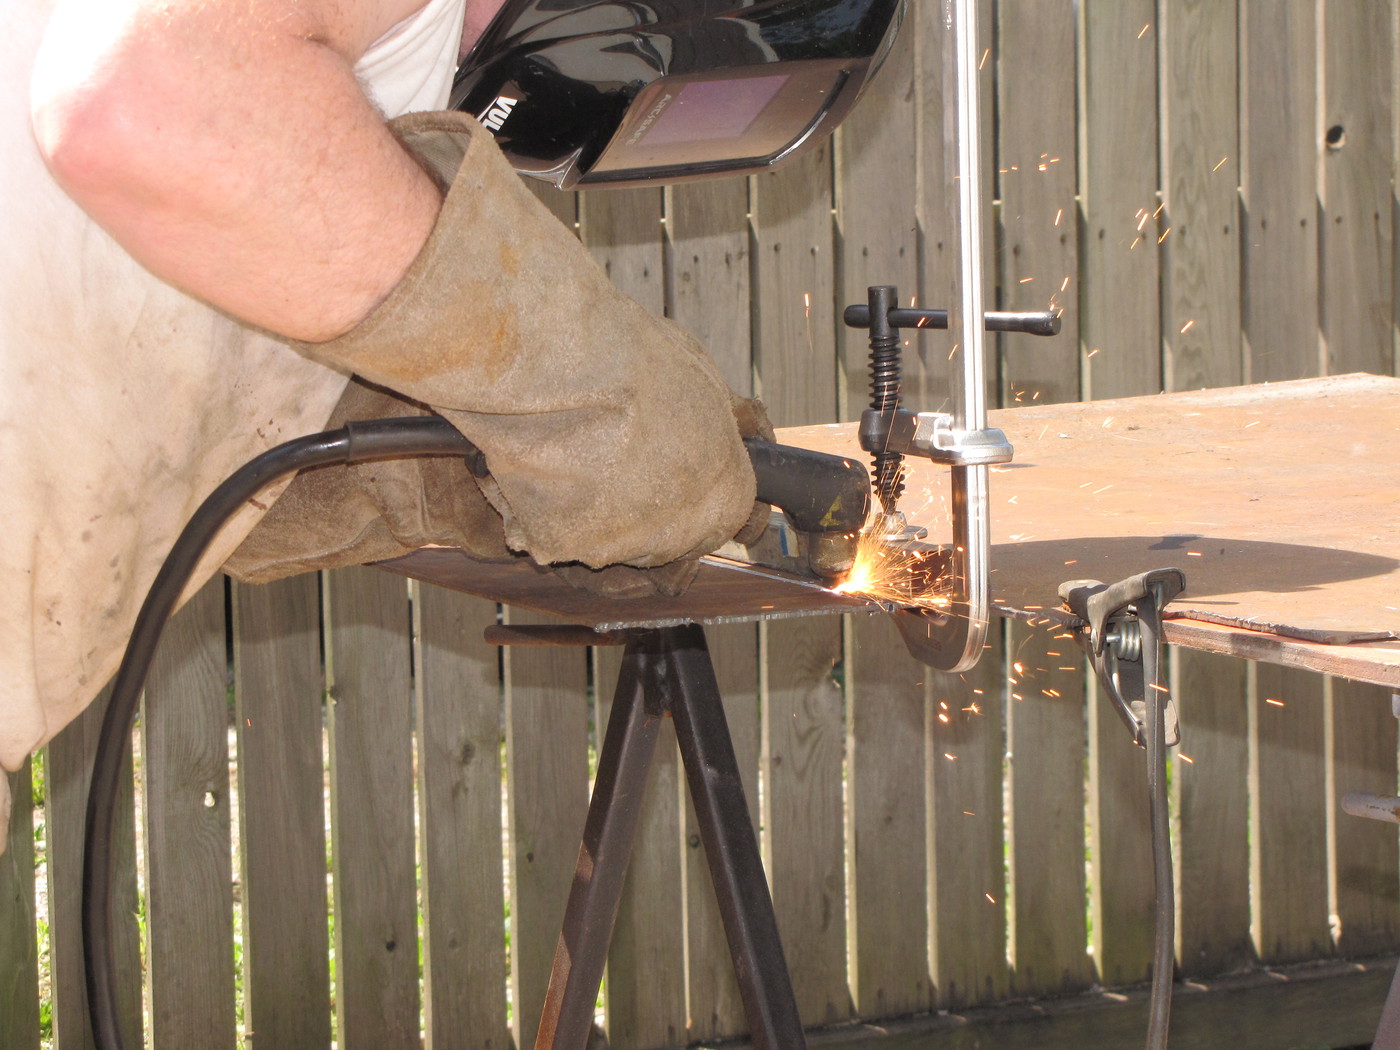
I stacked the plates up and tack welded the edges together.
This way all the reinforcement plates come out the same.

Then traced the pattern onto the metal.
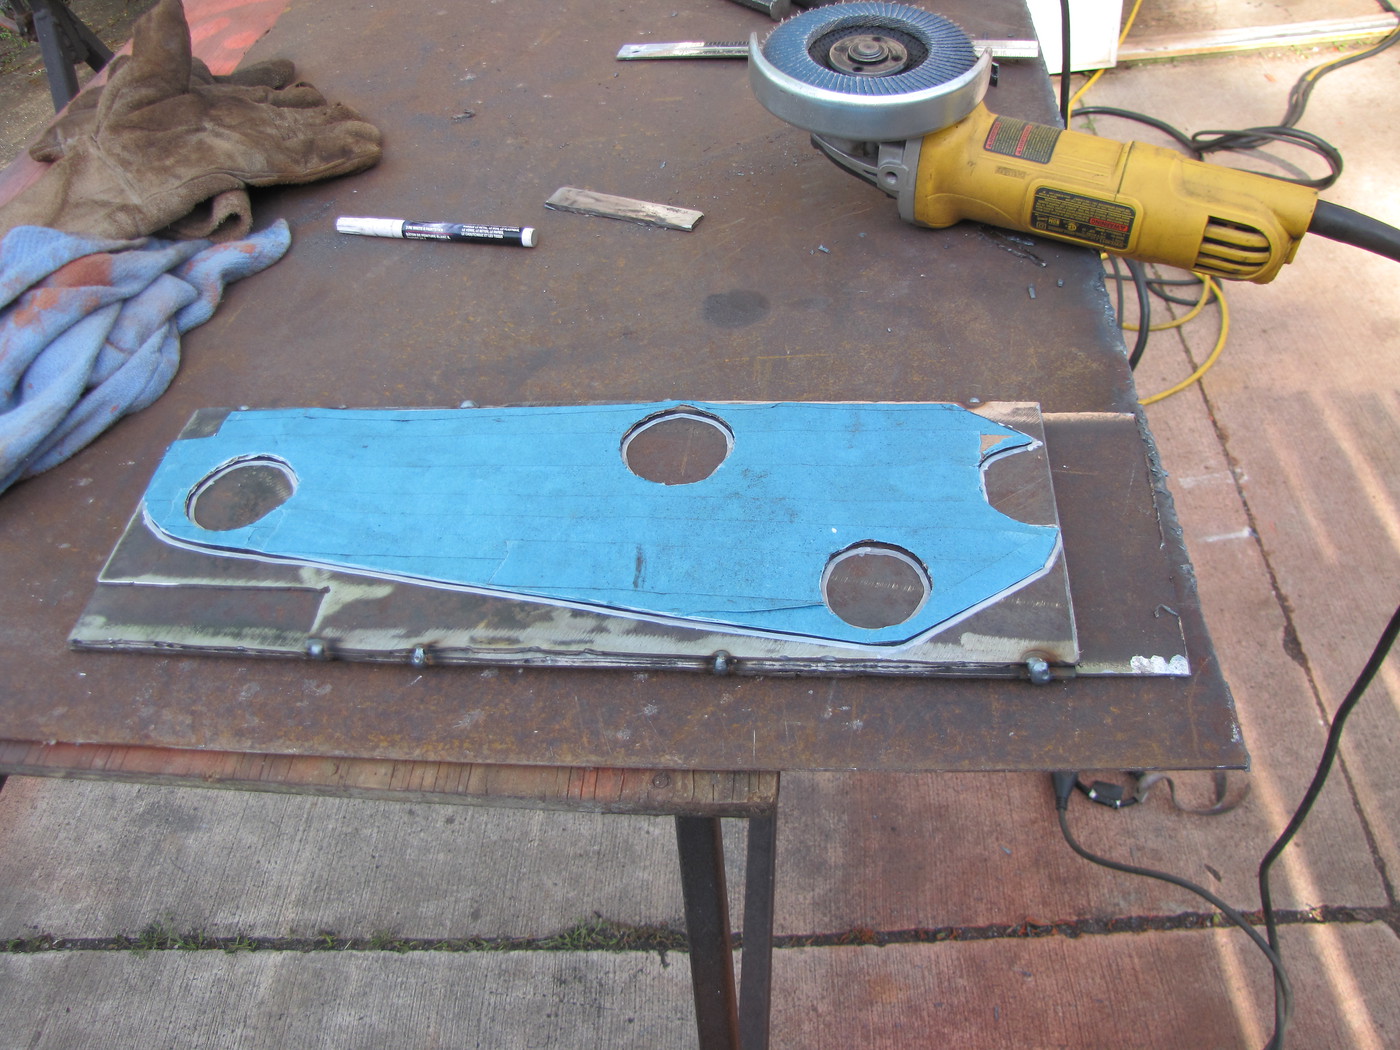
Used a 2" and 1"3/4" Bi-metal hole saw in my drill press to make the holes.
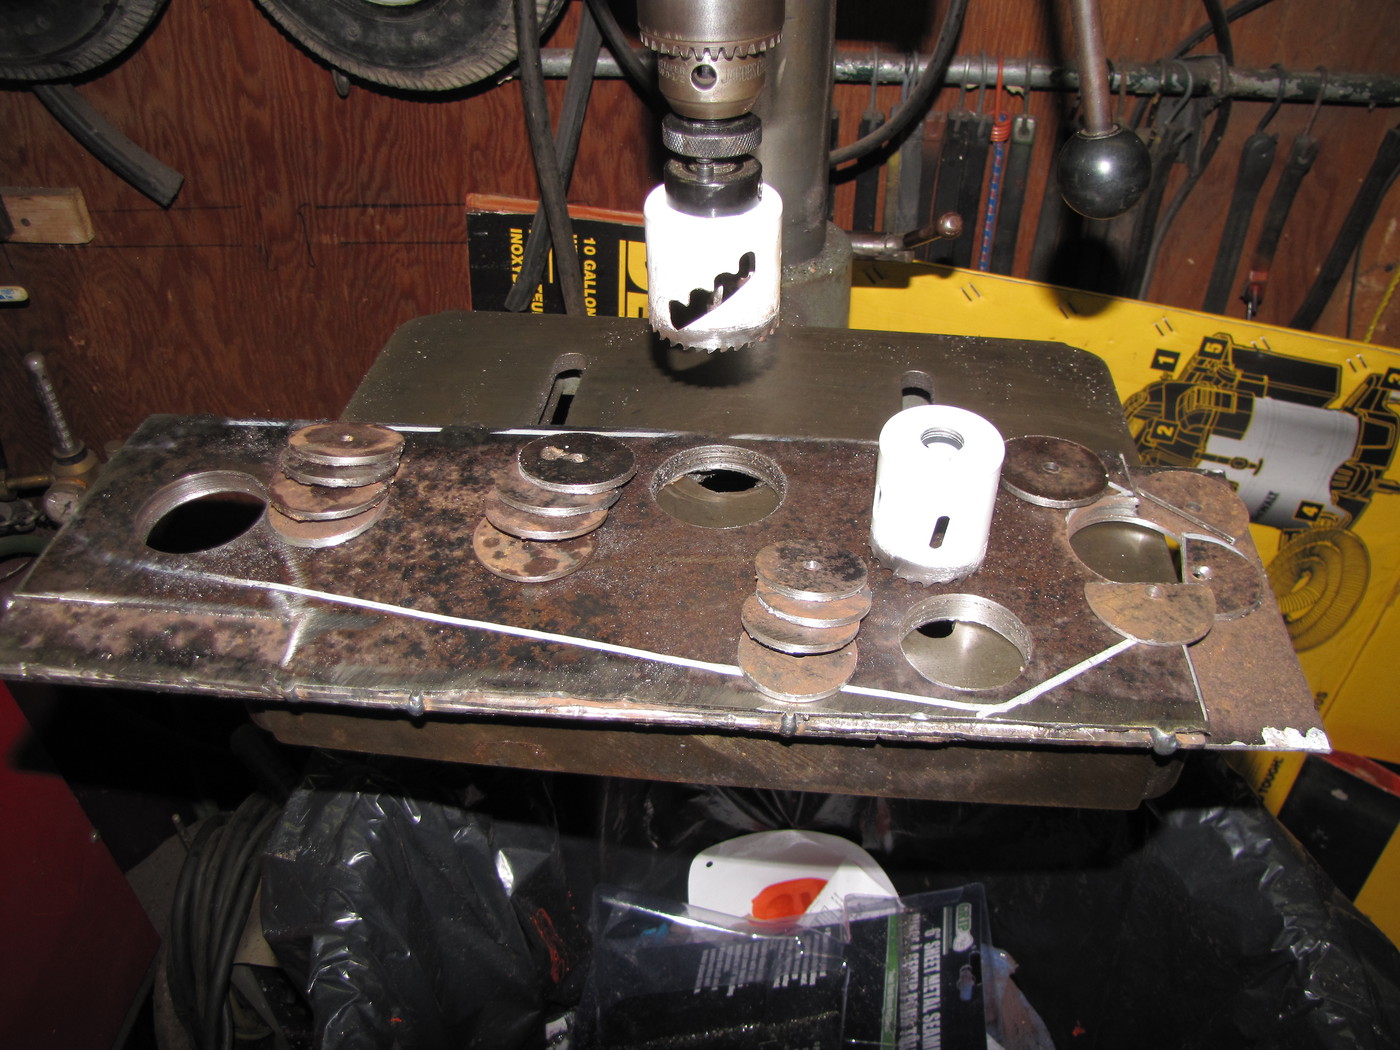
Once the holes were made I cut the blanks to shape.
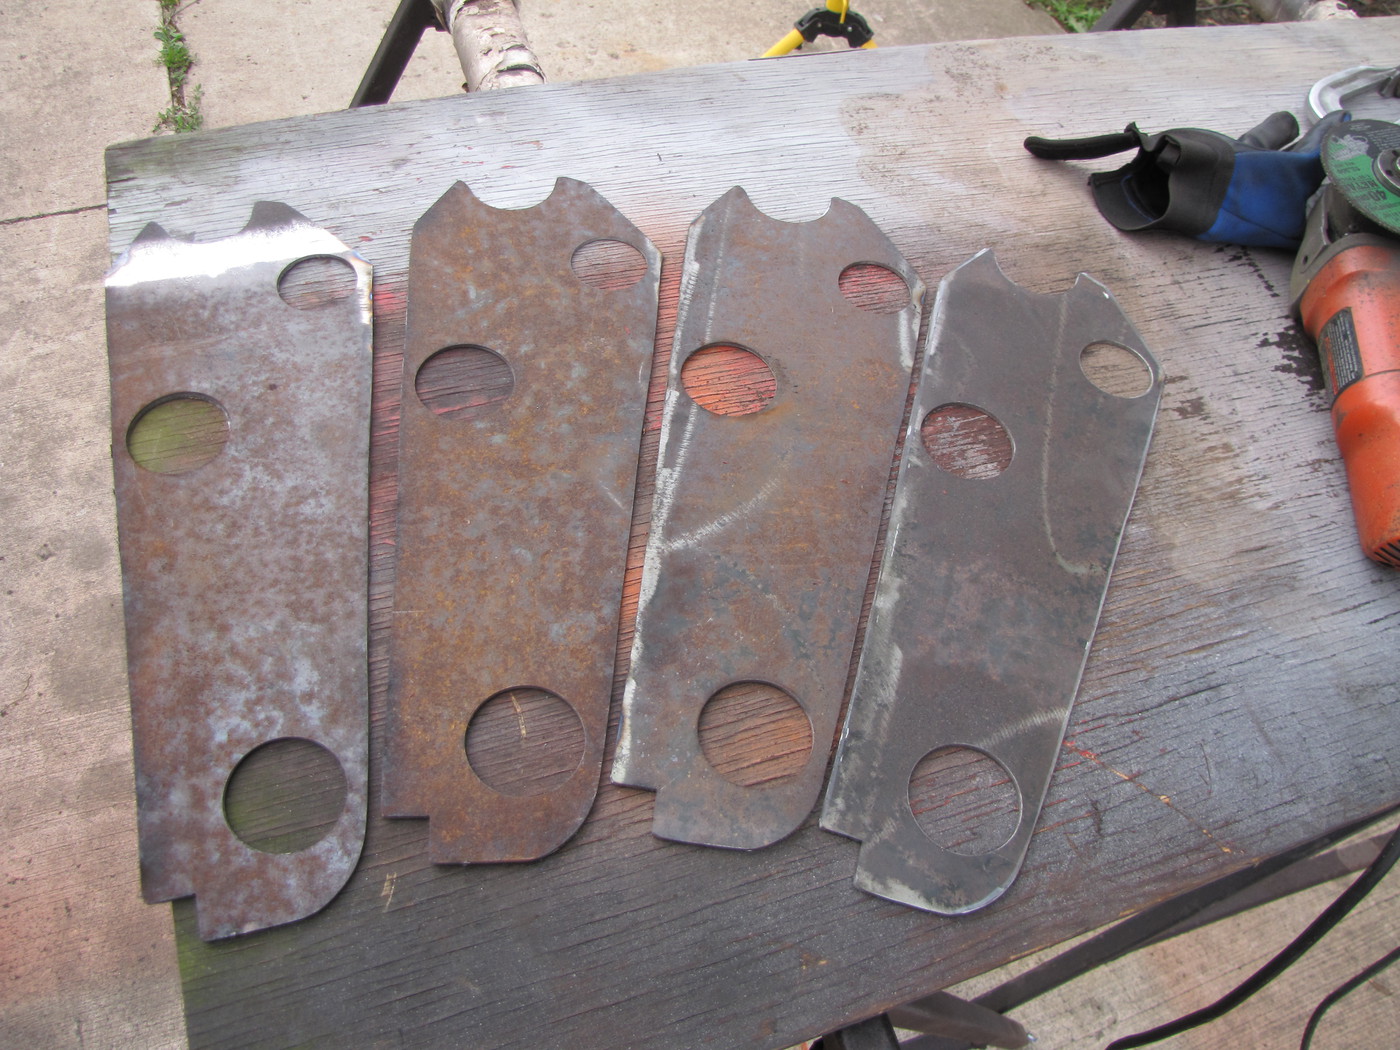
After a little grinding and fitting the reinforcement plates fit nice.
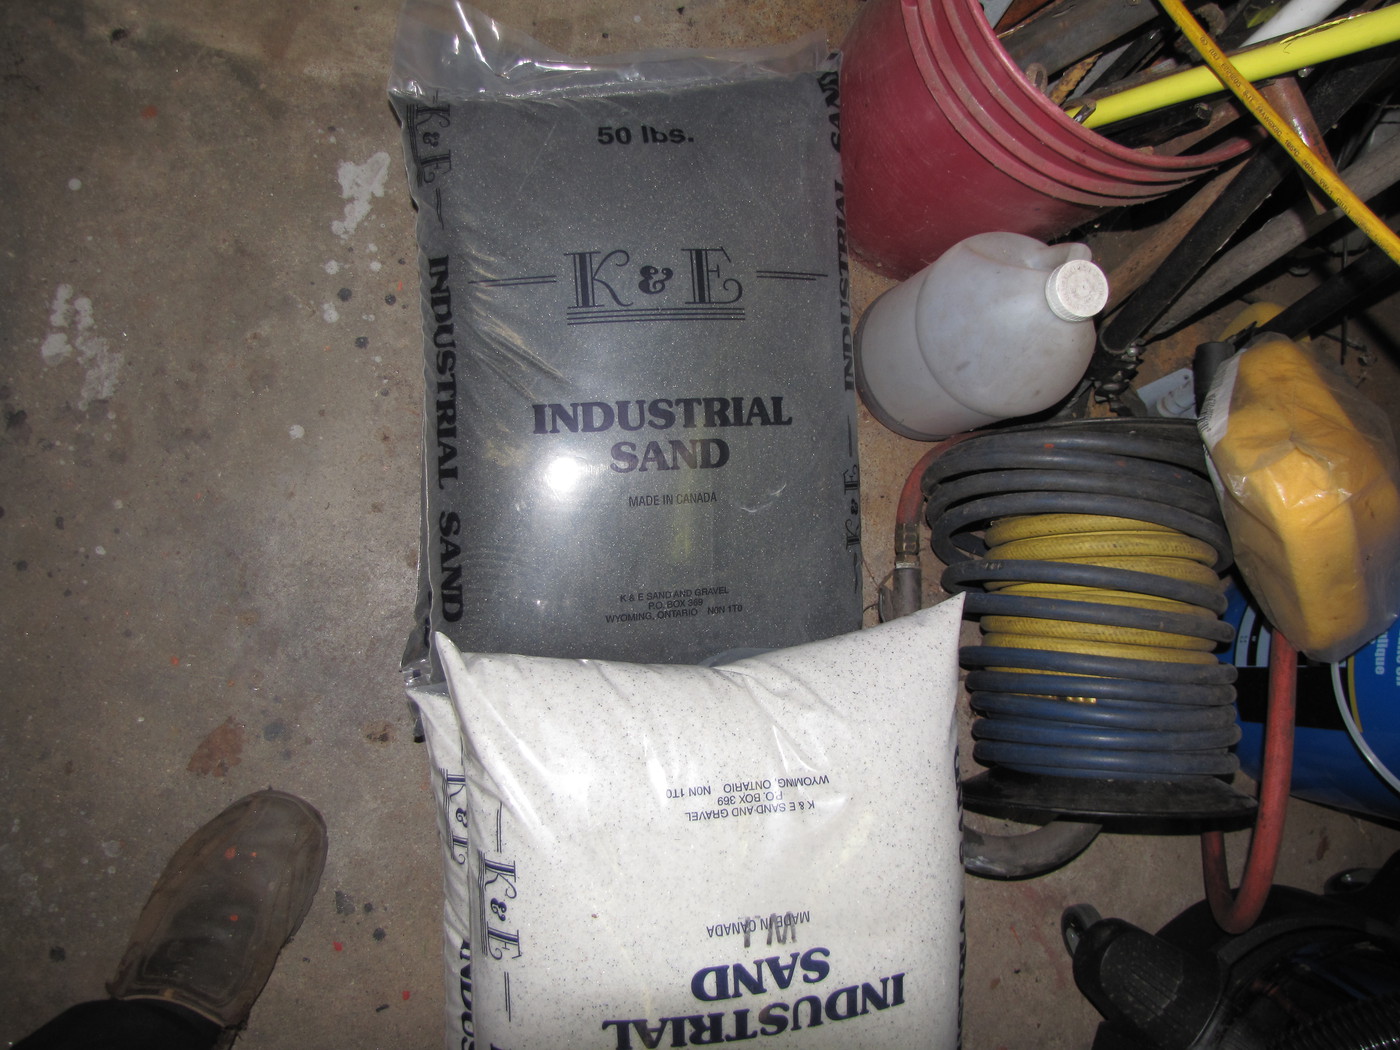
Then I threw them in the blast cabinet and got all the surface rust off.
This is the media I use in my blast cabinet.
Both are a none silica media. The black one is more aggressive than the white one.
I get it from a local quarry. $13.00 a bag.
All clean and ready for welding and paint.
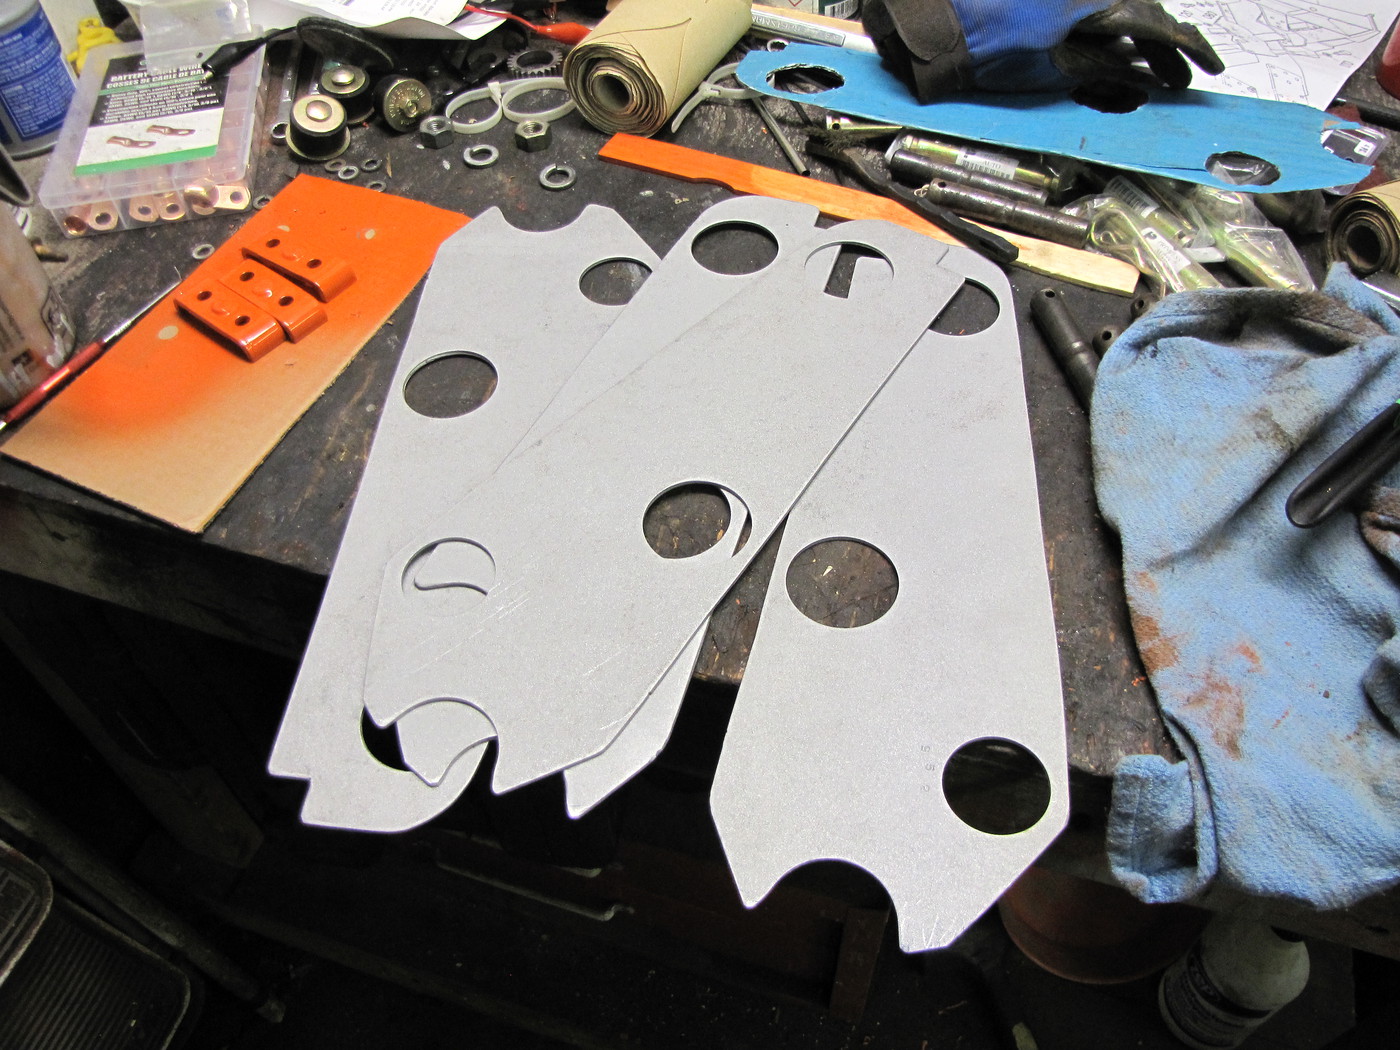
That's it today.
.
To make myself feel better I'm going to reinforce the Side Frames.
1st I made a template.
And then using some 1/8" plate I cut out some blanks to make the reinforcement plates.
The blanks are approx. 7"x20".
Cut the metal with my HyperTherm plasma torch.
I stacked the plates up and tack welded the edges together.
This way all the reinforcement plates come out the same.
Then traced the pattern onto the metal.
Used a 2" and 1"3/4" Bi-metal hole saw in my drill press to make the holes.
Once the holes were made I cut the blanks to shape.
After a little grinding and fitting the reinforcement plates fit nice.
Then I threw them in the blast cabinet and got all the surface rust off.
This is the media I use in my blast cabinet.
Both are a none silica media. The black one is more aggressive than the white one.
I get it from a local quarry. $13.00 a bag.
All clean and ready for welding and paint.
That's it today.
.
Chanceywd
Well-known member
Lifetime Member
Equipment
Kubota L2501DT BH77 VIRNIG URG60-CT 1950 8N WC-68
I haven't used it myself but after doing some body work I heard there is weld thru primer used in automotive work. It supposedly used to coat parts then when welding the back sides don't rust. Something maybe you could try when you laminate those to weld them on if you haven't already?Put in a few hours after work today.
To make myself feel better I'm going to reinforce the Side Frames.
1st I made a template.
And then using some 1/8" plate I cut out some blanks to make the reinforcement plates.
The blanks are approx. 7"x20".
Cut the metal with my HyperTherm plasma torch.
I stacked the plates up and tack welded the edges together.
This way all the reinforcement plates come out the same.
Then traced the pattern onto the metal.
Used a 2" and 1"3/4" Bi-metal hole saw in my drill press to make the holes.
Once the holes were made I cut the blanks to shape.
After a little grinding and fitting the reinforcement plates fit nice.
Then I threw them in the blast cabinet and got all the surface rust off.
This is the media I use in my blast cabinet.
Both are a none silica media. The black one is more aggressive than the white one.
I get it from a local quarry. $13.00 a bag.
All clean and ready for welding and paint.
That's it today.
.
Bill
Chanceywd
Well-known member
Lifetime Member
Equipment
Kubota L2501DT BH77 VIRNIG URG60-CT 1950 8N WC-68
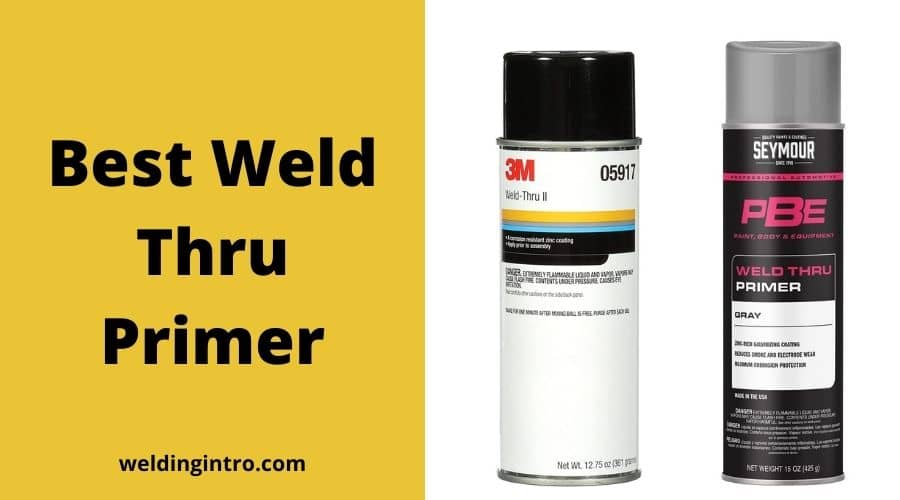
Here is an article on that type of primer.
 weldingintro.com
Bill
Best Weld Through Primer (Best Choices For Self Etching Weld-thru Primer)
If you are looking for the best weld through primer, you should look at my list which includes some of the easy-to-use primers to get better results!
weldingintro.com
Bill
Well...today's grand plans went to poop.
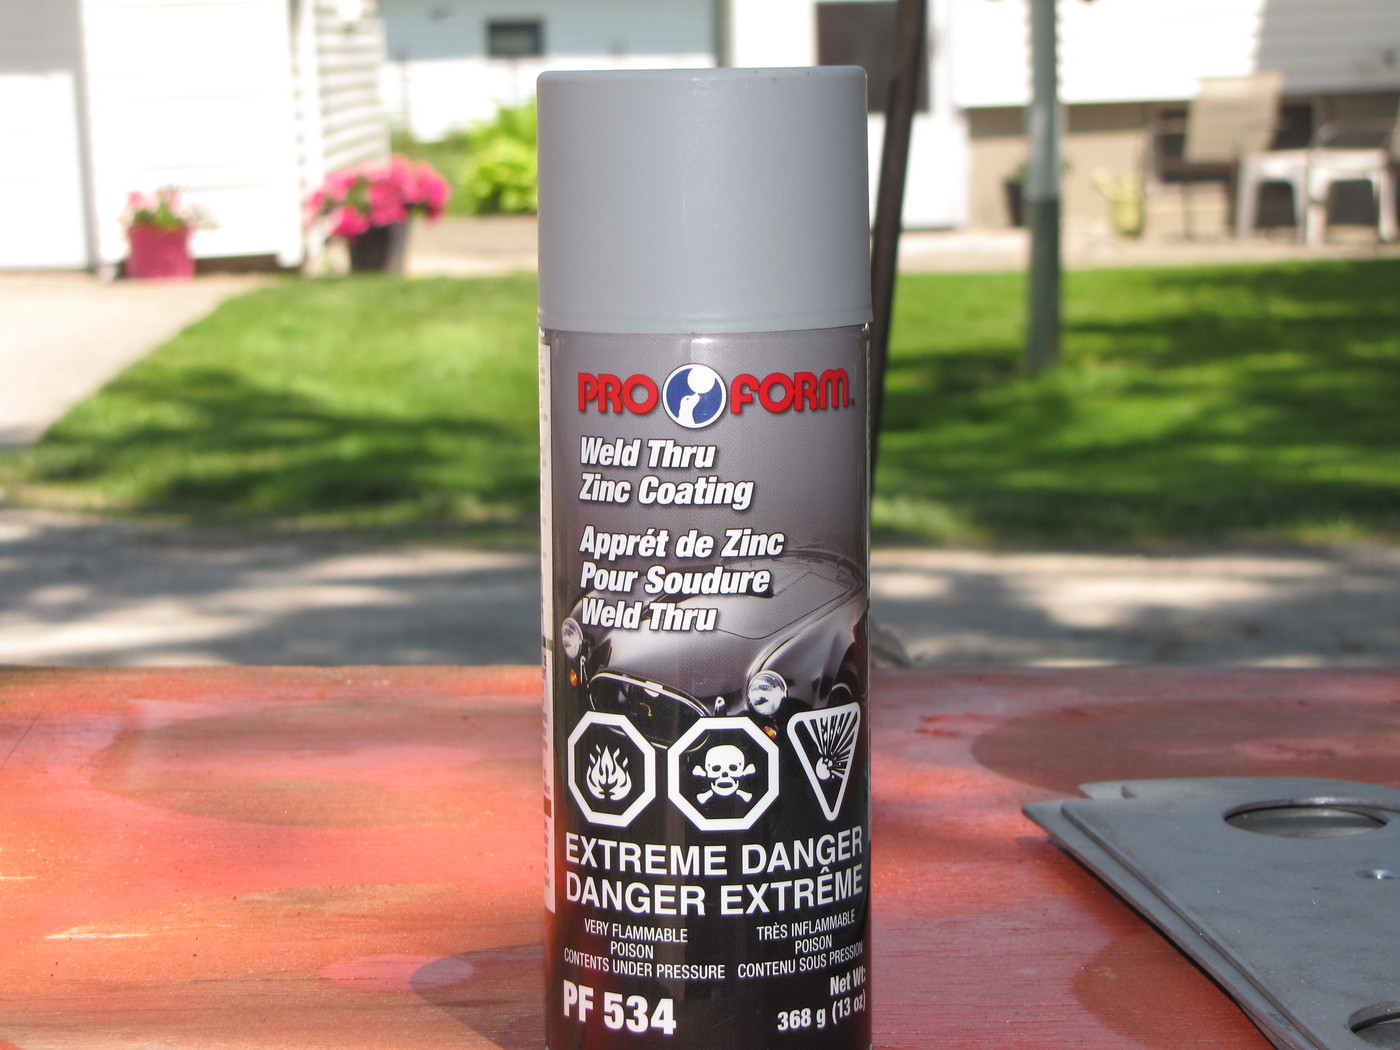
I picked up some weld through primer.
Got it at my local Car Quest, $36.01Cdn = $28.60us. There must be gold in that can somewhere.
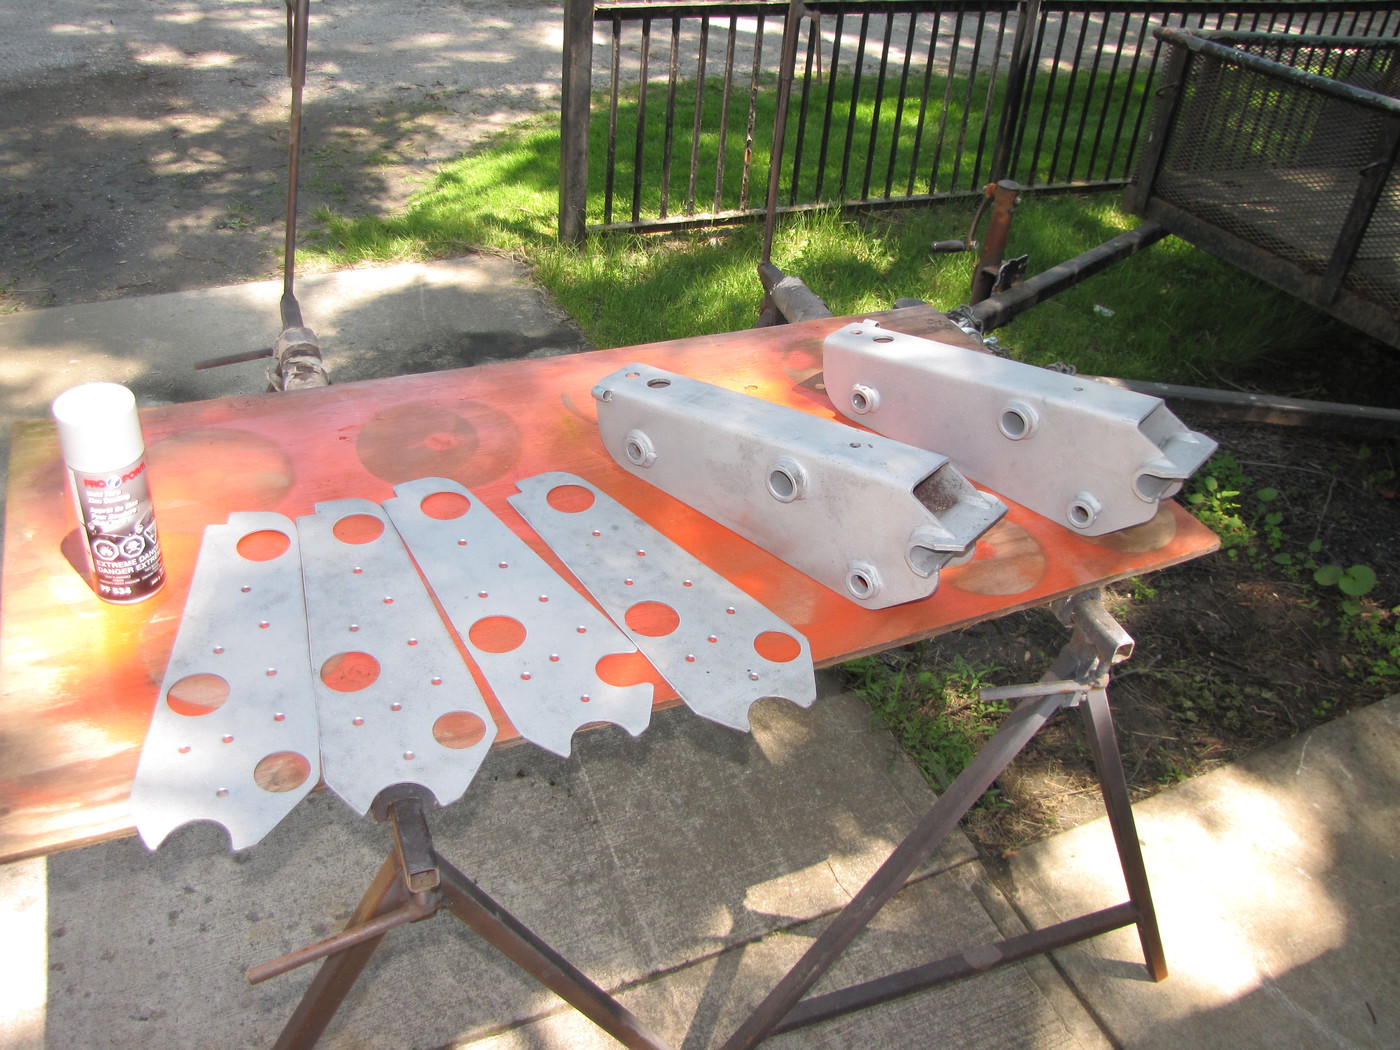
Will use this stuff in-between the reinforcement plates and the Side Frames.
My plan was to get everything welded up and paint the Side Frames today.
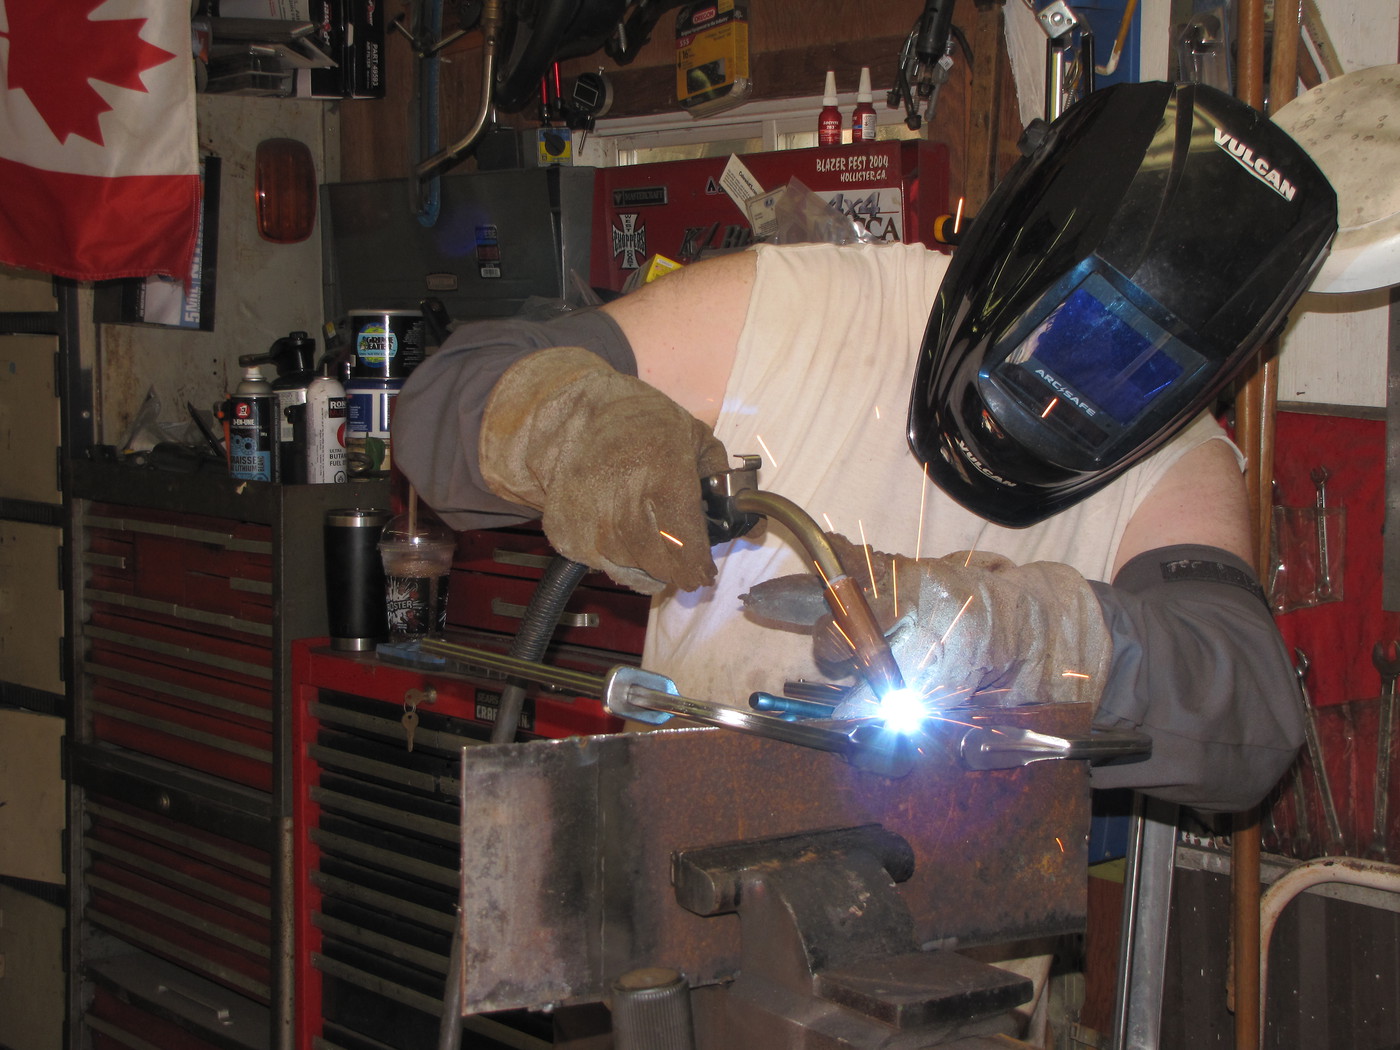
Got about five tacks on the 1st reinforcement plate and I ran out of Mig gas.
It's only 2:30pm on a Friday. I go to my welding store for a refill, note on door says "closed at 12:00,sorry".
So I'm done for the weekend.
.
I picked up some weld through primer.
Got it at my local Car Quest, $36.01Cdn = $28.60us. There must be gold in that can somewhere.
Will use this stuff in-between the reinforcement plates and the Side Frames.
My plan was to get everything welded up and paint the Side Frames today.
Got about five tacks on the 1st reinforcement plate and I ran out of Mig gas.
It's only 2:30pm on a Friday. I go to my welding store for a refill, note on door says "closed at 12:00,sorry".
So I'm done for the weekend.
.
Weld through primer still needs clean off in the weld area. It's kinda a misnomer. You don't actually weld through it.