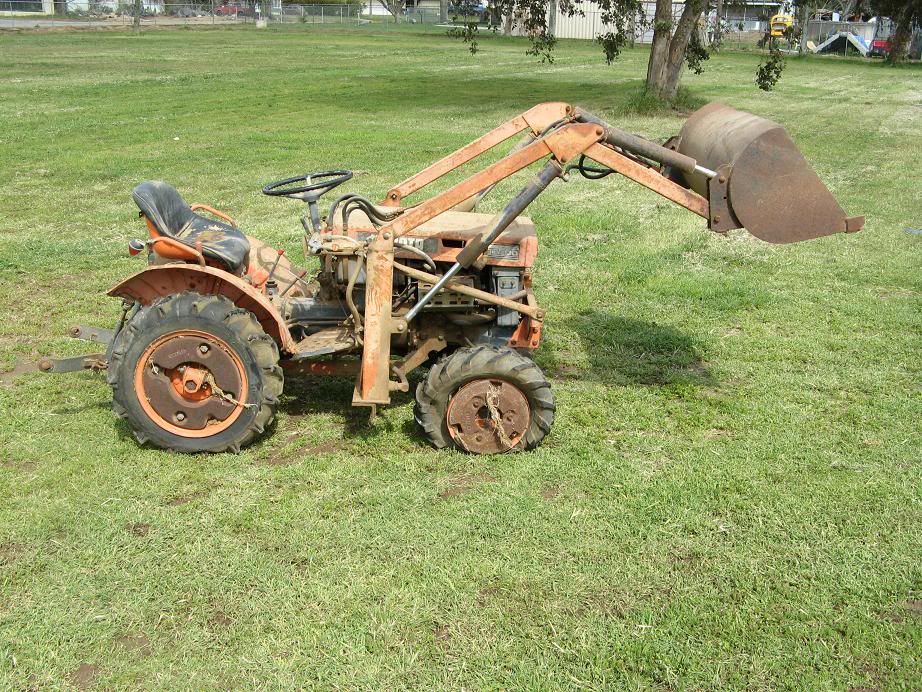
I recently bought a B6000 with front end trouble. I've written up my repair of it on another forum, and mentioned my annoyance in how the purchase went down on this forum, but thought folks here may be interested in the repair itself. It's more or less copied and pasted.
I can't make some of the photographs show up properly. I've tried editing them on my computer and uploading to photobucket, I've tried changing them in photobucket, but some still come out rotated. Sorry. I'm a computer ignoramus apparently.
After discovering the floppy right hub assembly, I didn't want to break anything (any worse) and want it to be serviceable and safe to use or sell. So, I pulled it apart this afternoon, and thought folks may want to see what it looked like.
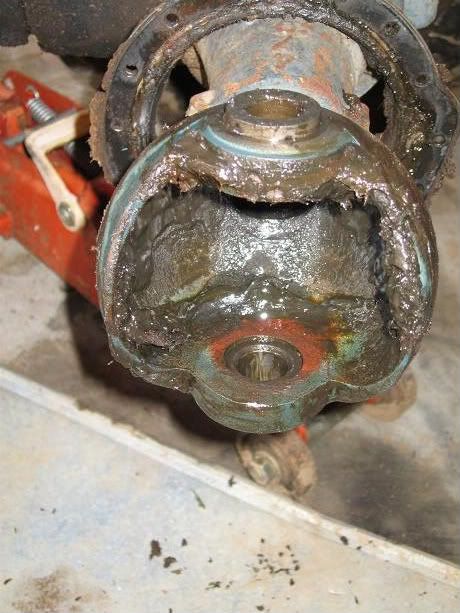
It's pretty simple, well built and very strong for its size. Here is the outer assembly.

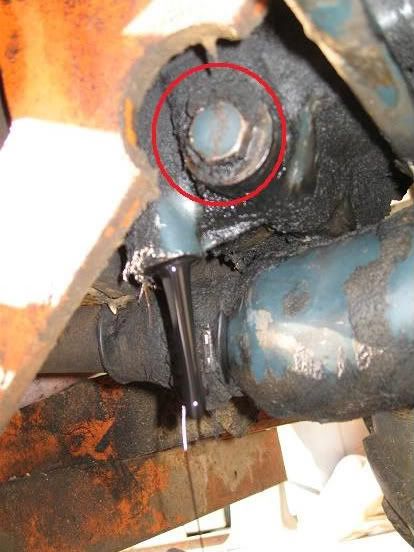
The knob up top with the grease zerk is the kingpin. Pull those 4 bolts off, and the steering arm comes up, bringing the kingpin with it. A dozen or so small bolts hold a dust guard around the knuckle. With those pulled, the dust guard slides back onto the axle and gives you a little more room to work.
The bottom kingpin is held in place by a clip. Two bolts hold the clip in, then the kingpin drops out. The hub then slides out, taking the axleshaft with it:
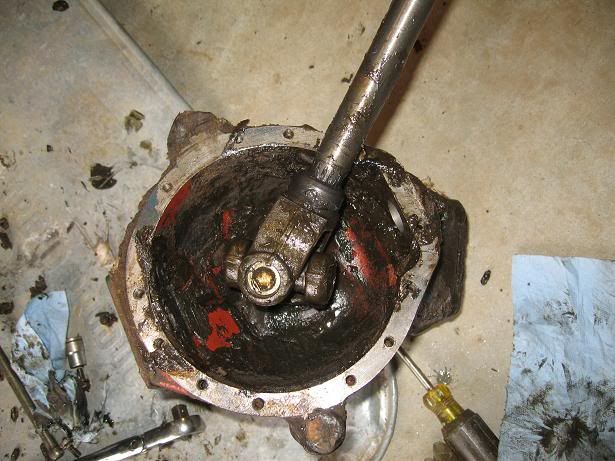
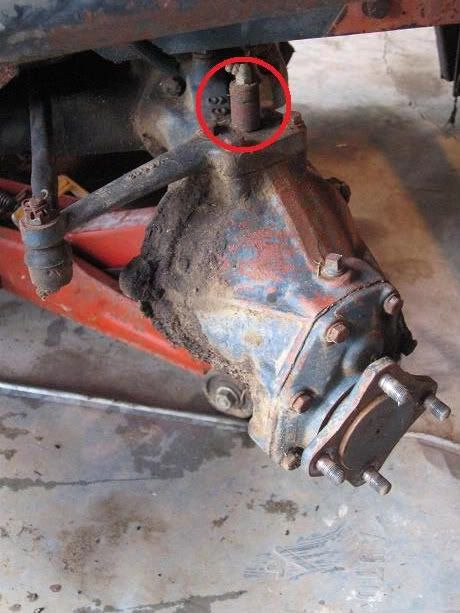
This is what the tractor end looks like now:
The little round divot at the bottom of the knuckle is a bushing, pressed in from the bottom. I needed to get mine out, and, while I have a reasonable equipped shop, I don't have the right puller to do this. Since I'm dumber than I am rich, I improvised one:
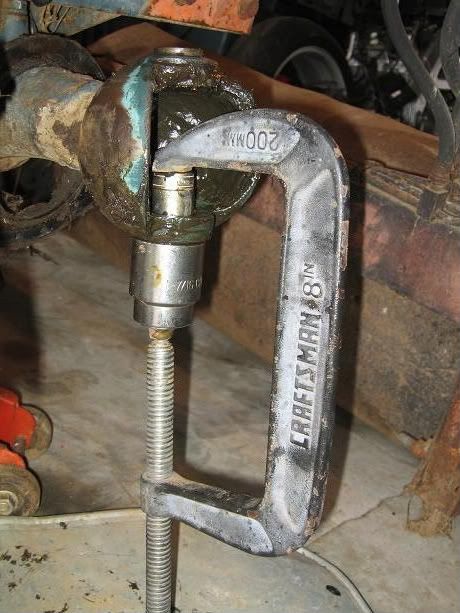
A 7/8 socket on top of the bushing, and whatever giant one I grabbed first to go over the bottom of the bushing on bottom, sandwhiched by a large C-clamp ALMOST worked. By hitting the socket with a hammer and long punch the bushing came out smoothly and easily.
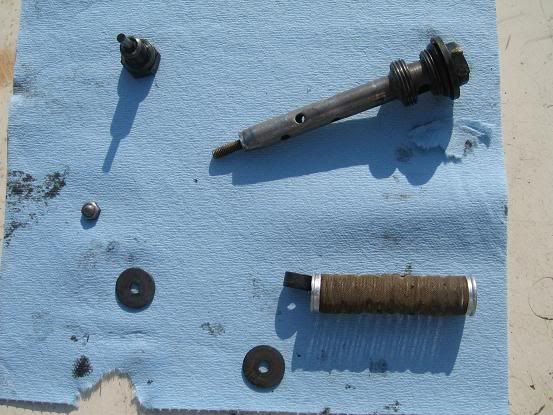
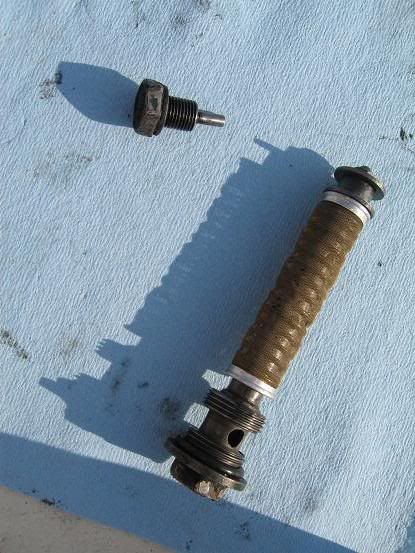
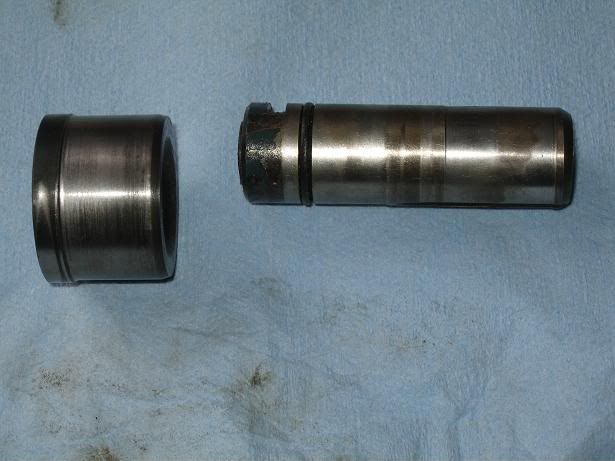
Here are the lower kingpin, and bushing. There is also a bearing that sits on top of the bushing, but I forgot to get a picture of that.
On the right edge of the kingpin, you can see the groove worn into it. It's about .006 or so edged out, and a corresponding but lesser amount on the bushing. When amplified at the top of the knuckle, though, the effect is much greater, as seen in the pictures above.
The new assistant supervisor kept an eye on things.
After taking a break, and while in the shower, I realized that I hadn't solved the issue by that amount of wear on the lower kingpin. I went back out, and confirmed what I thought I remembered:
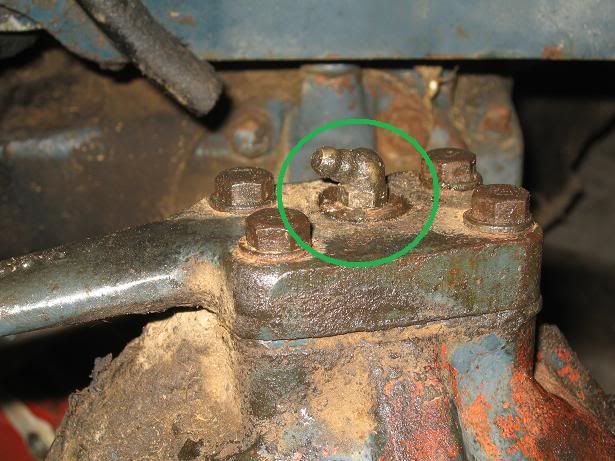
The top kingpin was floated far beyond where it should be. It would go up and down, just catching, or just releasing from its bushing. After it was set down into the proper place, it looks like this:
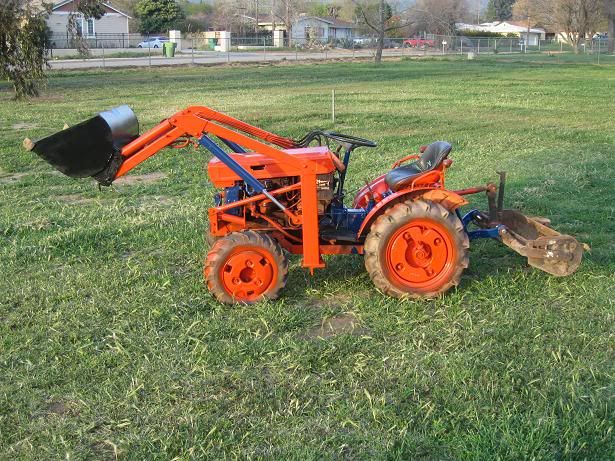
I'll still need to get a bearing, and a kingpin and bushing set top and bottom won't hurt, but they're not that bad. The front end is tight now, and feels solid. All that remains is to fill it with lube, service the other fluids on the tractor, then go try it out and see what else I need to repair!
For the moment though, I'm quite relieved. The bushings, kingpins and bearings are all available, but exorbitantly expensive (one kingpin is just under $50, for instance) to do top and bottom on both sides.
I can't make some of the photographs show up properly. I've tried editing them on my computer and uploading to photobucket, I've tried changing them in photobucket, but some still come out rotated. Sorry. I'm a computer ignoramus apparently.
After discovering the floppy right hub assembly, I didn't want to break anything (any worse) and want it to be serviceable and safe to use or sell. So, I pulled it apart this afternoon, and thought folks may want to see what it looked like.
It's pretty simple, well built and very strong for its size. Here is the outer assembly.
The knob up top with the grease zerk is the kingpin. Pull those 4 bolts off, and the steering arm comes up, bringing the kingpin with it. A dozen or so small bolts hold a dust guard around the knuckle. With those pulled, the dust guard slides back onto the axle and gives you a little more room to work.
The bottom kingpin is held in place by a clip. Two bolts hold the clip in, then the kingpin drops out. The hub then slides out, taking the axleshaft with it:
This is what the tractor end looks like now:
The little round divot at the bottom of the knuckle is a bushing, pressed in from the bottom. I needed to get mine out, and, while I have a reasonable equipped shop, I don't have the right puller to do this. Since I'm dumber than I am rich, I improvised one:
A 7/8 socket on top of the bushing, and whatever giant one I grabbed first to go over the bottom of the bushing on bottom, sandwhiched by a large C-clamp ALMOST worked. By hitting the socket with a hammer and long punch the bushing came out smoothly and easily.
Here are the lower kingpin, and bushing. There is also a bearing that sits on top of the bushing, but I forgot to get a picture of that.
On the right edge of the kingpin, you can see the groove worn into it. It's about .006 or so edged out, and a corresponding but lesser amount on the bushing. When amplified at the top of the knuckle, though, the effect is much greater, as seen in the pictures above.
The new assistant supervisor kept an eye on things.
After taking a break, and while in the shower, I realized that I hadn't solved the issue by that amount of wear on the lower kingpin. I went back out, and confirmed what I thought I remembered:
The top kingpin was floated far beyond where it should be. It would go up and down, just catching, or just releasing from its bushing. After it was set down into the proper place, it looks like this:
I'll still need to get a bearing, and a kingpin and bushing set top and bottom won't hurt, but they're not that bad. The front end is tight now, and feels solid. All that remains is to fill it with lube, service the other fluids on the tractor, then go try it out and see what else I need to repair!
For the moment though, I'm quite relieved. The bushings, kingpins and bearings are all available, but exorbitantly expensive (one kingpin is just under $50, for instance) to do top and bottom on both sides.
Last edited: