B219 loader cylinder rebuild
- Thread starter Turk999
- Start date
Dan_R_42
Member
Equipment
B7100-D, w/ Sims Cab, B219 FEL, ARPS 70 Backhoe, Oversized R4 Tires, LX2610 Cab
Good luck on your rebuild... It is something that I may need to address myself this summer on my B7100. I have the same loader.
Where did you track down your rebuild kits?
Where did you track down your rebuild kits?
I found them at: http://www.goldeneagledirect.com/index.php
Part number: 70050-00123
For $17.82 each cyl.
Part number: 70050-00123
For $17.82 each cyl.
Lil Foot
Well-known member
Lifetime Member
Equipment
1979 B7100DT Gear, Nissan Hanix N150-2 Excavator
Great, thanks for the info, it's on my to-do list also.I found them at: http://www.goldeneagledirect.com/index.php
Part number: 70050-00123
For $17.82 each cyl.
kubotasam
Well-known member
Equipment
B2410, B7100dt, B7500,Woods BH750,Landpride 2660RFM, Tiller, B2781 Snowblower
I don't know the torque spec for the nut. However I do know they need to be really tight and you need to put locktite on them. I just finished doing mine. I used my 3/4" ratchet and tighten them as much as I could.
Dan_R_42
Member
Equipment
B7100-D, w/ Sims Cab, B219 FEL, ARPS 70 Backhoe, Oversized R4 Tires, LX2610 Cab
kubotasam...I don't know the torque spec for the nut. However I do know they need to be really tight and you need to put locktite on them. I just finished doing mine. I used my 3/4" ratchet and tighten them as much as I could.
Are we talking Blue loctite or would this be a Red loctite application here ?
Last edited:
Dan_R_42
Member
Equipment
B7100-D, w/ Sims Cab, B219 FEL, ARPS 70 Backhoe, Oversized R4 Tires, LX2610 Cab
Is it the same kit for both the Lift cylinder and the Tilt cylinder ?I found them at: http://www.goldeneagledirect.com/index.php
Part number: 70050-00123
For $17.82 each cyl.
Is it the same kit for both the Lift cylinder and the Tilt cylinder ?
I think so. I bought 4 packs. Will be doing them in a week or so.....hopefully!!!
Dan_R_42
Member
Equipment
B7100-D, w/ Sims Cab, B219 FEL, ARPS 70 Backhoe, Oversized R4 Tires, LX2610 Cab
OK, Thanks...I think so. I bought 4 packs. Will be doing them in a week or so.....hopefully!!!
I'll wait to hear how you made out before I place an order for the kits.
kubotasam
Well-known member
Equipment
B2410, B7100dt, B7500,Woods BH750,Landpride 2660RFM, Tiller, B2781 Snowblower
The blue locktite is what you want to use. All 4 cylinders use the same kit.kubotasam...
Are we talking Blue loctite or would this be a Red loctite application here ?
So do you remember the size of the nut? I want to make sure I have the right size if we are talking 3/4. Nothing worse than starting a job and not having the right tools at hand.I don't know the torque spec for the nut. However I do know they need to be really tight and you need to put locktite on them. I just finished doing mine. I used my 3/4" ratchet and tighten them as much as I could.
kubotasam
Well-known member
Equipment
B2410, B7100dt, B7500,Woods BH750,Landpride 2660RFM, Tiller, B2781 Snowblower
I stopped by harbor freight and picked up a set of 3/4" drive . As I write this I can say that I have started the process. I removed the two big ones from the tractor. After dinner I'm going to start tearing into one of them. I was pleased to find out that the hoses disconnected fairly easy even though they were pretty badly rusted. The hardest part, so far, was that I had one of the retaining pins rusted solid into the pin that holds one end of a cyclinder on. But with some PB Blaster and some working, it did pop out.I do not remember what size the nut was. If I had to guess I would start at 1 1/8".
Last edited:
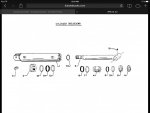
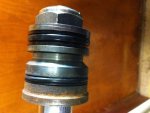
Ok so far I was able to get one tore apart and all the orings changed out. I had one hell of a time pulling the rod out. The lip on one side must have been hit and I had the file it back into place so the head could get by. The nut was very easy to break free and it was an 1 1/2". I got lucky, it was the biggest one I had. Also a note about the snap ring. Go buy a nice pair of snapping pliers. The ones I got from harbor freight broke within the first few minutes. It's 2:30 am here so I stopped for the night. I had 2 rings left from the kit and I'll go back and double check that I did not miss anything looking at the diagram before I put it all back together. I'll keep everyone posted on the progress. I did take a picture of the piston when I removed it and will post in tomorrow.
Ok I was able to finish the first two. I still need to hook them back up to see if everything holds. Just another note. The nut on the second one was the same as the first, tight but not real tight. When I get them put back on and test them I'll let everyone know if they hold. So far the hardest part was removing the seal on the end that is exposed to the weather. It is pressed in and I had to destroy it to get it out.
Well I was able to get the two back on the tractor and all the fittings tight. No leaks!!!! Now no to the other two. Just as a recap the kits that I bought worked perfectly. I did have one o-ring leftover for each cylinder. Not sure why but I replace all that I took off. If you are going to do this it is fairly straight forward and not bad at all. Just have a big hammer, good snap ring pliers and a 1 1/2 socket also something to pull out the pressed in one like a small screw drive. good luck and if you have any questions just ask.
Dan_R_42
Member
Equipment
B7100-D, w/ Sims Cab, B219 FEL, ARPS 70 Backhoe, Oversized R4 Tires, LX2610 Cab
Hi Turk,
Thank you for the updates. Sounds like you have done a great job so far!!!
When you are talking "the pressed in one" are you referring to the wiper on the end of the piston that keeps all the crap out of the cylinder? Did you need to press in it's replacement or did it just slide in place? If it was pressed in what did you use? Did you take any photos of that part?
Thanks, Dan
Yes that's the one. And no the new one does not just slide in. I just pushed it in to where it just stead in place. Which was just bearly in. I then turn the whole head over placing it on a flat surface. Then head it with a hammer a few times and it went right in to place. Just start out slow to make sure it's going in and your not just bending the new one. I'll be doing the next 2 soon and will try to take pictures of it or video it. I'll post it when done. Maybe this weekend. Maybe I'll try to video the whole thing. Never did that before but will try.Hi Turk,
Thank you for the updates. Sounds like you have done a great job so far!!!
When you are talking "the pressed in one" are you referring to the wiper on the end of the piston that keeps all the crap out of the cylinder? Did you need to press in it's replacement or did it just slide in place? If it was pressed in what did you use? Did you take any photos of that part?
Thanks, Dan
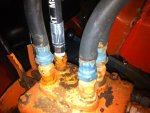
Sorry for not getting back to the cyl rebuild. I broke one of the steel lines on the loader and have been rebuilding the line. I still plan on videoing the last cyl rebuild in the next few weeks and will post it. For now here is some pictures of the line rebuild.
Attachments
-
89.1 KB Views: 553


