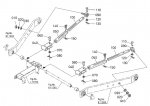
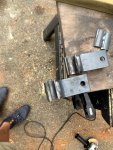
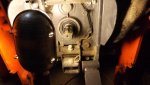
Just bought 2015 B2601 with hoe. Previous owner never had the hoe off so never installed the 3 point hitch. I am stumped how to attach the sway control bars to the lower pin. From what I can tell, the pin has to be pulled out but the hoe frame prevents it from doing so.
Help appreciated.
Help appreciated.
Attachments
-
 81.5 KB Views: 1,060