Need a bigger alternator on your B series?

TJP440

New member

Equipment
Gr2120 and B3200
Apr 16, 2017
12
14
3
Omaha, Ne
I just finished what I believe and hope is the last upgraded alternator on my B3200. I believe this mod will work on other b series units as well but I'm not 100% sure.
This all started last year when I decided to add a cab for winter work. The cab came with a FREE 300W heater. Hot idea (pun intended). The problem is the little dynamo only puts out ~ 14 amps. Hmm 300W at 14V = 21A. We have a problem Houston :(
So, I researched here and elsewhere for solutions. I did find that Kubota had offered a 40A? alternator upgrade that was used on their cabbed models but they were no longer available. And being a tight a-- , I kept looking. I did find a thread on here that someone had done a 60A upgrade but could not locate a source for the suggested alternator.
OK, so I bought a couple of different units off amazon but could not get them to function properly using the charge lamp.
So, I resorted to my hot-rodding roots and found a 90A mini alternator that was a single wire hook up and added a small digital meter to monitor the V. A small amount of fabrication was required and we were jamming. :) I also upgraded the charging system wiring as needed.
So, then I get to thinking if I have all this power available why not add another heater?
I found an airplane cabin heater that puts out~ 650W. That should do it and the total draw is well under the 90A the alternator is rated at. So, I proceed to install the added heater, wiring, fuses etc. and all is well for about 3-4 hours. In the middle of summer with no real load on it the alternator dies. OK replace it under warranty. Second one same thing. A bit of googling shows the alternator was originally a 55A denso unit that is being copied by you know where and sold as a 90A.
More research results in a GM CS121 alternator rated at 120A being sold by reputable sources. It appears bigger but actually fits better. Minor mod's again are required.
I am more confident than I was before as the unit is actually made here in the US and is a well-established company.
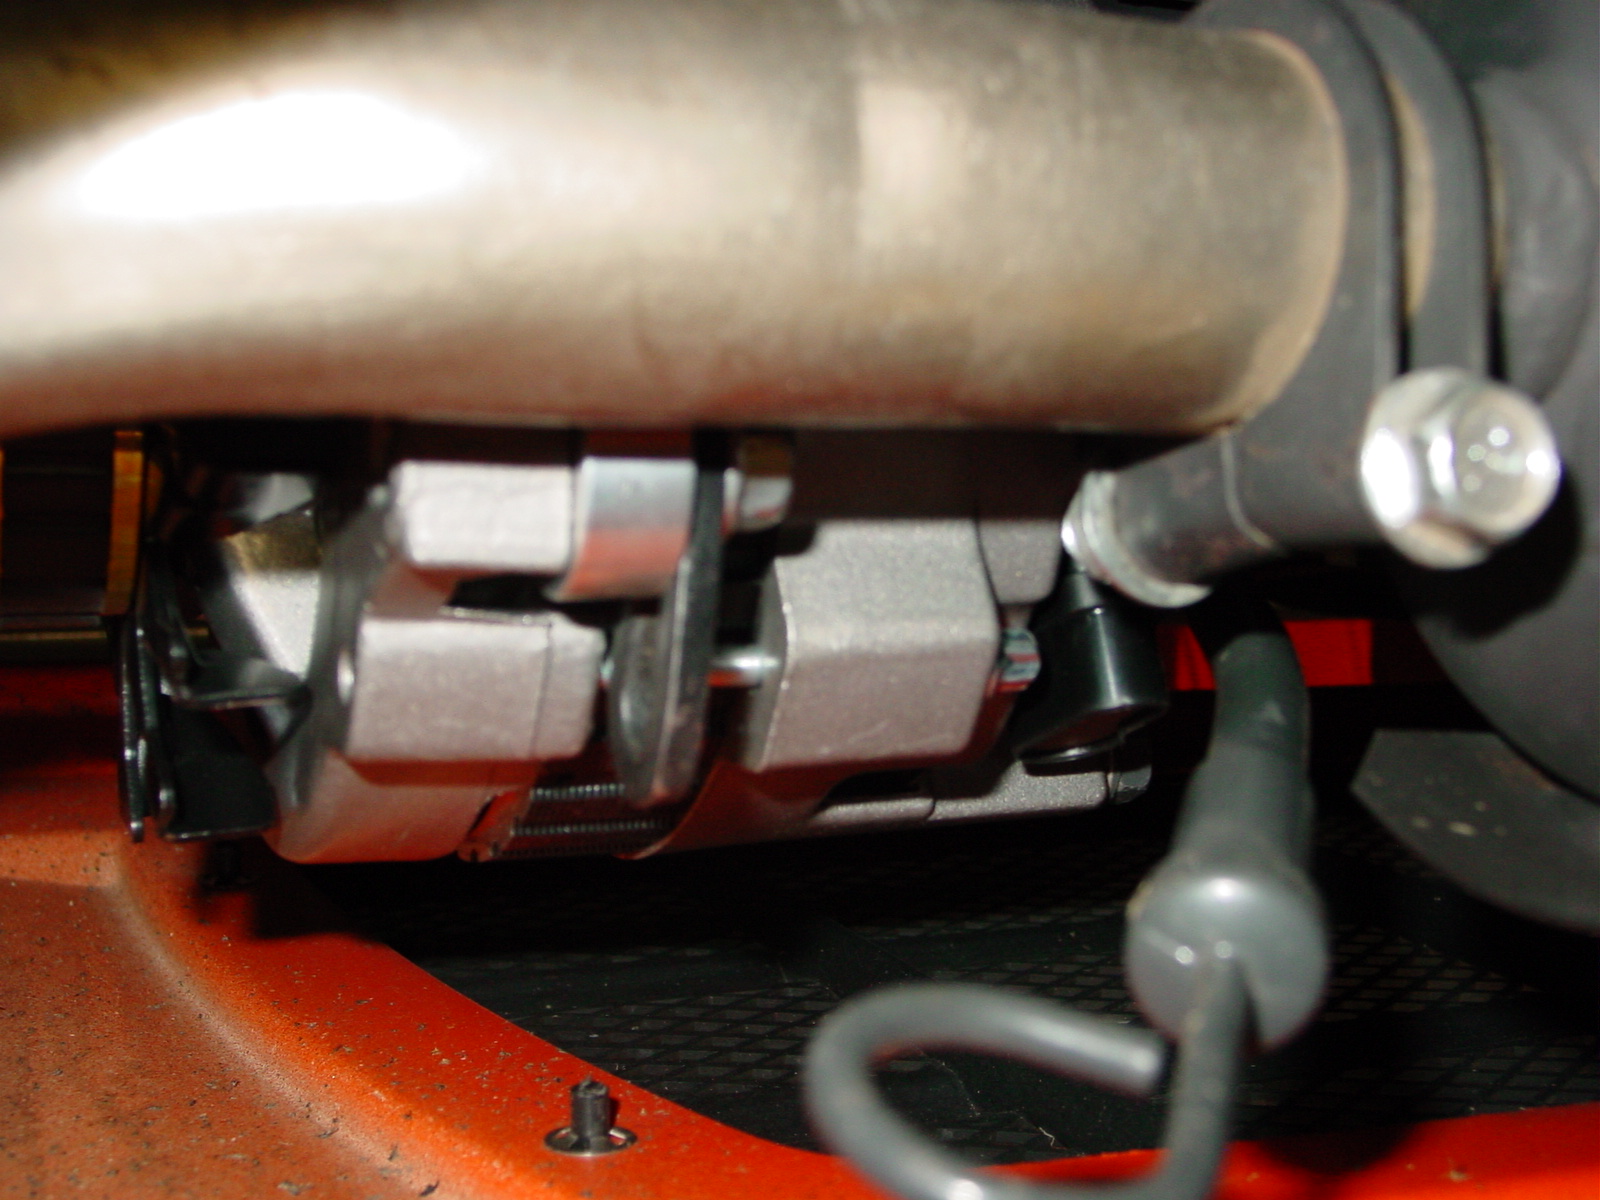
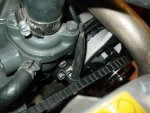
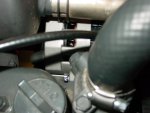
Sorry for the pic's as they were an afterthought. If anyone is interested, I can provide better pic's and more detail
Respond or send me a PM :) 🍺


DSC03447.JPG
 

Attachments

  • Like
Reactions: 6 users

VaGlock

Active member

Equipment
B2601 FEL - BH
Jun 28, 2020
100
26
28
Central Va.
Curious about how difficult were the mods and cost of the alternator? Would like to update my B2601.
 

TJP440

New member

Equipment
Gr2120 and B3200
Apr 16, 2017
12
14
3
Omaha, Ne
Sorry for the delayed response. I had about 80% of it typed out and it vaporized :( getting late so I'll try again tomorrow 🍺
 
  • Like
Reactions: 1 user

ItBmine

Well-known member

Equipment
B2620, RTV-X1100C
Jan 21, 2014
1,328
335
83
Canada
The optional 40 amp is no longer available from Kubota?

That's what I had got on mine.
 

johnjk

Well-known member
Lifetime Member

Equipment
B3200 w/loader, Woods RC5 brush hog, 4' box blade, tooth bar, B1700 MMM,
Apr 13, 2017
1,275
856
113
West Mansfield, OH
Definitely interesting. Thanks for sharing. Where did you source a cab for the B3200?
 

TJP440

New member

Equipment
Gr2120 and B3200
Apr 16, 2017
12
14
3
Omaha, Ne
The alternator I am currently using is a Tuff Stuff performance CS121 GM style Part # 7937.
Alternator Link
Current pricing is about 130.00, do you shopping though 😉
Mod's required:
1. Remove existing dynamo and dipstick
2. I slotted the lower mounting hole on the alternator about .200" to lower the alternator and accommodate the previously modified adjustment bracket. This may or may not be required on your unit.
3. The alternator was then mounted with a 5/16 x 18 x 3" ? long bolt. A spacer approximately 1" long was needed to move the alternator and align the pulleys.
4.The adjustment bracket previously modified consisted of cutting off the existing mounting holes. I then cut a piece of 1/8 inch ¾ or 1 " angle about 2 " long and added the holes for mounting it using the two bolts directly below the thermostat (10mm heads) . I did have to notch one side of the angle to clear the T/stat.
5. I removed the LF engine lifting plate and bolt for added clearance.
6. The Alternator was then rotated against the block and the previously cut slotted adjustment matched up to the angle iron piece fabbed in step 3.
I angled the end of the adjusting arm to follow the correct arc/travel for adjustment of the belt. A short 6/16's ? spacer (LOL 3/8) was used between the adj. bracket and alternator with the bolt entering from the back.
7. The two pieces were then welded together.
8. The shortest belt possible was used which required slipping the alternator in at an angle from the rear and then installing the lower mounting bolt and spacer. Don't have the belt number handy but I can provide it if needed. It may be different than your unit though.
9. I ran a 6 ga wire from the alternator to the starter stud.
10. The dipstick was slowly tweaked to clear the alternator etc. and reinstalled with a small amount of sealer and the mounting tab to the same location.
11. Remove the instrument cluster.
12. Disconnect the existing voltage regulator. Remove the charge lamp indicator bulb.
13. I then installed a small digital meter and tied into the main battery feed at the ignition switch Digital meter

A pretty simple deal if one has basic mechanical skills and fabrictaion abillities. I can provide more pic's but my time is extremely limited so patience will be required. Hiddsight being 20/20 I should have taken measurements and pic's as I did it :( 🍺
 
Last edited:
  • Like
Reactions: 1 user

TJP440

New member

Equipment
Gr2120 and B3200
Apr 16, 2017
12
14
3
Omaha, Ne
Definitely interesting. Thanks for sharing. Where did you source a cab for the B3200?
The cab was sourced from Cover my tractor and I'll say their instructions must have been written by a Dyson, Shark or Hoover engineer :mad: 🤣🤣
It was a real PITA to install and required quite a bit of time.
However, being an engineer myself, I expect perfection. I am not one to go 85-90% of the way there and call it good, which IMO is exactly what they did :(
I do believe reinstalling it will be much quicker than the initial install.
My remaining issue is the door opening is pretty narrow. I'm 5'10 ~ 200 lbs so I'm not all that big.
 
Last edited:
  • Like
Reactions: 1 user

leveraddict

Well-known member

Equipment
2017 BX23S 60" LP BoxBlade 54" mower 60" BackBlade EA 12" 1 bottom plow & Forks
Apr 1, 2019
906
582
93
NEPA
So......after all that time work and money how well does that heater work? I just tied into the thermostat housing and lower radiator hose. EZ! I guess if your hooking up all kinds of power pulling toys to your tractor the way you went is worth it? Just curious.
 

TJP440

New member

Equipment
Gr2120 and B3200
Apr 16, 2017
12
14
3
Omaha, Ne
So......after all that time work and money how well does that heater work? I just tied into the thermostat housing and lower radiator hose. EZ! I guess if your hooking up all kinds of power pulling toys to your tractor the way you went is worth it? Just curious.
I did consider the water route but couldn't think of a way to do it cleanly and where to place the heater without hacking up the cover below the instrument panel. Once the cab / cover is in place there's not a lot of room unless you go overhead. Then hoses and routing were another dilemma. I try to do things so they look like they belong there or are, 1 easily removed. or 2. easily put back to original.
Probably should've asked here first. As for the heat can't say with 100% certainty as the only real time i was able to try it the sun was shining pretty brightly and it was a 20 degrees. I was only using the smaller heater and ready to remove the light jacket I had on.
Hopefully it'll be like the chains, wheel spacers etc. I bought several years back and have never really needed them as our winters seem to be getting milder ;) 🍺
 
  • Like
Reactions: 1 user

Vigo

Well-known member

Equipment
B6100, B8200
Jan 9, 2022
595
339
63
San Antonio Texas
Nice work. Keep in mind alternators Usually don’t put out their full output at idle (although they could if you have changed the pulley ratio compared to the original application), and if that’s the case you don’t want to max out whatever it CAN do at idle or low revs because they are cooled by their onboard fan which performs poorly at low speeds.

If you have a dc clamp meter and a temp gun you can find out what’s what but if you don’t have those things you can at least watch your system voltage. The battery itself is about 12.65 V when fully charged. Anything above that comes from the alternator. that being the case any time the engine is running and your voltage drops into the 12.6’s you have indirectly determined that you’ve maxed out whatever the alternator can do at that rpm. If that rpm is fairly low you may also be slowly overheating it.

Just something to watch out for. It’s fairly likely that trying to run a 600 W heater at engine idle or anywhere near it is actually bad for the alt.

On a diesel engine which only revs a little past 3000 you can spin the alternator much faster at low engine RPMs without exceeding its RPM limit when the engine is at redline. Most alternators can do about 12-14000 rpm. So, a >3:1 overdriven pulley ratio can work, whereas on a car with a 5-6000 rom redline you can only get away with a 2:1 overdrive across the pulleys.
 
Last edited:
  • Like
Reactions: 1 user

TJP440

New member

Equipment
Gr2120 and B3200
Apr 16, 2017
12
14
3
Omaha, Ne
Nice work. Keep in mind alternators Usually don’t put out their full output at idle (Although they could if you have change the pulley ratio compared to the original application) and if that’s the case you don’t want to max out whatever it CAN do at idle or low revs because they are cool by their onboard fan which performs poorly at low speeds.

If you have a dc clamp meter and a temp gun you can find out what’s what but if you don’t have those things you can at least watch your system voltage. The battery itself is about 12.65 V when fully charged. Anything above that comes from the alternator. that being the case any time the engine is running and your voltage drops into the 12.6’s you have indirectly determined that you’ve maxed out whatever the alternator can do at that rpm. If that rpm is fairly low you may be slowly overheating it.

just something to watch out for. it’s fairly likely that trying to run a 600 W heater at engine idle or anywhere near it is actually bad for the alt.

on a diesel engine which only revs a little past 3000 you can spin the alternator much faster at low engine RPMs without exceeding its RPM limit when the engine is at redline. most alternators can do about 12-14000 rpm. So, a >3:1 overdriven pulley ratio can work, whereas on a car with a 5-6000 rom redline you can only get away with a 2:1 overdrive across the pulleys.
Thank you for your response 🍺 having spent 25 or so years in engineering and another 20+ owning a classic car resto / repair shop, Everything you said is true and may help others as well
 
  • Like
Reactions: 1 user