L3940 HST Seat Safety Switches with a Twist

defdeskubota

New member
May 21, 2017
19
3
3
Vermont
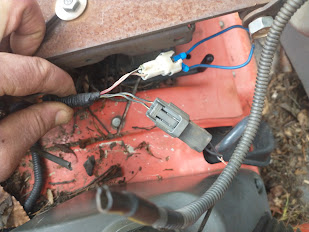
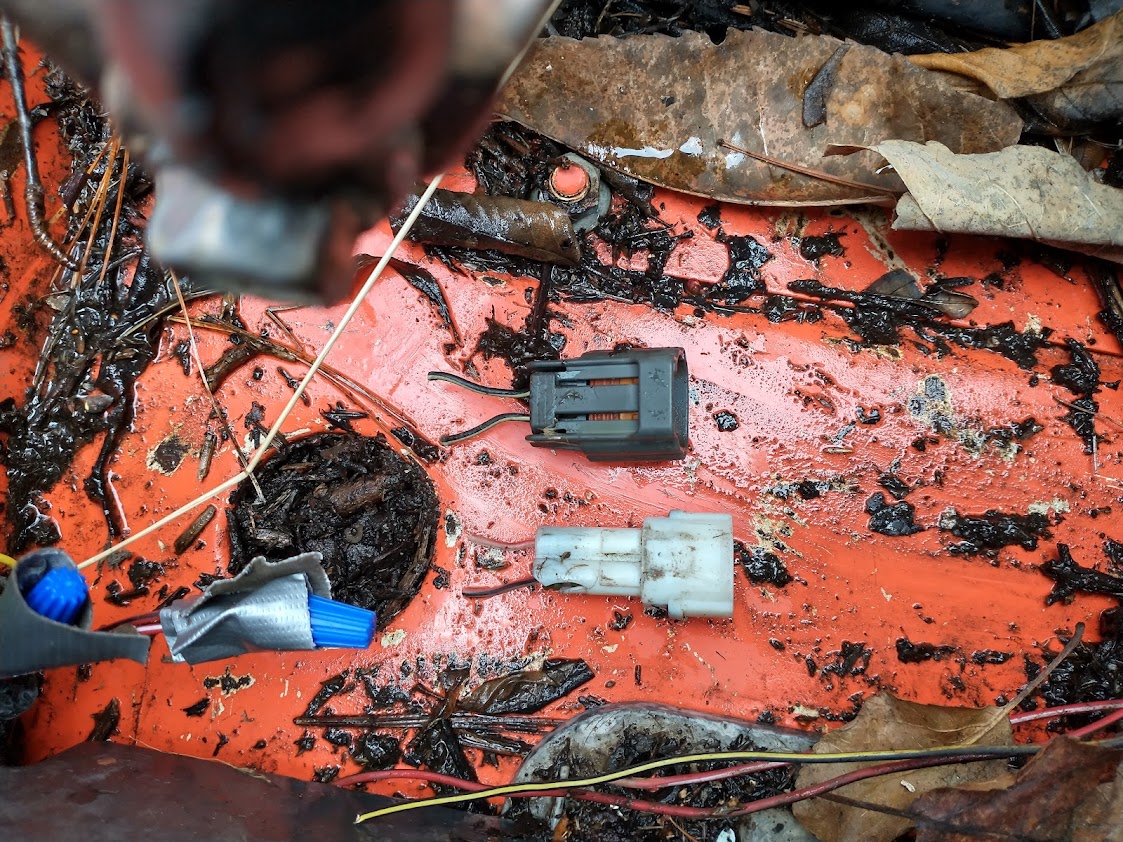
This is a 2010 model, quite some time ago I was having issues with the plunger seat safety switch and then the internal one (in the cushion). From what I recall, I put a jumper in both. Yesterday, about 5 miles from home and deep in the woods, it started exhibiting the same issue as when I jumped them, starts fine stalls under throttle. Being where I was with no tools and thinking I lost one of the jumpers, I cut off the seat side plastic connector with some wire to spare and twisted the ends to act as the jumper. It didnt work, same condition. (1st Picture)Thinking maybe the wire might have split under the insulation from piling tools around the seat, I pulled the harness out the back towards the 3 point hitch and cut off as much "spare wire" as I could before it joined the rest of the harness and spliced the wires together. Still no change. I called service at Kubota and they said to try disconnecting one of the splices as he wasnt sure if both switches needed to be "closed". Doesn't sound right to me but at this point I'll try again tomorrow. Tractor tries to move before it cuts out eliminating a trans problem.
Any ideas? I cant imaging there's a break in the harness between where I am and the motor as the wires seem to run high under the body under the seat. I have a friend with a telehandler who could come tow me out, but I'd like to get this squared away as there's work to do.
Thanks for any suggestions.
wire1.jpg


w-qQ6BoUWNApdUczJrPXzZm9UVCEyRTM-CLPPEiV5H9MFxSDZ_DsZ42AraKpCe6QqKxokPqf_W50B8l_KeWDuKjxzBWrcE...jpg
 

Schmitty

Member

Equipment
L4740, grapple, forks, box blade
Mar 25, 2018
46
18
8
Madison, WI
I had an identical issue that I addressed here. It came down to having the WSM and working through each of the electrical paths from fuse block to the PTO switch, seat switches, clutch switch, etc and on to the ECU.

I put the two start condition tables for Lxx40-1 and -3 WSMs in this thread as well.

Best of luck, you are on the right path by checking fuses, jumping switches, as so on. Remember to work safely, have the tractor wheels blocked up, and the trans in neutral when jumping safety switches!

Regards,
Schmitty
 

defdeskubota

New member
May 21, 2017
19
3
3
Vermont
I had an identical issue that I addressed here. It came down to having the WSM and working through each of the electrical paths from fuse block to the PTO switch, seat switches, clutch switch, etc and on to the ECU.

I put the two start condition tables for Lxx40-1 and -3 WSMs in this thread as well.

Best of luck, you are on the right path by checking fuses, jumping switches, as so on. Remember to work safely, have the tractor wheels blocked up, and the trans in neutral when jumping safety switches!

Regards,
Schmitty
Oh man, not what I wanted to hear at all, electrical nor patience are my strong suits. I'll look at you links tomorrow, thanks.
 

Firefight100

Member

Equipment
MX5200
Apr 3, 2021
78
62
18
63379 troy mo
This may help. Posted from someone else.
there's an easy way to diag safety switches on the L3301, L3901, and L4701 (maybe others but these I know for sure). Also MX5200, MX5800, MX6000.

On the dash you have two buttons. One is the park regen button the other is the DPF inhibit button. With the key turned OFF, Hold them down. THEN turn the key on. Once the key is on, let go of the two buttons, then push and hold them again until the letter "A" comes up in the panel where the digital hour meter normally is. Once you see the letter "A", hold down the inhibit button until you hear a beep (I think it's the inhibit....if it don't beep within about 3 seconds, turn the key off and start over, but use the park regen button this time). Once you hear a beep you are ready to test the switches. Mash the HST pedal down. You outta hear a beep every time the switch enters or exits neutral position. Hop up off the seat. You outta hear a beep each time the switch enters and exits the "run" position. Same for the PTO switch. If you have a DT model, the forward-reverse lever will also beep when taken out of or put into neutral. Same for the PTO lever.

That said, if one of your switches ain't working right it won't beep. Easy.

this is really handy to test the adjustment of the HST neutral switch adjustment on the MX's ;)
 
  • Like
Reactions: 2 users

defdeskubota

New member
May 21, 2017
19
3
3
Vermont
This may help. Posted from someone else.
there's an easy way to diag safety switches on the L3301, L3901, and L4701 (maybe others but these I know for sure). Also MX5200, MX5800, MX6000.

On the dash you have two buttons. One is the park regen button the other is the DPF inhibit button. With the key turned OFF, Hold them down. THEN turn the key on. Once the key is on, let go of the two buttons, then push and hold them again until the letter "A" comes up in the panel where the digital hour meter normally is. Once you see the letter "A", hold down the inhibit button until you hear a beep (I think it's the inhibit....if it don't beep within about 3 seconds, turn the key off and start over, but use the park regen button this time). Once you hear a beep you are ready to test the switches. Mash the HST pedal down. You outta hear a beep every time the switch enters or exits neutral position. Hop up off the seat. You outta hear a beep each time the switch enters and exits the "run" position. Same for the PTO switch. If you have a DT model, the forward-reverse lever will also beep when taken out of or put into neutral. Same for the PTO lever.

That said, if one of your switches ain't working right it won't beep. Easy.

this is really handy to test the adjustment of the HST neutral switch adjustment on the MX's ;)
Thanks, that will be helpful if it is one of the other switches, but since I have cut out the 2 seat switches it will be no good in helping with a cracked wire etc. related to those two, which given the condition, I think where the trouble lies. If I cant get it going today though, I am going to order the new switches a splice them in just so I can start back from square one.
That said, I have not cracked my manual to look at the wiring diagram, but am I correct that the wires related to the seat switches run under the seat/feet and come up into the dash before going to the motor?
I ask because I did receive a big stuck stick in between the oil filter and the body. There is a big bundle of harnessed wire in that location (basically under left foot) which on preliminary inspection, did not look frayed or broken, though the oil pressure sender wire (single red) took a good shot (bent the steel cover protecting it).


*EDIT: I forgot, any credence to the Kubota tech suggestion that one of the switches is open and doesn't need to be jumped, or in this case have the wires twisted together?
w-qQ6BoUWNApdUczJrPXzZm9UVCEyRTM-CLPPEiV5H9MFxSDZ_DsZ42AraKpCe6QqKxokPqf_W50B8l_KeWDuKjxzBWrcE...jpg
 

Mark_BX25D

Well-known member

Equipment
Bx25D
Jul 19, 2020
1,611
1,141
113
Virginia
I had an identical issue that I addressed here. It came down to having the WSM and working through each of the electrical paths from fuse block to the PTO switch, seat switches, clutch switch, etc and on to the ECU.
That's called, "intelligent, methodical troubleshooting." That's not really the best way to address a problem like this.

It really works better to just start cutting and hacking and flinging different "fixes" and parts at it, jumping from one thing to another, until you find the problem. A useful adjunct to this approach is to go on a forum somewhere, ask what other people did to solve a similar problem, and blindly do what people tell you without any testing or thought.

This method often goes by the name, "spray and pray", and sometimes, "firing the parts canon". This approach maximizes your cost and frustration. It also usually maximizes the time it takes to solve the problem, too. One in a while things go wrong and you hit on the solution right away, but this is not usually the case.

It's clearly the better approach.
 
Last edited:

defdeskubota

New member
May 21, 2017
19
3
3
Vermont
If it weren't so true I might take offense to this comment.😂
But answering genuine questions is often nice too!
 
Last edited:
  • Like
Reactions: 1 user

cthomas

Well-known member
Lifetime Member

Equipment
LX2610 HSDC
Jan 1, 2017
863
572
93
La Farge Wi
I have seen quite a few "techs" fire that parts cannon over the years. Then the bean counters figured this out and starting requesting(demanding) warranty parts back for inspection and the dealership would not get paid for improper/not required "repairs". One that comes to mind is an airbag recall which involved cutting a connector out and soldering the wires together. Found a dealership was just cutting the connector out and using butt connectors. AND THIS WAS ON AN AIRBAG CIRCUIT!
 

Mark_BX25D

Well-known member

Equipment
Bx25D
Jul 19, 2020
1,611
1,141
113
Virginia
Butt connectors are preferred for marine applications, and soldered connections are "permitted". Butt connections are specified in many military and aerospace applications where soldered wires are prohibited.

The reason for this is that properly done butt connections are equal or superior to soldered connections, and it is far easier to train someone to do a correct butt connection than a correct solder joint.

The idea that soldered wire joints are better than butt connections is an old-wive's tale, generated by people who don't bother to learn how to do them correctly, often using poor quality or just plain wrong tools (like pliers) for the job.
 

larrywinfrey

New member

Equipment
Kubota L3901 DLT
Mar 28, 2023
2
0
1
North Carolina
On the dash you have two buttons. One is the park regen button the other is the DPF inhibit button. With the key turned OFF, Hold them down. THEN turn the key on. Once the key is on, let go of the two buttons, then push and hold them again until the letter "A" comes up in the panel where the digital hour meter normally is. Once you see the letter "A", hold down the inhibit button until you hear a beep (I think it's the inhibit....if it don't beep within about 3 seconds, turn the key off and start over, but use the park regen button this time). Once you hear a beep you are ready to test the switches. Mash the HST pedal down. You outta hear a beep every time the switch enters or exits neutral position. Hop up off the seat. You outta hear a beep each time the switch enters and exits the "run" position. Same for the PTO switch. If you have a DT model, the forward-reverse lever will also beep when taken out of or put into neutral. Same for the PTO lever.

That said, if one of your switches ain't working right it won't beep. Easy.

this is really handy to test the adjustment of the HST neutral switch adjustment on the MX's ;)
This worked for my L3901. I held both and turned the key, released and pressed them both again and that's all I had to do. Though, when pressing buttons... the screen changed... makes me think that there's more to this "diag mode" than just the safety switches.
My issue was the neutral switch on the fwd/rev shuttle.
Anyone have more info on this diag mode?