Great, thanks, maybe I'll have the dealer order the bracket for me and I'll just DIY. I was planning to torque my loader subframe anyway which will get accomplished when I install the new one.The way I see it, it looks like I have to disconnect the loader, remove the third function valve and box (hopefully without disconnecting the hoses), then unbolt the loader subframe from the frame?
That is a pretty accurate description.
DIY BH77 Install Journey
- Thread starter radas
- Start date
nbryan
Well-known member
Equipment
B2650 BH77 LA534 54" ssqa Forks B2782B BB1560 Woods M5-4 MaxxHaul 50039
Well all I can offer is photos of my B2650HSD ROPS hydraulic lines that connect my BH77 when installed.As some of you may know, I've recently acquired a BH77 and due to lack of trailer, looking for a "fun project", and being generally dealer averse I've decided to do my own install. I'm mechanically inclined but have limited hydraulics know how.
I've gotten to the point where I've followed the BH4962 instructions for the B2650 on relocating my toolbox, removing the rear toolbox/hazard light brace, and relocating the hazard lights. I've also pre-installed my parker 3/8" connectors on one of the hard lines and the flexible hose that "closes the loop" to the power beyond when the BH77 is disconnected.
I'm not at all concerned about the installation of the subframe itself, but I am a little apprehensive to install the two hydraulic lines as my lines to the power beyond do not appear to be set up consistent with the BH77 manual. I do have a Kubota third function as well as kubota rear remotes installed, so I am assuming that either of these things have changed the layout of my hydraulic lines to the power beyond.
Here is my issue:
View attachment 100738
That hydraulic line is supposed to connect from the power beyond to what appears to be the rear axle/differential assembly. The area I've circled in red is where one of my BH77 hard lines are supposed to be installed along with the hose that "closes the loop". Unfortunately, the existing hard line on the tractor does not mount to the power beyond at all, it mounts to a hose that is leading towards the front of the tractor (I'm assuming for the loader or third function). If I do install the BH77 hydraulic lines, I am not sure where to connect the remaining hose to.
These are the two lines I need to install:
View attachment 100739
Nowhere in this diagram do they provide insight on how to install if you have a third function or rear remotes which appears to have changed my layout a bit. Any advice or guidance would be appreciated. I can take some better photos over the weekend after I pick up the BH77 and take the loaded tire off and put a jackstand under the right axle.
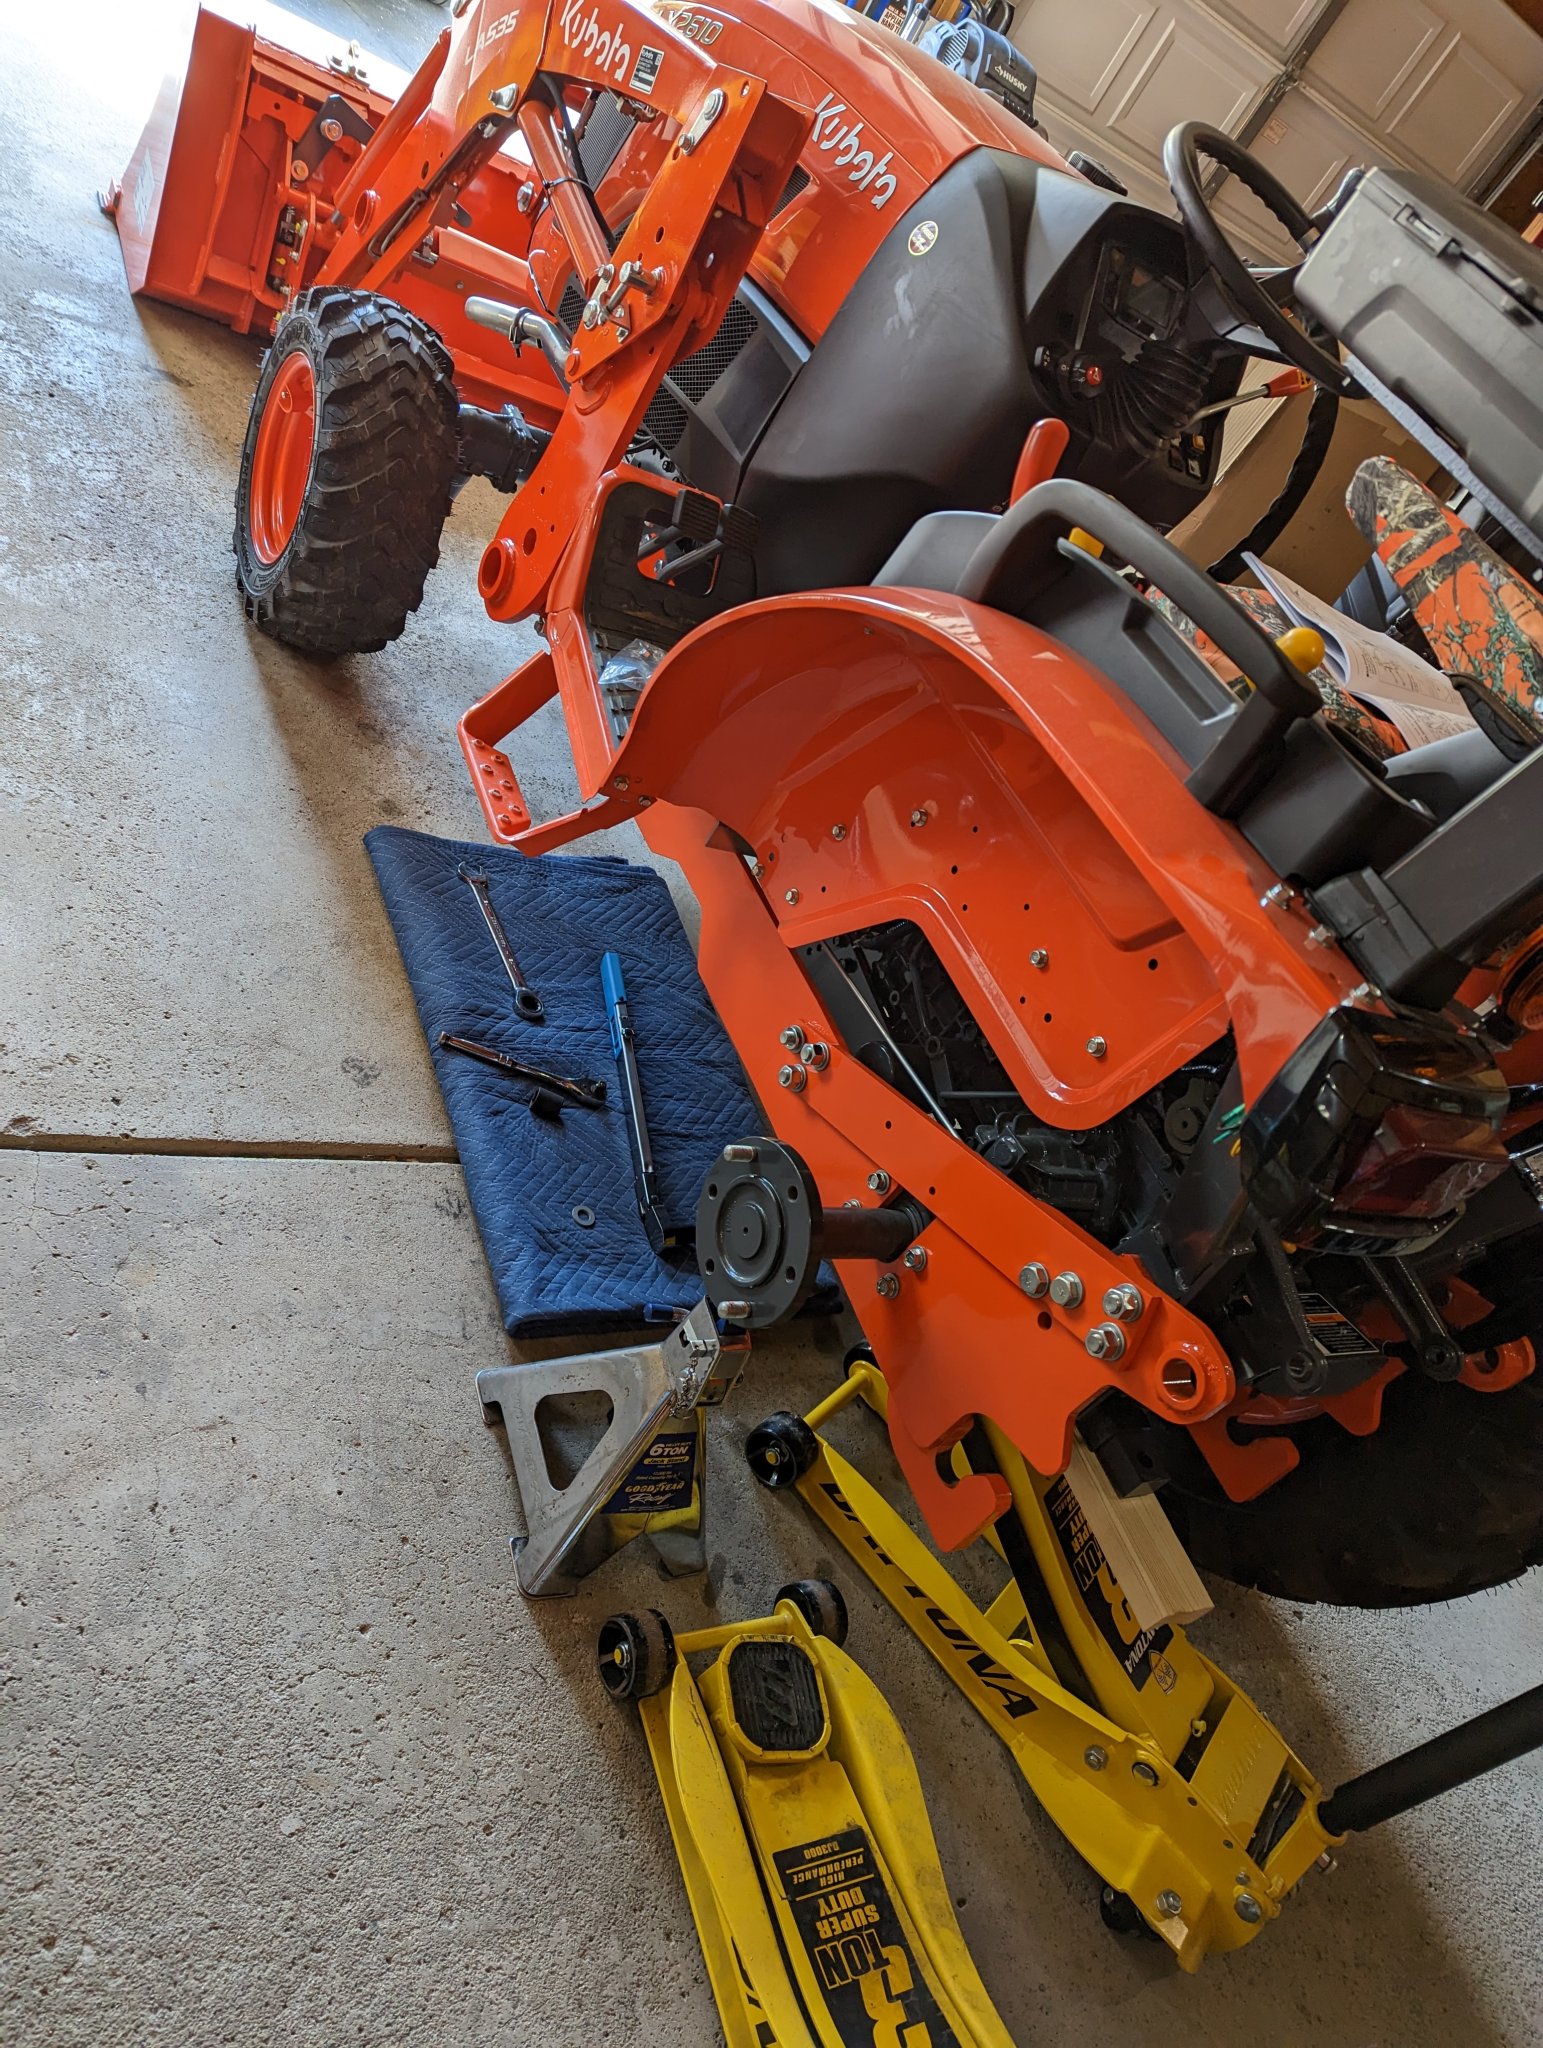
Here's where I am so far with the install/prep:
View attachment 100740
Hope they help. If more detail needed I'll try and oblige.
Appreciate the photos, they'll be helpful for anyone taking on this project too.Well all I can offer is photos of my B2650HSD ROPS hydraulic lines that connect my BH77 when installed.
Hope they help. If more detail needed I'll try and oblige.
View attachment 101396 View attachment 101394
Thankfully, I got the hydraulics all sorted out. Now to get a new $2k loader subframe under warranty so I can install my backhoe subframe
 I had to rig my hydraulic lines for now to complete the power beyond loop.
Got my replacement loader mount today, big shout out to my dealer for pulling one for me from a crated LA535.
Yet another curveball in my BH77 install journey. Thankfully this should go on pretty quickly. Will also force me to learn how to remove and attach the loader for the first time.
Yet another curveball in my BH77 install journey. Thankfully this should go on pretty quickly. Will also force me to learn how to remove and attach the loader for the first time.
Awesome to get that part so fast. Whatever you do, take the loader off on VERY level ground. I thought a slight slope would be ok, it wasn't. Im never doing that again.Got my replacement loader mount today, big shout out to my dealer for pulling one for me from a crated LA535.
Yet another curveball in my BH77 install journey. Thankfully this should go on pretty quickly. Will also force me to learn how to remove and attach the loader for the first time.
View attachment 101478
A few problems are like a good marriage, you learn how to make things work! You'll understand and appreciate your tractor (and dealer) more after this episode!
Runs With Scissors
Well-known member
Equipment
L2501 TLB , Grappel, Brush Hog, Box Blade, Ballast box, Forks, Tiller, PH digger
I can only add that, removing, and more importantly reinstalling the BH, is WAY easier when on a dolly.
The ability to "jiggle it" makes all the difference in the world.
I have taken mine off twice and reinstalled it twice. Once with a dolly, and once without.
With a dolly took about 3minutes....Get it pretty close, hook up the hydraulics, push and jiggle it till its in place, then use the boom to set it into the J hooks....Its that simple.
Without took about 15 minutes of backing up, shifting and re-backing up...jockeying it around...re-backing up......using a 2x4 to move it around........etc.
Also, those 6 inch casters from HF work exceedingly well and make moving it around the shop effortless.
Pic is of my Ballast weight dolly, the BH dolly is doubled up 2x6's but same basic simple design.
![20230221_100209[1].jpg](http://www.orangetractortalks.com/forums/attachments/20230221_100209-1-jpg.101519/)
The ability to "jiggle it" makes all the difference in the world.
I have taken mine off twice and reinstalled it twice. Once with a dolly, and once without.
With a dolly took about 3minutes....Get it pretty close, hook up the hydraulics, push and jiggle it till its in place, then use the boom to set it into the J hooks....Its that simple.
Without took about 15 minutes of backing up, shifting and re-backing up...jockeying it around...re-backing up......using a 2x4 to move it around........etc.
Also, those 6 inch casters from HF work exceedingly well and make moving it around the shop effortless.
Pic is of my Ballast weight dolly, the BH dolly is doubled up 2x6's but same basic simple design.
Agreed, it has been a good learning experience so far. I've got quite a bit of DIY auto wrenching and home renovation background, but have always been nervous about working on the LX. This has taken the apprehension away, it's all nuts and bolts (and some hydraulics) after all.A few problems are like a good marriage, you learn how to make things work! You'll understand and appreciate your tractor (and dealer) more after this episode!
Haha you're not the only one that's mentioned the dolly. I'm actually ordering the casters and lumber tonight, just need to get the BH mounted for the first time so I can test my dolly height and make sure the pins fully disengage at 7.5-7.75" of total height based on the DIYMyWay tutorial I watched. I have a dolly for my BB and another for my bucket and forks - built em both like pallets so I can move them around with the forks if need be. I like your setup in the photo, very organized.I can only add that, removing, and more importantly reinstalling the BH, is WAY easier when on a dolly.
The ability to "jiggle it" makes all the difference in the world.
I have taken mine off twice and reinstalled it twice. Once with a dolly, and once without.
With a dolly took about 3minutes....Get it pretty close, hook up the hydraulics, push and jiggle it till its in place, then use the boom to set it into the J hooks....Its that simple.
Without took about 15 minutes of backing up, shifting and re-backing up...jockeying it around...re-backing up......using a 2x4 to move it around........etc.
Also, those 6 inch casters from HF work exceedingly well and make moving it around the shop effortless.
Pic is of my Ballast weight dolly, the BH dolly is doubled up 2x6's but same basic simple design. View attachment 101519
Runs With Scissors
Well-known member
Equipment
L2501 TLB , Grappel, Brush Hog, Box Blade, Ballast box, Forks, Tiller, PH digger
I watched the same video, and did the same as you, by waiting until it was on to measure for proper height.I'm actually ordering the casters and lumber tonight, just need to get the BH mounted for the first time so I can test my dolly height and make sure the pins fully disengage at 7.5-7.75" of total height based on the DIYMyWay tutorial I watched.
I will try to remember to snap a few photos of mine tonight, because height is an issue.
Used the garage floor, best I could do, still a PITA!Awesome to get that part so fast. Whatever you do, take the loader off on VERY level ground. I thought a slight slope would be ok, it wasn't. Im never doing that again.
Appreciate that, I'm guessing my finished height will be around 7-7.5" based on some research. I decided to hold off on buying materials until the BH is mounted.I watched the same video, and did the same as you, by waiting until it was on to measure for proper height.
I will try to remember to snap a few photos of mine tonight, because height is an issue.
Dealer called me today, said they'd reimburse me 1 hour shop time for replacing my own loader mount and completed the warranty process. Really good gesture from them since they already went the extra mile by getting me a new mount within a few hours of calling.
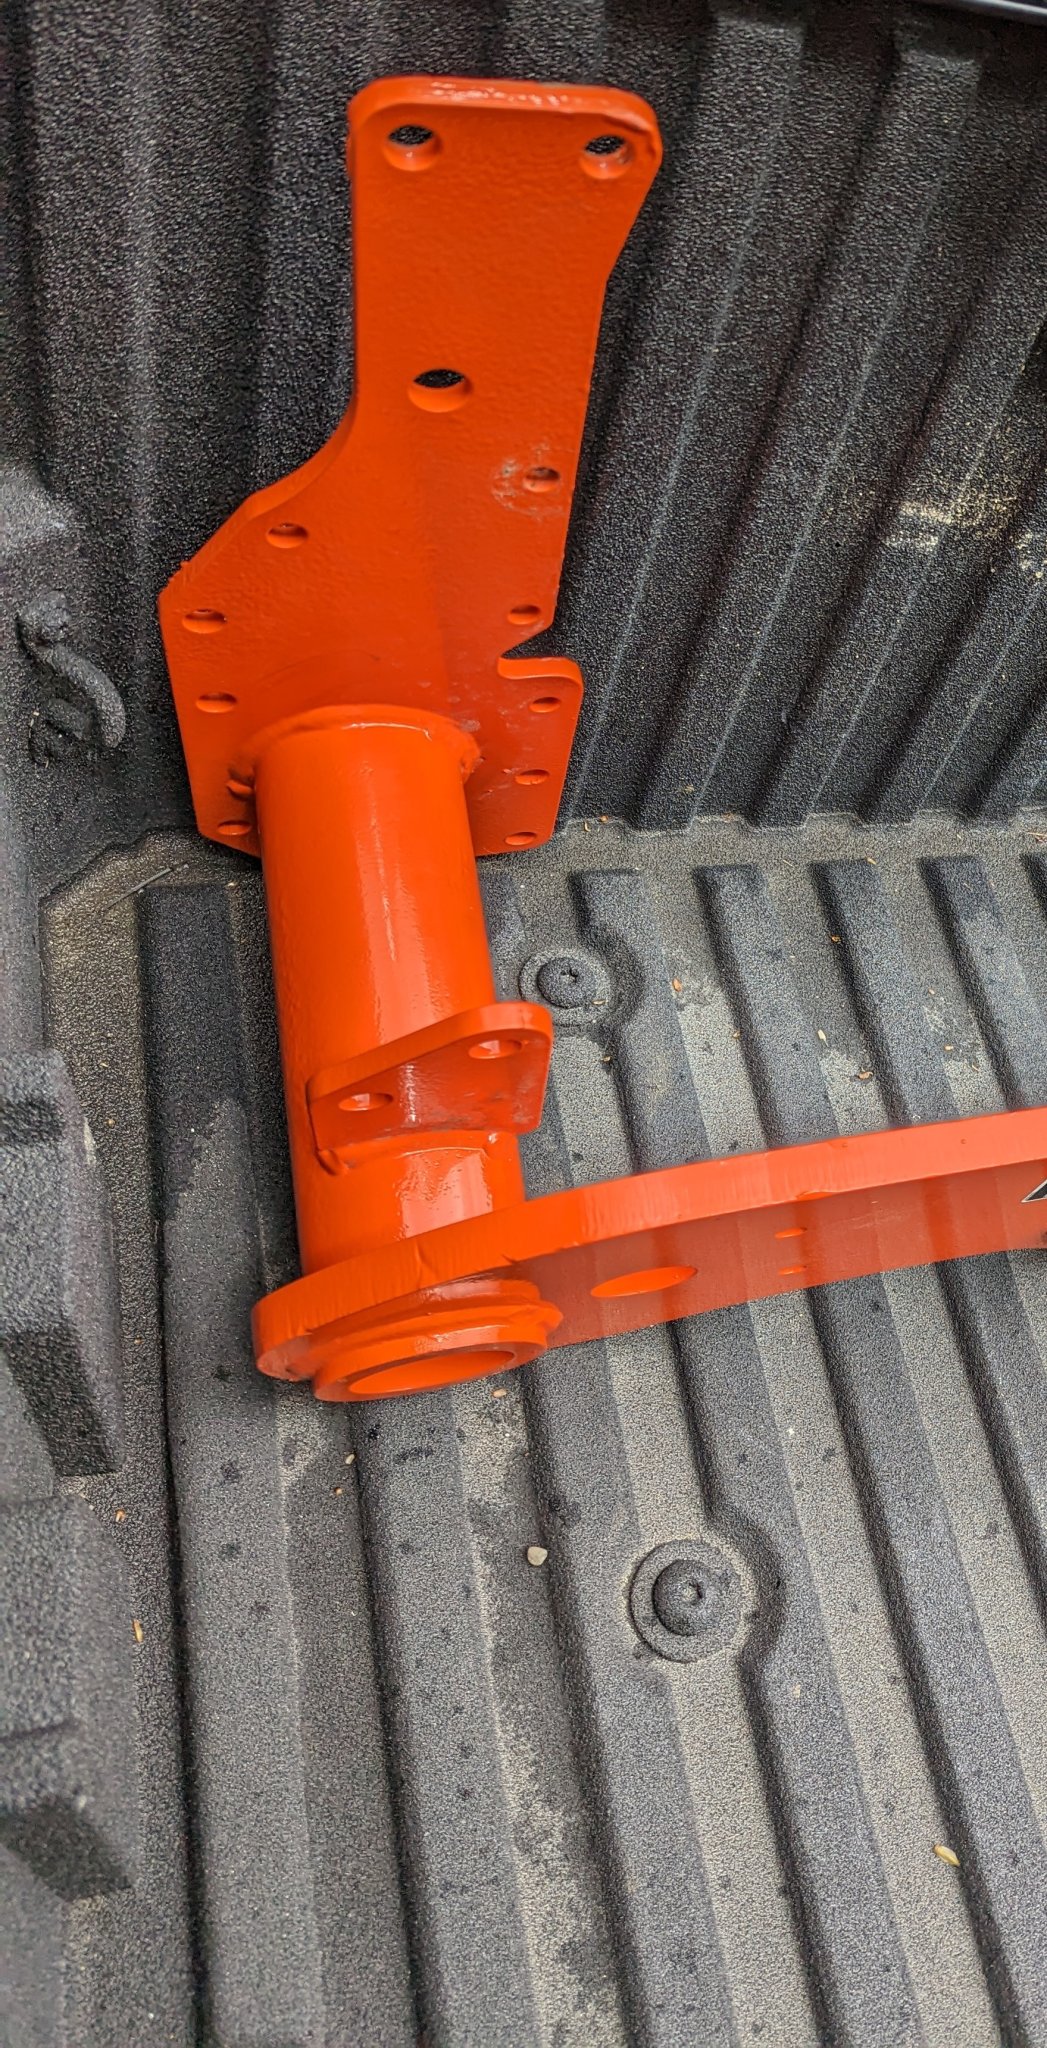
Got the loader mount on tonight.
Removing the loader was a little PITA, there was definitely a learning curve to it. Mounting the new loader frame mount took some finessing too since most of the weight is far away from the mounting bracket. Once I got a few bolts in, the rest were easy.
Torqued to spec and mounted my 3rd function valve/bracket and called it a night. Not bad for an hour and a half - two hours of work (shop time calls for an hour). This is the first time I've gotten reimbursed to fix something I own.
Runs With Scissors
Well-known member
Equipment
L2501 TLB , Grappel, Brush Hog, Box Blade, Ballast box, Forks, Tiller, PH digger
So here's some pictures of my dolly just for reference. (with Box Blade cause BH is on tractor)
It's nothing revolutionary, but it is strong.
It needed to be low enough to put under the BH, yet strong enough on the business ends to handle the weight with no problem.
Given that I wanted to use 6 inch casters, height was a problem; Therefore I sammich'ed some construction adhesive between 2x6's and "under-slung" them to make it lower and stronger, and I had
to "bevel" the edges to clear the wheels.
The only thing I will caution you about it is the fact that it rolls so easy with those 6" casters, that when I turned my back the other day, it rolled out into the street with the box blade on it and almost hit a car.
So I might consider getting at least 1 locking caster.
![20230503_151918[1].jpg](http://www.orangetractortalks.com/forums/attachments/20230503_151918-1-jpg.101650/)
![20230503_151845[1].jpg](http://www.orangetractortalks.com/forums/attachments/20230503_151845-1-jpg.101646/)
![20230503_151854[1].jpg](http://www.orangetractortalks.com/forums/attachments/20230503_151854-1-jpg.101648/)
![20230503_151753[1].jpg](http://www.orangetractortalks.com/forums/attachments/20230503_151753-1-jpg.101649/)
It's nothing revolutionary, but it is strong.
It needed to be low enough to put under the BH, yet strong enough on the business ends to handle the weight with no problem.
Given that I wanted to use 6 inch casters, height was a problem; Therefore I sammich'ed some construction adhesive between 2x6's and "under-slung" them to make it lower and stronger, and I had
to "bevel" the edges to clear the wheels.
The only thing I will caution you about it is the fact that it rolls so easy with those 6" casters, that when I turned my back the other day, it rolled out into the street with the box blade on it and almost hit a car.
So I might consider getting at least 1 locking caster.
That's a nice dolly, thank you for sharing! I'm thinking 4-6" casters like you have but maybe 2-4 locking. I'm itching to get this backhoe on so I can take measurements.So here's some pictures of my dolly just for reference. (with Box Blade cause BH is on tractor)
It's nothing revolutionary, but it is strong.
It needed to be low enough to put under the BH, yet strong enough on the business ends to handle the weight with no problem.
Given that I wanted to use 6 inch casters, height was a problem; Therefore I sammich'ed some construction adhesive between 2x6's and "under-slung" them to make it lower and stronger, and I had
to "bevel" the edges to clear the wheels.
The only thing I will caution you about it is the fact that it rolls so easy with those 6" casters, that when I turned my back the other day, it rolled out into the street with the box blade on it and almost hit a car.
So I might consider getting at least 1 locking caster.
View attachment 101650
View attachment 101646 View attachment 101648 View attachment 101649
I got the hard side done tonight after work.
I did accidentally strip the lower ROPS nut for the 130mm bolt, was threading in fine at first and got really tight at the end. I was freaking out until I realized I could just double nut that particular bolt and torqued it to spec. Just need to order one extra nut JIC it happens on the other side... Shit happens

Had 50 minutes of kid/wife-free lunch time today that I decided to use to get a head start on the other subframe. Ended up getting it all done sans the 130mm bolt and m16x1.5 nut I need to replace from my mishap on the other side. I ordered them both from Messicks but il going to run around and see if I can find a m16x1.5x13mm grade 10 bolt and m16x1.5 grade 10 nut locally.
No luck with Fastenal but my local hardware store has both the bolt and nut class 10.9 in stock!!!A call to Fastenal might save time, gas and frustration.
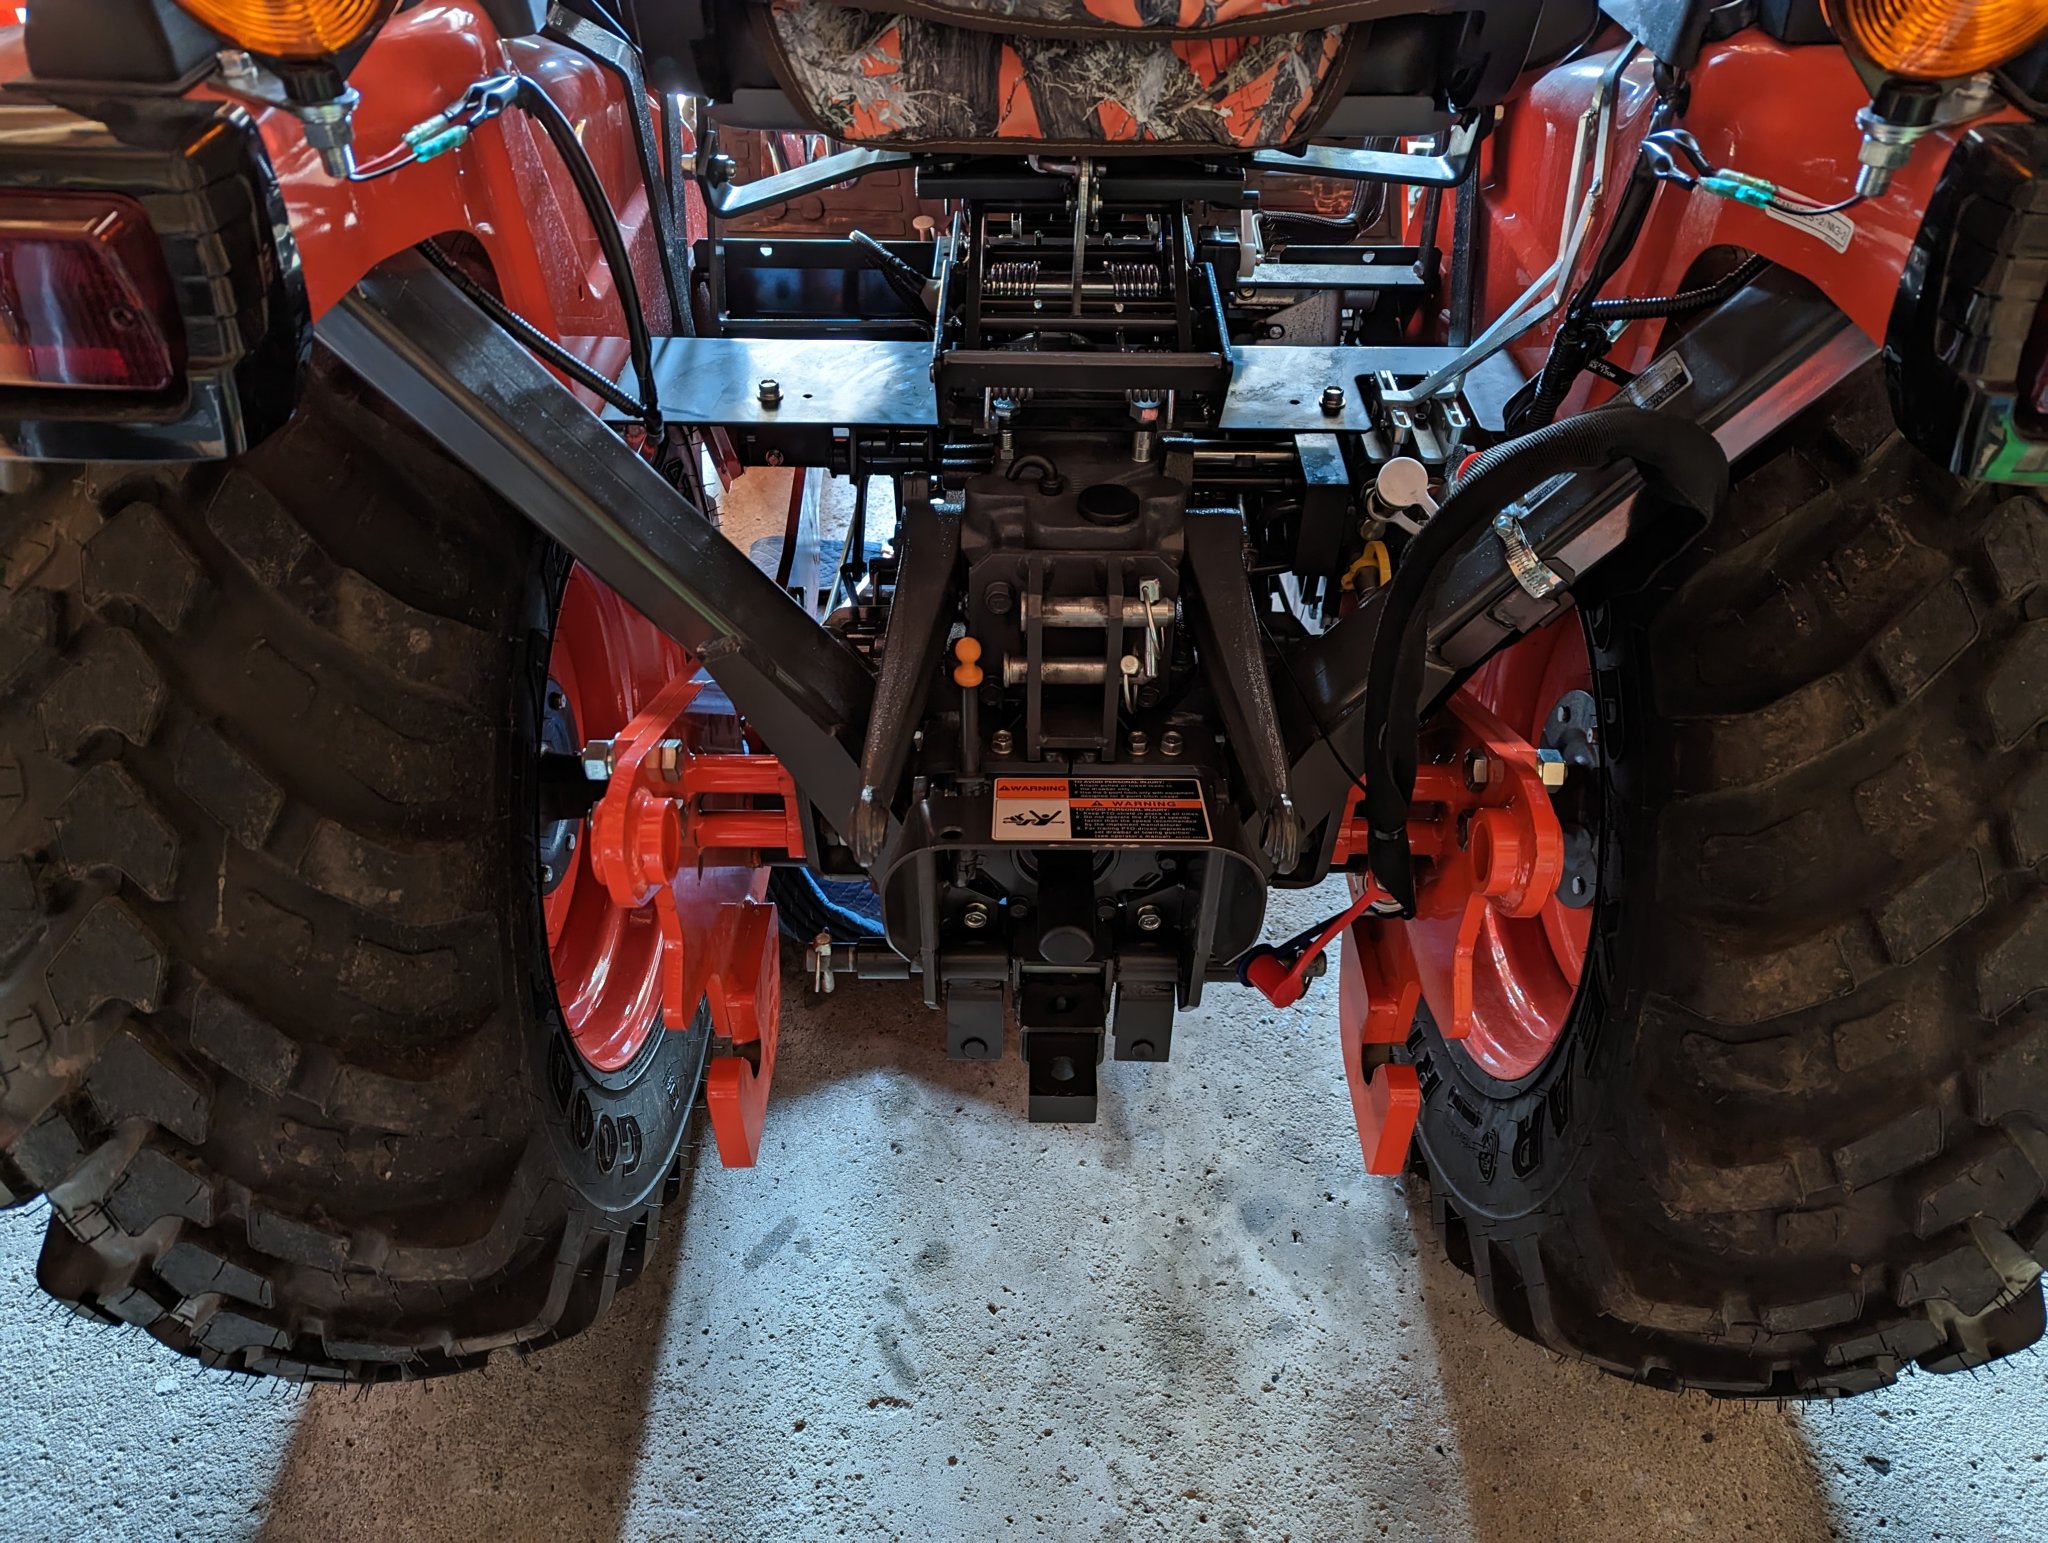
Wanted to keep this thread updated, got both sides in and torqued. I installed double nuts on the lower ROPS bolt on both sides - those threads seemed pretty rough on the side I completed today as well so figured why not have the extra insurance. Tomorrow I'm gonna get the BH pallet in the garage rotated and mount it for the first time - wish me luck.
fried1765
Well-known member
Equipment
Kubota L48 TLB, Ford 1920 FEL, Ford 8N, SCAG Liberty Z, Gravely Pro.
When you order USPS shippable parts from Messick's, be sure to ask them to ship via USPS!Had 50 minutes of kid/wife-free lunch time today that I decided to use to get a head start on the other subframe. Ended up getting it all done sans the 130mm bolt and m16x1.5 nut I need to replace from my mishap on the other side. I ordered them both from Messicks but il going to run around and see if I can find a m16x1.5x13mm grade 10 bolt and m16x1.5 grade 10 nut locally.
View attachment 101766 View attachment 101767
Their UPS charges can eat you alive.
My bolt hasn't even shipped yetWhen you order USPS shippable parts from Messick's, be sure to ask them to ship via USPS!
Their UPS charges can eat you alive.
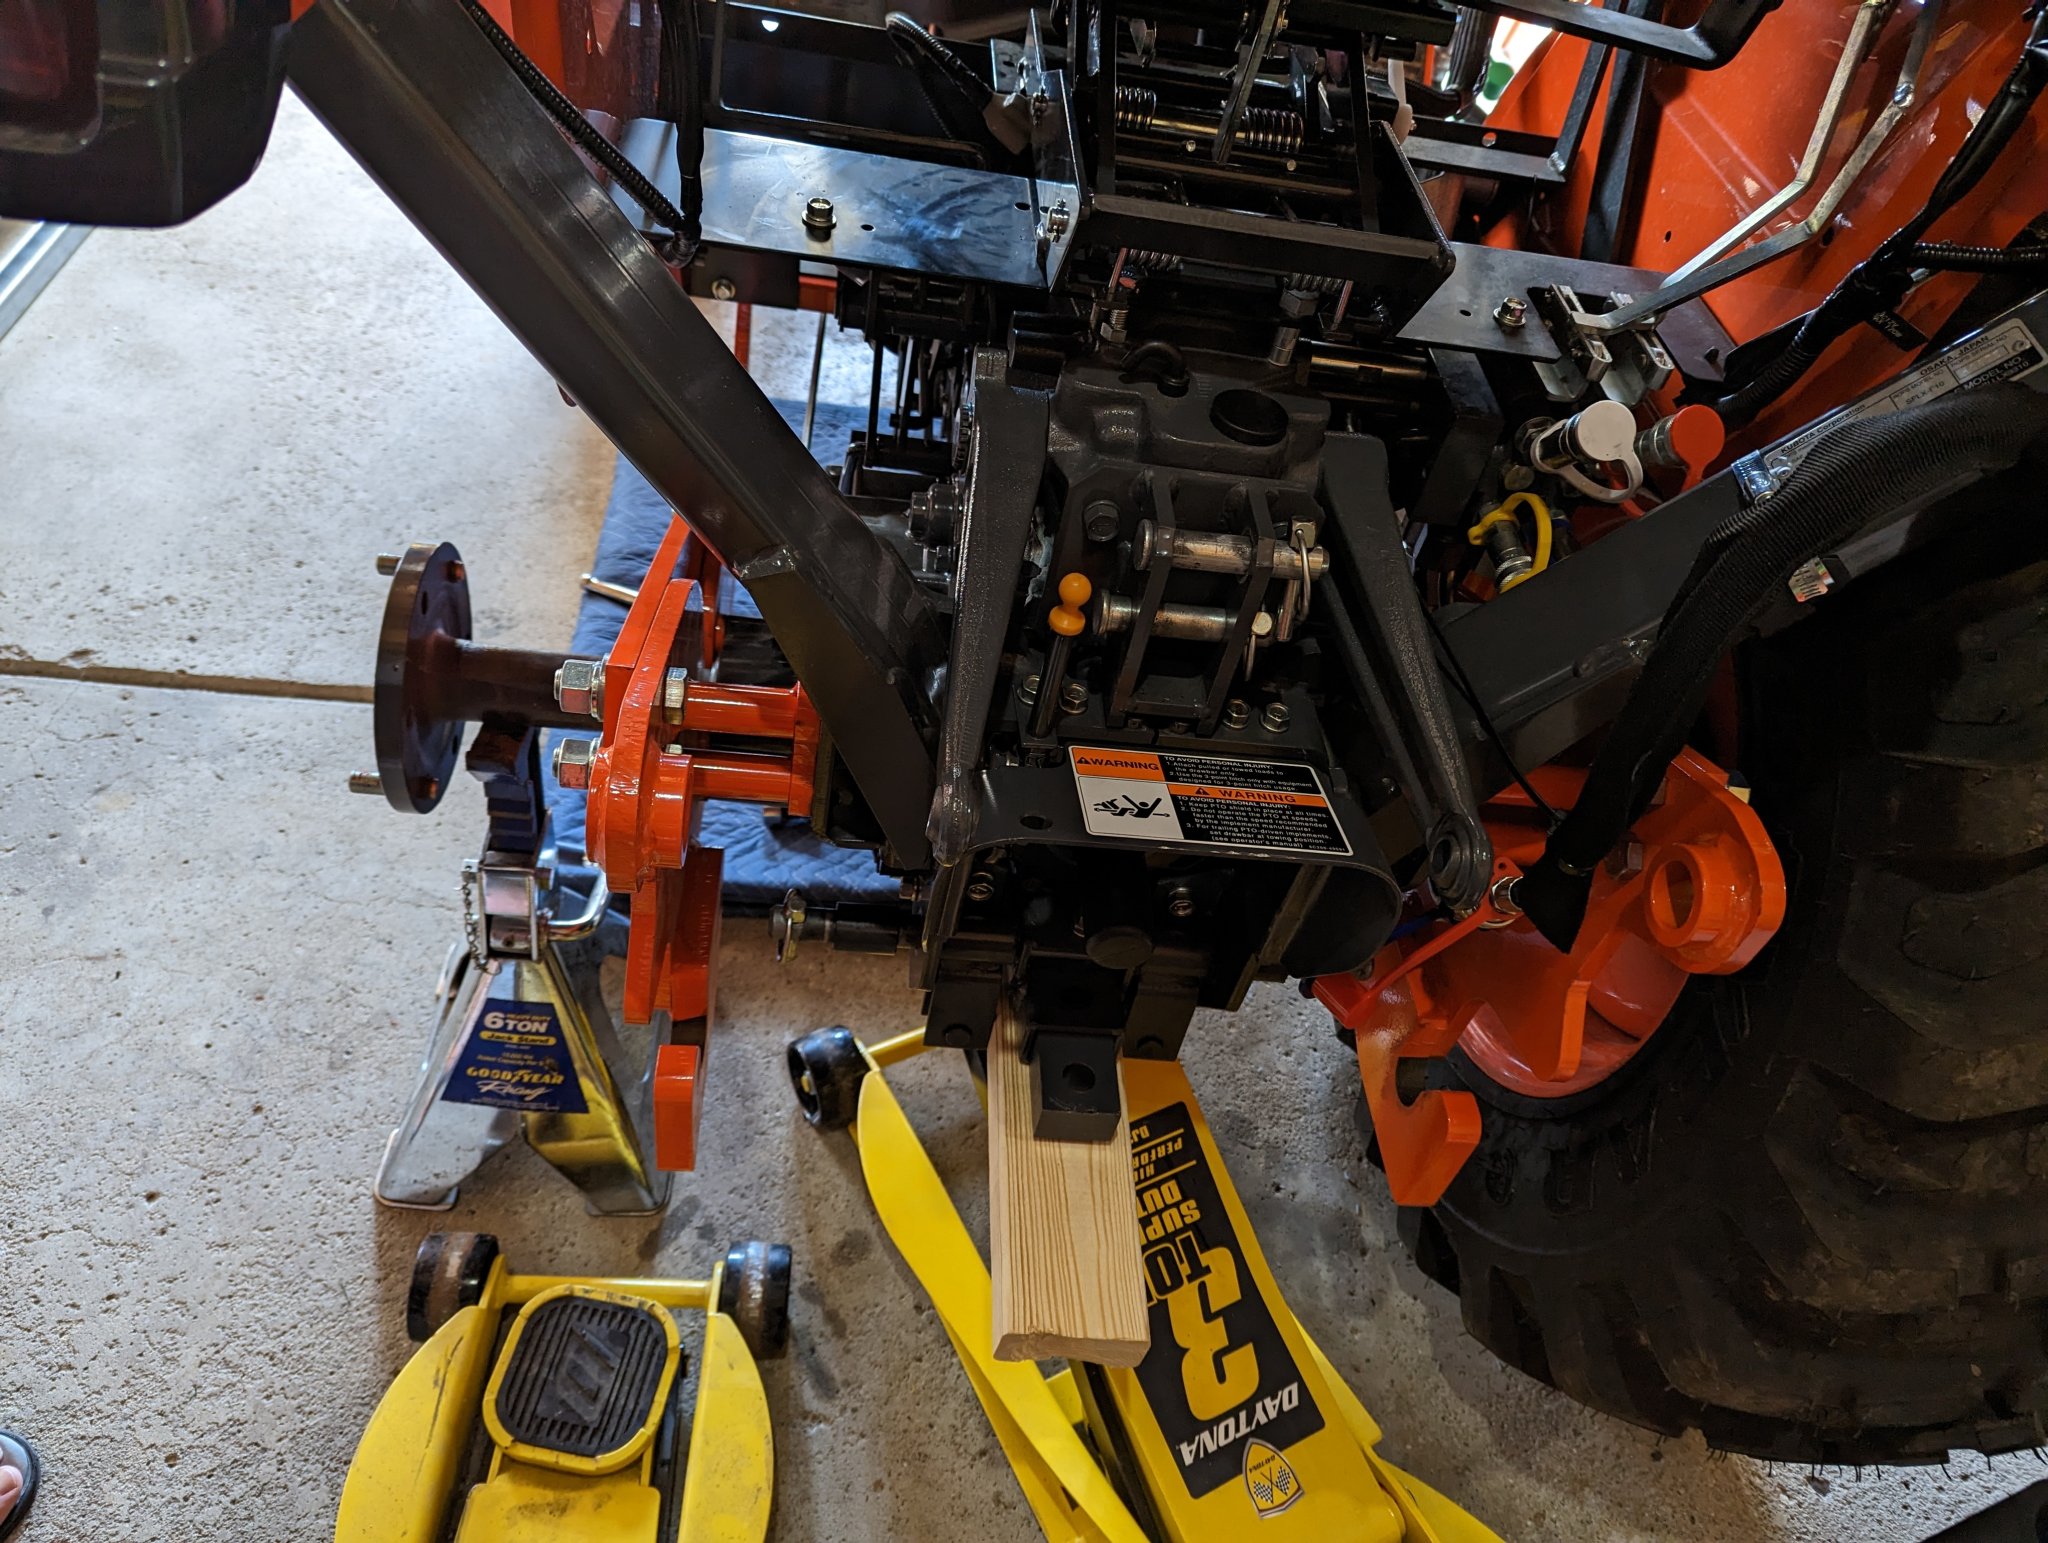
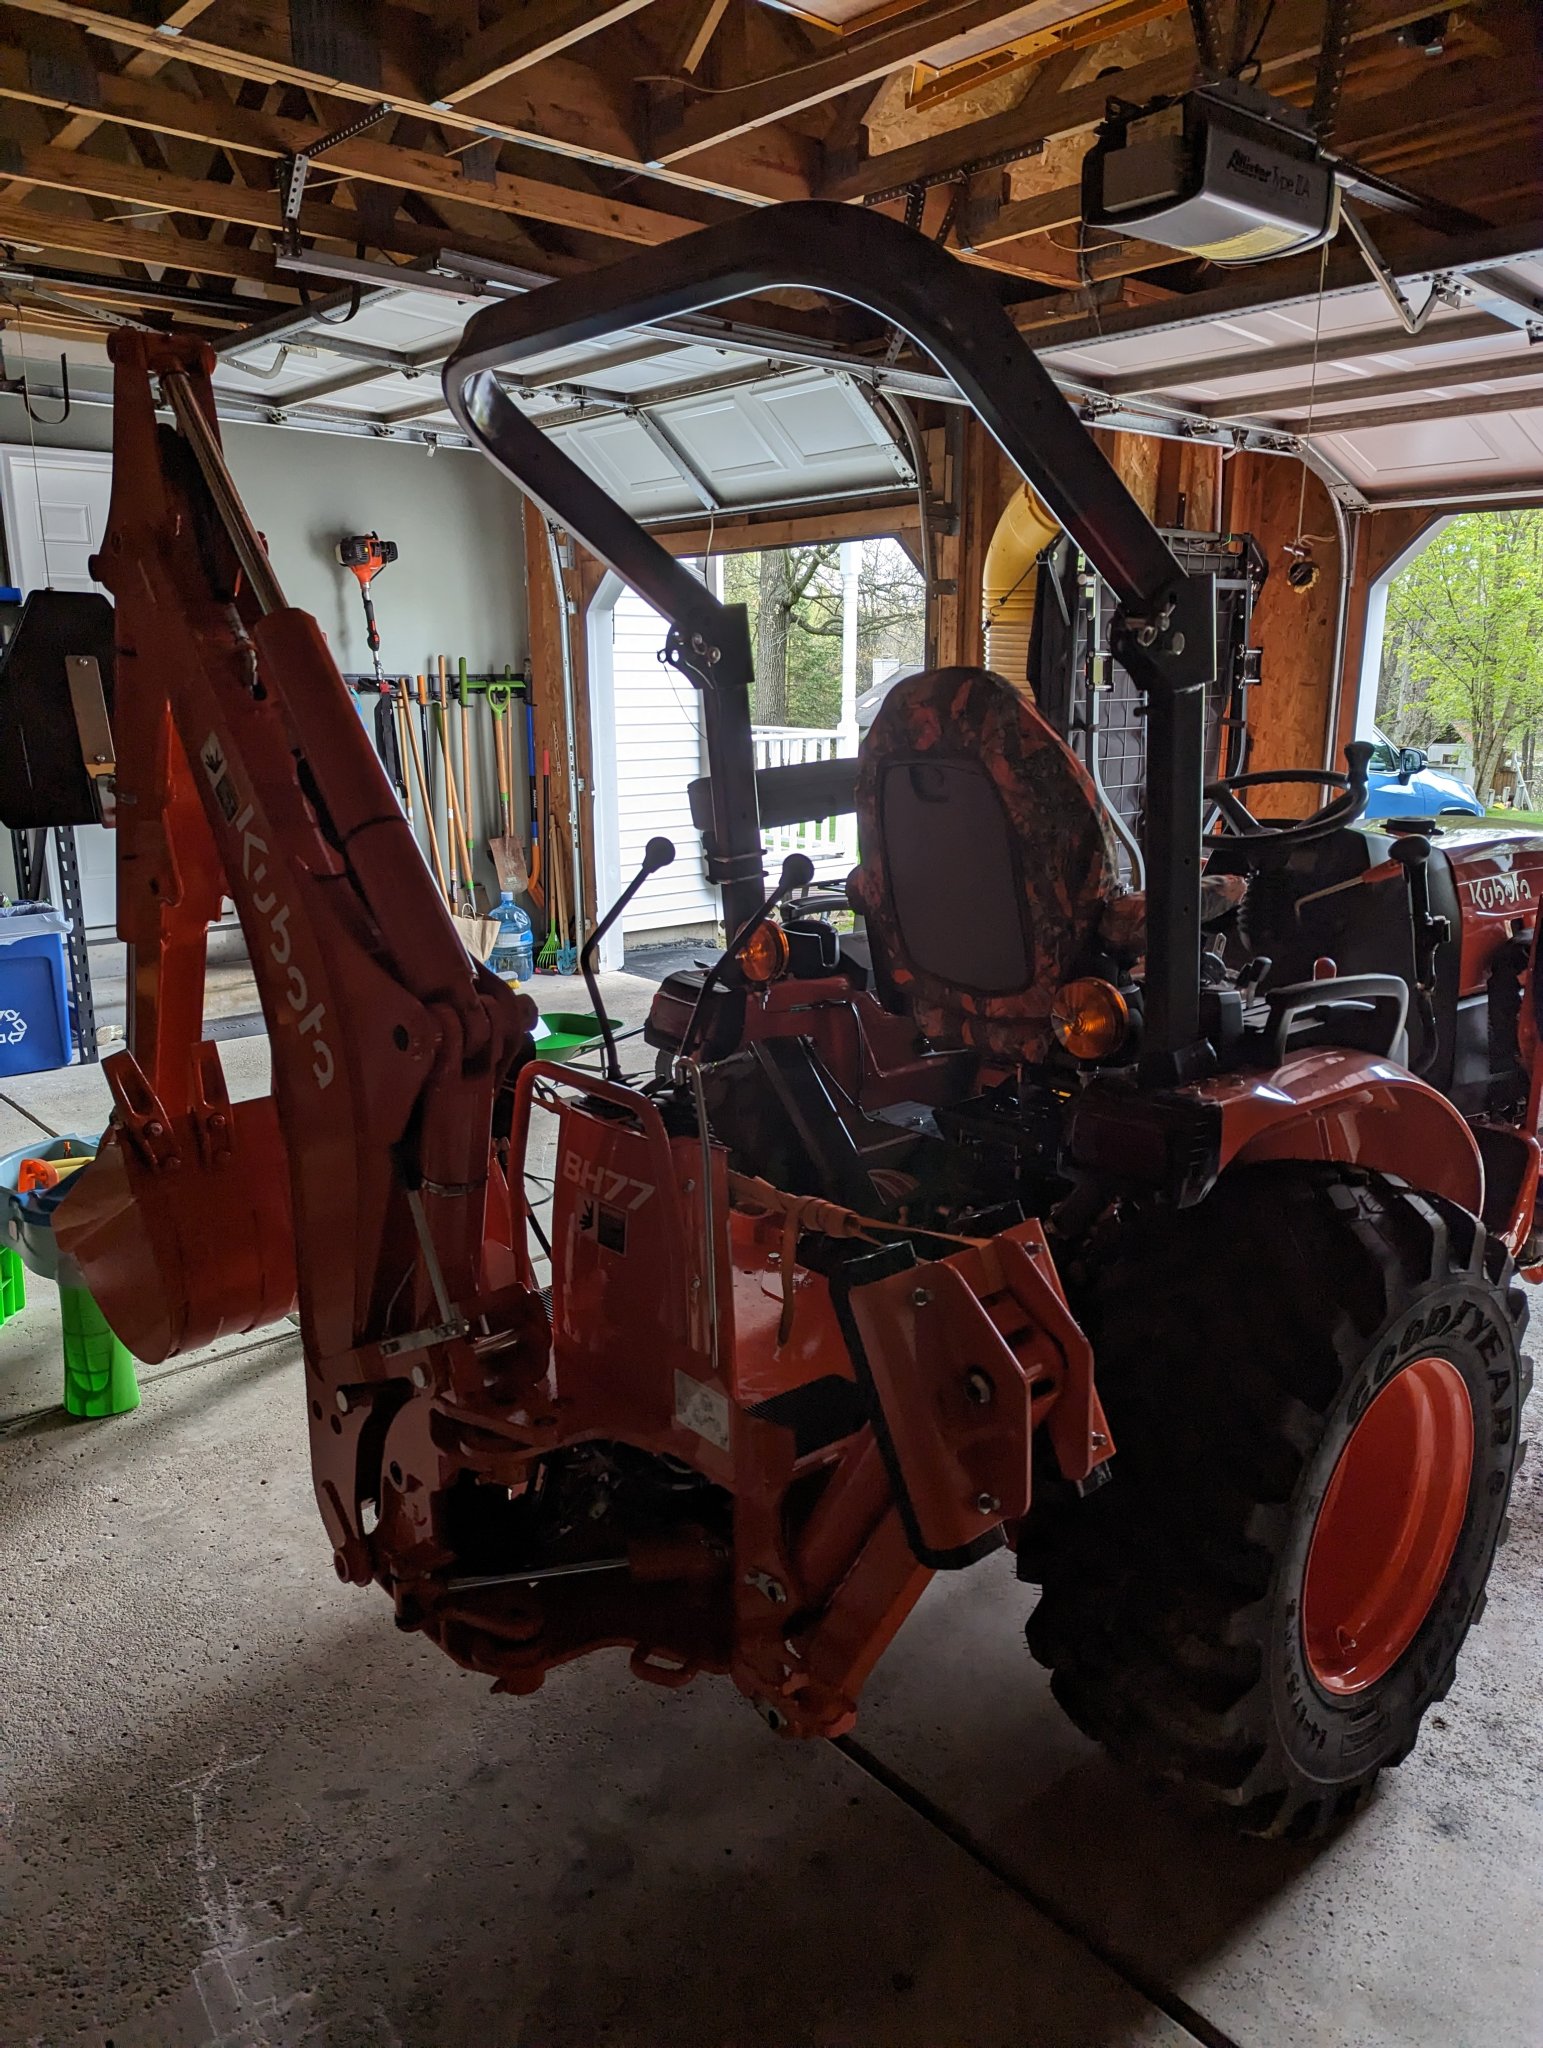
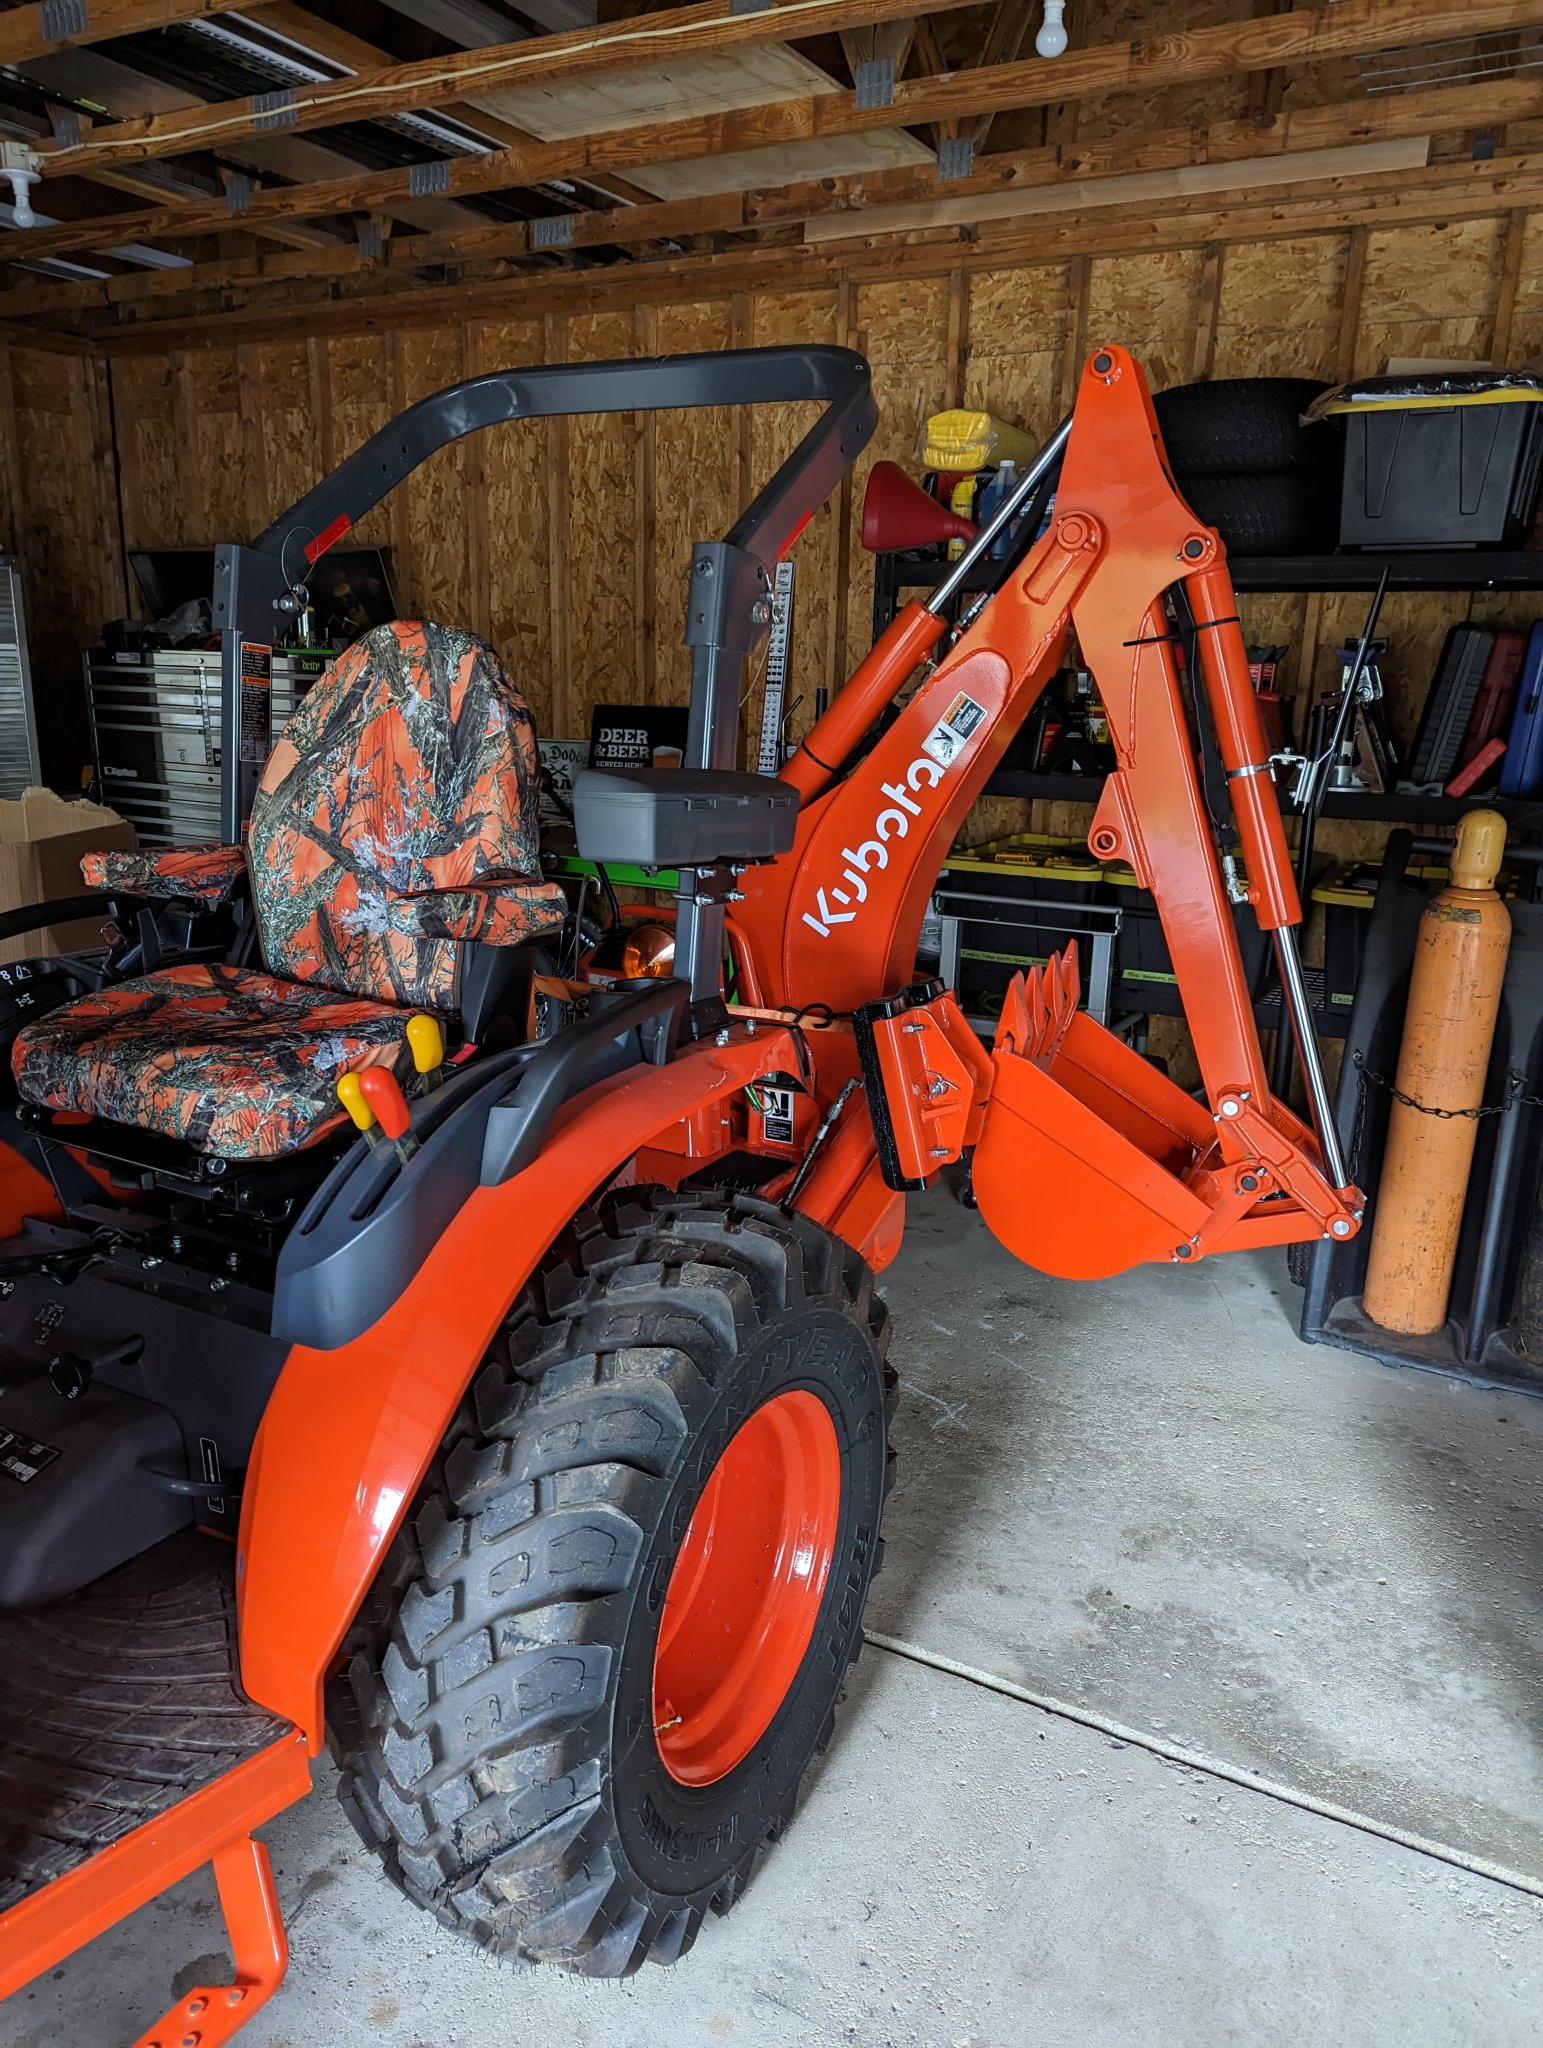
I have to call and cancel that. Yeah I was not happy with the $10 shipping fee for one bolt...After much persistence and many issues along the way, the BH77 is on and functional. After hitting the gym and figuring out how to get the hoe off the pallet and mounted on the subframe, I was too tired to play around with it outside and it looks like we're going to have a storm.
The trick to mounting the BH77 when it's on a pallet and you don't have any forklifts around was pretty simple after screwing around with it for a while. I ended up working it off the pallet and rested the bottom on two floor jacks, then used the outriggers, floor jacks, and boom? to work it into place. The key was that the pallet had to come off otherwise there was no room for the tractor to get back far enough to line up with the pins.
Anyway, here are some photos.
jkrubi12
Well-known member
Equipment
B2601/LA435/QA54"/BH70/B8160box/BB1254/PFL1242/SGC0554/WC-68 Chipper
As a new backhoe owner myself I know you must be feeling great now that it's on and working! Congratulations on an epic journey; not many owners would undertake a BH self-install from the crate, never mind the additional roadblocks that popped up in your case. Nice write-up & pics, looks great!
I just built a storage dolly for my BH70 today, have had the BH about a week now. My dealer came to my house, picked up the tractor (1 year old), and returned it 3 days later with a brand new BH installed. Kubota even honored the no money down 60 month zero-percent financing and KTAC. I've played around with it a little, but days of rain & other projects have limited my time thusfar. One thing for sure, however, is that the learning curve for the BH is a monster!
I just built a storage dolly for my BH70 today, have had the BH about a week now. My dealer came to my house, picked up the tractor (1 year old), and returned it 3 days later with a brand new BH installed. Kubota even honored the no money down 60 month zero-percent financing and KTAC. I've played around with it a little, but days of rain & other projects have limited my time thusfar. One thing for sure, however, is that the learning curve for the BH is a monster!