air in return lines and creaking noise

pea42

New member
Dec 7, 2015
17
0
0
mobile, alabama
I've got a V1902, just rebuilt. It seems to be working well, except for two issues.


Issue #1:

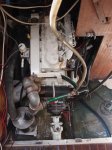
There is air in my return lines, but does not appear to affect engine; it runs. The fuel injector has a bleeder valve and when that valve is closed, air bubbles accumulate in the return hoses on both sides of each injector. When I open the bleeder valve, fuel pushes the air back to the tank. Air does not exist in the hose that goes from the bleeder valve to the first injector. I temporarily replaced the return tubes between injectors with clear tube so I could see where air is coming from.

Engine recently rebuilt, injector pump recently rebuilt. With engine off, but elec. fuel pump running, no air accumulates in return hoses; it only happens when engine is running. The higher the rpm, the more air. I've tightened the fuel injection pipes. Any ideas where the air is coming from?

Possible problem #2:
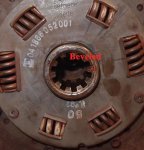
When I turn the engine manually, I hear a creaking noise coming somewhere at the rear of the engine. I can also feel the creaking in several places (crank shaft, water hoses, transmission housing). I don't recall this being present until the first run after the rebuild (which was yesterday).

Here is a link to pictures and video of the air bubbles as well as a video of the creaking.

http://bodylens.com/engine/


Creaking video shows the front of the engine, but the noise is coming from the rear of the engine, down low.

Thanks

Edit: Regarding creaking. It sounds like an impeller running dry, but there is no impeller in that part of the engine. Also, when cranking by hand (like in the video), I can reverse direction and hear no creaking for about 1/4 turn, then creaking resumes.
 
Last edited:

North Idaho Wolfman

Moderator
Staff member
Lifetime Member

Equipment
L3450DT-GST, Woods FEL, B7100 HSD, FEL, 60" SB, 743 Bobcat with V2203, and more
Jun 9, 2013
29,014
5,345
113
Sandpoint, ID
The air is most likely because the pistons are compressing air and forcing out leaking valves, rebuild or replace the injectors.

EDIT: Just watched the video of the air, it not an issue, that would be normal operation for that system, it's not pressurized, it's just over flow fuel.

The creaking could probably be from the rear thrust bearings, are you 100% sure they were install the right direction, if they were installed backwards with the oil slots towards the inside it will just wear the trust bearings at a rapid rate, until they make a gap, Not a good thing. ;)

EDIT: I would check it again with the fan belt off, but by the sound and said location it's almost guaranteed to be a bearing.
 
Last edited:

pea42

New member
Dec 7, 2015
17
0
0
mobile, alabama
Thanks for the opinion about the air, I won't worry about it.

The noise is present with and without the belt. I'll call the machine shop who did the internal rebuild tomorrow and see if they will take a look at it.

Thanks again for helping out. Really appreciate it.
 

pea42

New member
Dec 7, 2015
17
0
0
mobile, alabama
Wolfman,

Thank you for your input. This evening, I removed the bell housing and the noise went away. I narrowed it down to the new damper plate. I put the old damper plate on and there is no noise. The new damper plate seems to fit, but I noticed that, with the new damper plate, I cannot put the bell housing on all the way and have to use the bolts to close the last 3/16" gap between mating surfaces.

With the old damper plate, I can push the mating surfaces of the bell housing and the engine up tight without needing bolts to close the gap.

I'm not sure what the deal is with the new damper plate, but there is something different.

Is there a break-in period for damper plates?

I added pictures of the damper plate:

http://www.bodylens.com/engine

Thanks again.
 

North Idaho Wolfman

Moderator
Staff member
Lifetime Member

Equipment
L3450DT-GST, Woods FEL, B7100 HSD, FEL, 60" SB, 743 Bobcat with V2203, and more
Jun 9, 2013
29,014
5,345
113
Sandpoint, ID
Ok, then yes that was forcing the crank into the trust bearing.

Can you give me a picture of the new damper plate bolted on it at the same angle as your second "old damper photo"?

Also if you have them both off slide them on the output shaft and make sure they go all the way on.

The other things would be to check direction of the plate and triple check dimensions and offsets.
 

pea42

New member
Dec 7, 2015
17
0
0
mobile, alabama
Ok Wolfman, you are spot-on again.

I removed the housing and compared the distance that they travel and the new one bottoms out about thick 1/16" before the old one.

In other words, the new one travels down the spline ~0.48" and the old one travels down ~0.53". That's a approximate difference, errors exist in cheap calipers and the fact that I gently slid each plate down the shaft until I felt slight resistance. If I pushed to hard, the metal would bind and make it very difficult to remove.

I then compared the part of the damper plate that bottoms out on the gearbox end and saw that the old one appears to have been modified slightly. The face of the damper plate spline ( the collar that has the grooves in it that mate with the gearbox input shaft) is flat on the new plate, but the old one is concave. Looks like someone took a large countesink and machined out a slightly concave shape, allowing that old plate to travel farther down the gearbox input shaft.

Not sure if this concave shape is part of that design of that old plate or a modification. Either way, I'm going to have a machine shop countersink the new one a bit so it will travel all the way down as far as the old one.

Thanks again for all you quick and accurate advice. It makes it so us amateurs can get things done and learn a lot about our engines.
 

Attachments

North Idaho Wolfman

Moderator
Staff member
Lifetime Member

Equipment
L3450DT-GST, Woods FEL, B7100 HSD, FEL, 60" SB, 743 Bobcat with V2203, and more
Jun 9, 2013
29,014
5,345
113
Sandpoint, ID
Great, let us know how it turns out.

It's boating season, so hope you get it going soon!

Is it in a sail boat or other type?
 

pea42

New member
Dec 7, 2015
17
0
0
mobile, alabama
Yes, it's in a sailboat, 1982 Pearson 367 (36' long, 17,000 lbs)

Here is a link to pictures of the work I've done.
https://picasaweb.google.com/111274927949602013478

It was marinized by Universal (now owned by Westerbeke)
The only marinized parts are exhaust manifold, raw water pump, heat exchanger, bell housing, thermostat housing, and motor mounts. It has four, instead of three.

The transmission is a forward/reverse gear with at 2:1 reduction (Hurth ZF 15M). My boat has the engine mounted backwards (the fan belt end faces the back end of the boat with the flywheel/bellhousing/gear box end facing forward. the output shaft of the gear box connects to a v drive, which sends the force back out to the propeller, which is under the engine.

The parts diagrams from Universal are exact copies of what kubota produces. They didn't do a good job of hiding the Kubota lineage.


Once I get the engine installed and hooked up to the V drive and shafts, I'll upload those pictures (several weeks from now)

I'm down on Alabama's gulf coast and crossing my fingers that a hurricane does not form while engine is out of boat.

I won't be getting out on the water for another year. I've torn out the back half of the interior and will get to rebuilding that once the engine is back in and the boat can run under its own power. Some of the interior was in bad shape and I didn't like the design of other aspects, so out it went.

It's kinda tough building cabinets in a boat that is sitting in the water, listing to one side. Nothing is square and nothing is level! Whenever I need to "level" or "plumb" something, I have to first get a reference from current position, referred to as "boat level" or "boat plumb", usually about a half a bubble on the level, that is then the new "level".

I really appreciate your help. Many kubota blocks were used in many boats, but very few used the v1902 blocks. Most boat motors are Perkins, westerbeke, or Yanmar. They all have their tractor motor roots and prices for those companies are 3 to 10 times what the tractor dealers charge for the same parts.

ya'll have a good weekend.

Edit: I just noticed you are in Sand Point. There was a sistership in Coeur d' Alene for a while, they moved it to Puget Sound a few years ago, the sold it. Name of the boat was Sol. Huh, small world.
 
Last edited:

North Idaho Wolfman

Moderator
Staff member
Lifetime Member

Equipment
L3450DT-GST, Woods FEL, B7100 HSD, FEL, 60" SB, 743 Bobcat with V2203, and more
Jun 9, 2013
29,014
5,345
113
Sandpoint, ID
Edit: I just noticed you are in Sand Point. There was a sistership in Coeur d' Alene for a while, they moved it to Puget Sound a few years ago, the sold it. Name of the boat was Sol. Huh, small world.
Yea CDA is just down the road from us.
We have Lake Pend Oreille (Pronounced Ponderay) up here, 148sq miles of water so there are quite a few really big boats around.
I'm working with a friend that wants to power a house boat with twin V2203's.

I build cabinets and yes not having a reference point is O so fun!
This is where a good dry dock comes in handy!

Oh yea and we also share the same first name! ;)
 
Last edited:

Rolling Stock

New member

Equipment
L4350DT, LA950 loader
Jun 17, 2016
25
0
0
Othello, WA
Just spitballing here, but would it be possible to install some temporary outrigger pontoons to cause the boat to sit level in the water? Not sure how much space you have to work with, but as my dad would say, "better to spend a little extra time making the tool for the job rather than banging your head against the wall wondering why the job is so hard".
 

pea42

New member
Dec 7, 2015
17
0
0
mobile, alabama
Well, looks like I was wrong in my assessment of the cause of the resistance. I wish I were smarter. I feel so defeated. A weeks worth of anguish and a few gallons of sweat trying to figure out what I did wrong.

Turns out it was much simpler: the damper plate is warped!
I discovered this when I put the damper plate on the gearbox input spline (instead of bolted to the flywheel), then set the whole gearbox/bell housing in place. It fit perfectly against the engine with no gaps or resistance, just like the old one.

Next, I loosely bolted the damper plate to the flywheel. Again, easy fit of the bell housing. Snug tightening of the damper plate bolts resulted in skewed center axis of the damper plate, causing the gearbox input spline to not slide all the way in. Hardly noticeable, but it made a big difference!

Removed it all and put a straight edge across the back plane of the damper plate to discover that it's warped by nearly 2 mm!

Now, I have to wait for RMA/replacement-by-mail cycle and hope the replacement is not warped.

Oh well. Thanks for ya'lls help.

Rolling stock, I thought about leveling the boat, but it's out of plane fore and aft also. Plus when I move tools around/clean up periodically it shifts and I have to get a new reference. It would take continual adjusting of the stabilizers. The boat will never sit level for more than a few seconds because water around here is always moving. I'm just shooting for keeping all the interior components square to each other so it doesn't look too out-of-square.

I'll upload a picture of the engine/drive system in place in a few weeks.
 

pea42

New member
Dec 7, 2015
17
0
0
mobile, alabama
Well, it's been more than a few weeks, but the engine is finally in.

Thank ya'll very much for answering my questions during this engine rebuild. I knew nothing about engines when I started this last winter, except that diesel's have no spark plugs.

The engine is in the boat, aligned with the v-drive, v-drive aligned with the propeller shaft flange and it runs!

Damper Plate issue: I checked 10 damper plates for warp ad they all had 1mm - 2mm warp; none of them was perfectly flat.

I worked around this problem by drilling/tapping a hole in the bell housing for a 3/8" NTP plug (9/16" dia hole). I then loosely fastened the damper plate to the flywheel and bolted the bell housing to the engine. No binding.

Now, I used a long allen wrench, stuck through the 9/16" hole and tightened the bolts, rotating until the next bolt was in view through the hole.

Engine started within 30 seconds on first try; I was really surprised.

Anyway, here two pictures, as well as a link to more, for those who are interested.

Thanks again for all your help.

http://bodylens.com/Gallery
 

Attachments