Built a cab for my BX 2370-1

tinkerwitheverything

Active member

Equipment
bx2370-1
Jun 3, 2015
318
72
28
Manitoba
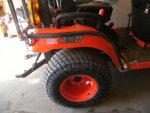
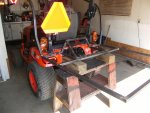
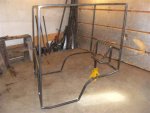
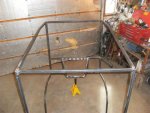
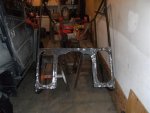
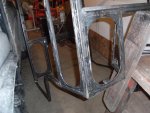
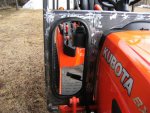
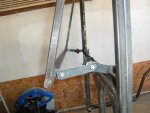
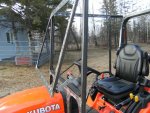
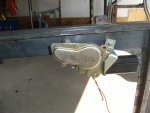
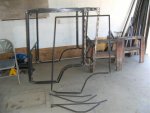
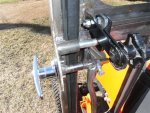
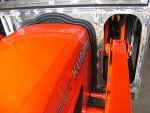
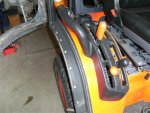
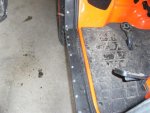
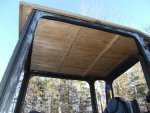
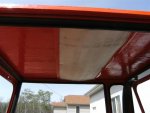
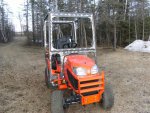
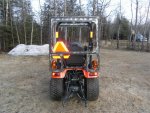
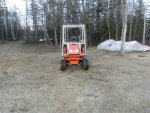
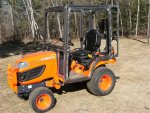
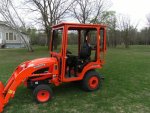
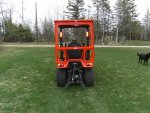
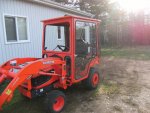
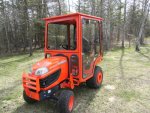
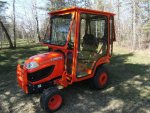
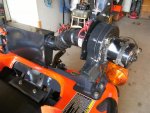
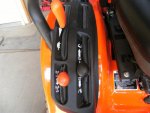
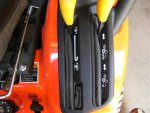
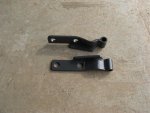
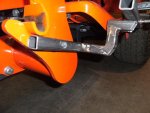
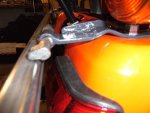
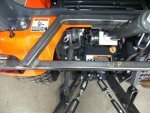
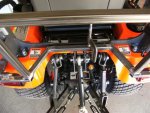
Built a easy removable cab for my BX. I like to have the cab off for summer grass cutting etc; The thing about this cab is that when I made it I have the option of leaving it on for the summer.Both doors are removeable and both the front and rear windows open to allow max air flow.The first thing I did was to shorten my ROPS .Unless your a good experienced welder I wouldn't recomend anyone to do that.{ don't worry if I sell the tractor in the future I'll replace the lower half} I wanted to have a Rops inside the cab rather then not have one at all.Also in the summer the Shortened ROPS holds my sun shade that I had on my BX 2350. [I didn't have a cab for the 2350].First I had to make some mounts the rear uses the rops mounting bolts and the front mount bo;ts onto and into the holes in the loader mount.
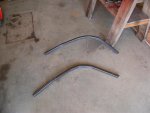
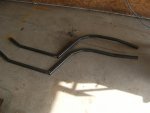
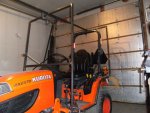
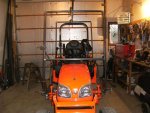
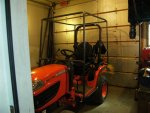
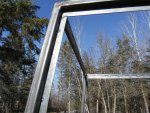
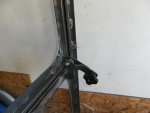
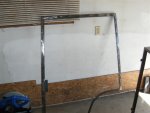
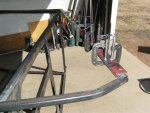
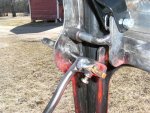
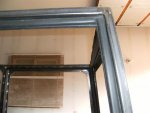
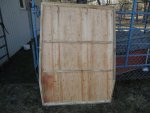
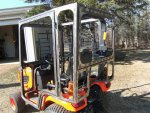
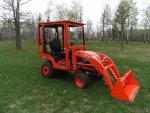
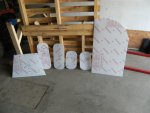
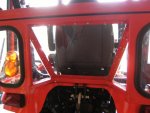
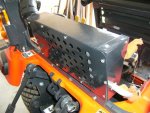
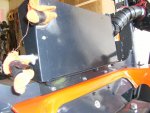
The next thing was to make the back of the cab,which takes some thinking because of the 3 pth top link .Rather then guess what to do I left the top link in the up storage position and worked around that.I left the cross piece in place and cut it out once I had made the frame to fit around the top link.I had to figure out how wide to make the back so that when I attached the sides the cab would still flip over and clear the side grab handles.I also wanted the cab to have a taper from the top to the bottom. The other thing to take into consideration was that I wanted to keep the back as narrow as possible so that when I put on my grass catcher that the chute didn't rub on the cab.
 

Attachments

tinkerwitheverything

Active member

Equipment
bx2370-1
Jun 3, 2015
318
72
28
Manitoba
I didn't mention it but the main frame is made out of 1x1 sq tubing. I made the lower sides so that they would follow the contour of the fenders and floor boards.The sides also have a bit of a bend near the fuel tank cap area so that they get narrower towards the back of the tractor. You can see how the cab tips over onto saw horse's for easy removal.
 

Attachments

D2Cat

Well-known member
Lifetime Member

Equipment
L305DT, B7100HST, TG1860, TG1860D, L4240
Mar 27, 2014
13,010
4,391
113
40 miles south of Kansas City
TWE, your thinking process, and metal working skills shine in this project.

Folks often look at something like your project and think there's nothing to it. Just cut, bend and weld. And that's what it looks like when you're done.

However, the thought of where everything goes, how it mounts, will it clear everything, will it function as I want, take forethought and time.

Nice job. Thanks for talking the time to take pictures. That's another whole project just to stop and get in all in pictures!
 

tinkerwitheverything

Active member

Equipment
bx2370-1
Jun 3, 2015
318
72
28
Manitoba
I made the front of the cab with the same taper from top to bottom as what the back has.The top of the cab is 3" narrower then the bottom. I then made the upper sides of the cab to match the lower sides.I made the bend inwards near the back of the cab so that when I make the doors the hinges will be square with the uprights of the frame.
 

Attachments

85Hokie

Moderator
Staff member
Lifetime Member

Equipment
BX-25D ,PTB. Under Armor, '90&'92-B7100HST's, '06 BX1850 FEL
Jul 13, 2013
10,347
2,170
113
Bedford - VA
tinker,

as a wood worker and metal worker - that is damn impressive!

I cant wait to see the finished product!:D:)
 

tinkerwitheverything

Active member

Equipment
bx2370-1
Jun 3, 2015
318
72
28
Manitoba
I welded in some 1/2" and 3/4" flat strapping to beable to install my windows and weather striping.To make the corners I welded in some 3" x 3" flat metal and used a coffee can to get the proper curve.I just used a jigsaw with a metal blade to cut the curves and a angle grinder to finish them with.The place above the 3 pth for the top link I just used 1" flat and drilled holes for the lexan to be mounted to both the top and sides. You can see the moulding that I used for the windows etc: The spot around the dash took me a little while to cut out as I wanted it have a perfect fit once I installed the weather striping so that it would have a good seal.
 

Attachments

tinkerwitheverything

Active member

Equipment
bx2370-1
Jun 3, 2015
318
72
28
Manitoba
I used 3/4" sq tubing for the main frame of the front and rear windows.I then used 1" flat to beable to mount the window glass to.Using the same method as what I did to make the corners etc: The top of the windows I used a 3" flat piece so that I could have a place to install a wiper. I made brackets etc: to keep the windows open and locked shut.I just used the design thats on all the other cabs that I've built.The mechanism's are just copied from a big tractors design.Before drilling the hole for the wiper motor,I made a mock up of the window out of a piece of cardbord so I could figure out the best spot to place the motor to get the most possible wiping coverage of the wiper blade. The wiper motor was picked up from the wreckers and it came out of the back window of a Ford Probe.
 

Attachments

chim

Well-known member

Equipment
L4240HSTC with FEL, Ford 1210
Jan 19, 2013
1,771
861
113
Near Lancaster, PA, USA
Very nice. I like the brackets and window mechanism. You have imagination and skill. Congrats! Anxious to see the finished product.
 

Tooljunkie

Well-known member
Lifetime Member

Equipment
L1501,home built carry all, mini plow blade.
May 13, 2014
4,150
27
48
59
Lac Du Bonnet, Manitoba,Canada
Impressive. Takes a lot of patience. Planning.imagination. Skill is the culmination of all of that.
Definetly skill.
 

tinkerwitheverything

Active member

Equipment
bx2370-1
Jun 3, 2015
318
72
28
Manitoba
The doors are a pain to make.[It's easier to make windows] LOL .They had lots of bends and angles and had to be cut and fit together just right in order for them to close and seal up when closed. { as you can tell I hate making doors} I used 3/4" sq tubing for the frame and added in 3/4" & 1" flat stock even some 2" where it was needed to beable to mount the windows and weather striping to. Knowing that the flat stock is a pain to bend by itself I put them into the jig along with the 3/4" sq tubing and bent them at the same time.I also had to figure out where to add material for the door handles.The next part was figuring were to make the closer brackets for the doors and the stabilizer pin for the doors and front window.Everything was kept really tight as you can see in the pics .
 

Attachments

tinkerwitheverything

Active member

Equipment
bx2370-1
Jun 3, 2015
318
72
28
Manitoba
I cut and fit all of the weather striping and window and door rubbers etc: and cut and made the seal from the cab to the tractor. I used some baler belting that I screwed to the cab frame and used automotive door weather striping to seal it against the tractor. One thing to remeber is that when making the cab frame I always had to make sure that the frame would always follow the tractor's body etc; so that it would be easy to install the weather striping to seal up the cab to the tractor.
 

Attachments

tinkerwitheverything

Active member

Equipment
bx2370-1
Jun 3, 2015
318
72
28
Manitoba
I made the roof out of 3/8" plywood ,added some ribs into it too keep it from being to flimsy in the middle. Also added some triple layered floor underlament to the bottom of the roof.I pre drilled and pre fit the roof before I even painted the cab or the roof. Before installing the roof I laid a piece of tarp over the top of the cab frame and set the roof on top.I then pushed the top down as tight as possible and stretched the tarp as tight as possible before screwing the plywood down.
 

Attachments

tinkerwitheverything

Active member

Equipment
bx2370-1
Jun 3, 2015
318
72
28
Manitoba
Before painting the cab I installed it onto the tractor to make sure that everything fit and worked like it's supposed to.
 

Attachments

tinkerwitheverything

Active member

Equipment
bx2370-1
Jun 3, 2015
318
72
28
Manitoba
Painted the cab Kubota orange I wasn't happy with the paint that I used.It was very hot and even in the shade the paint wanted to orange peel and drag when I was painting [by brush] I used a brush simply because it's mostly narrow edges plus you get heavier coats.I ended up sanding some places where it orange peeled [makes me mad to have to do stuff twice.] Anyway this is what it looks like all painted.
 

Attachments

tinkerwitheverything

Active member

Equipment
bx2370-1
Jun 3, 2015
318
72
28
Manitoba
This is the finished cab with the lexan for the side and small windows and the laminate safety glass for the front and rear windows.The only place where I didn't use rubber window moulding was in the 3pth area.I had pre drilled holes in the steel and when I was ready to install the lexan all I had to do was drill holes in it and bolt it into place.

And thats how easy it is to make a Cab for a BX 2370-1. LMAO :D
 

Attachments

tinkerwitheverything

Active member

Equipment
bx2370-1
Jun 3, 2015
318
72
28
Manitoba
You did a excellent job, looks factory made. Will you install a heater for those Manitoba winters?
Thanks. Made in my small work shop with basic tools welder,angle grinder,hacksaw,jigsaw, pipe bending jig with a jig for bending sq tubing, lots of time and patience,
I made a custom made heater that I installed behind the seat.I made it so that it's able to fit in that tight area.This way the heater stays on all year long.I,ve installed weather striping to seal up the air leakage around the shift levers. I still have to run my heater hose's to the engine yet.
 

Attachments

Kubota_Man

Member

Equipment
BX24, Rear blade, Front blade, Snowblower, 54" MMM, Box scraper, Landscape rake
Dec 25, 2010
953
2
16
Kellogg, Idaho
WOWZA!!!!

Very nice job. I love how it all came together. Looks like it was factory made only better.