Bankruptcy on a Trailer
- Thread starter ccoon520
- Start date

Magicman
Well-known member
Lifetime Member
Equipment
M4900 Utility Special 4WD e/w FEL & 1530 John Deere "Traveling Man"
Since your topic title sorta indicated a "money pit" how about; "Leakin' Bucket" or "Hungry Onion"?
On today's nautical adventures I have pictures from the seated bearing that I finished a couple days ago but was too dark for any good pictures, and the adventures of chasing down a wire without the correct tools. First here is the pic of the new sealed bearing all seated and happy:

Now onto the meat and potatoes of the day. As stated at the start of the thread the boat came with the trim switch and sender wires cut both inside and outside the hull. This wouldn't have been a big deal if the boat was about 2 or 3 years newer because at that point Mercury would have moved to their modern standard of wire color coordination. So even though I have 2 different work shop manuals with detailed instructions on how to do almost everything to this motor and sterndrive setup, the wiring diagrams (while technically accurate) do not have the correct color notations for the boat. So off I went this morning chasing a single wire.
I started at the dash to correspond the trim gage location on the front so I can find it from under the console:
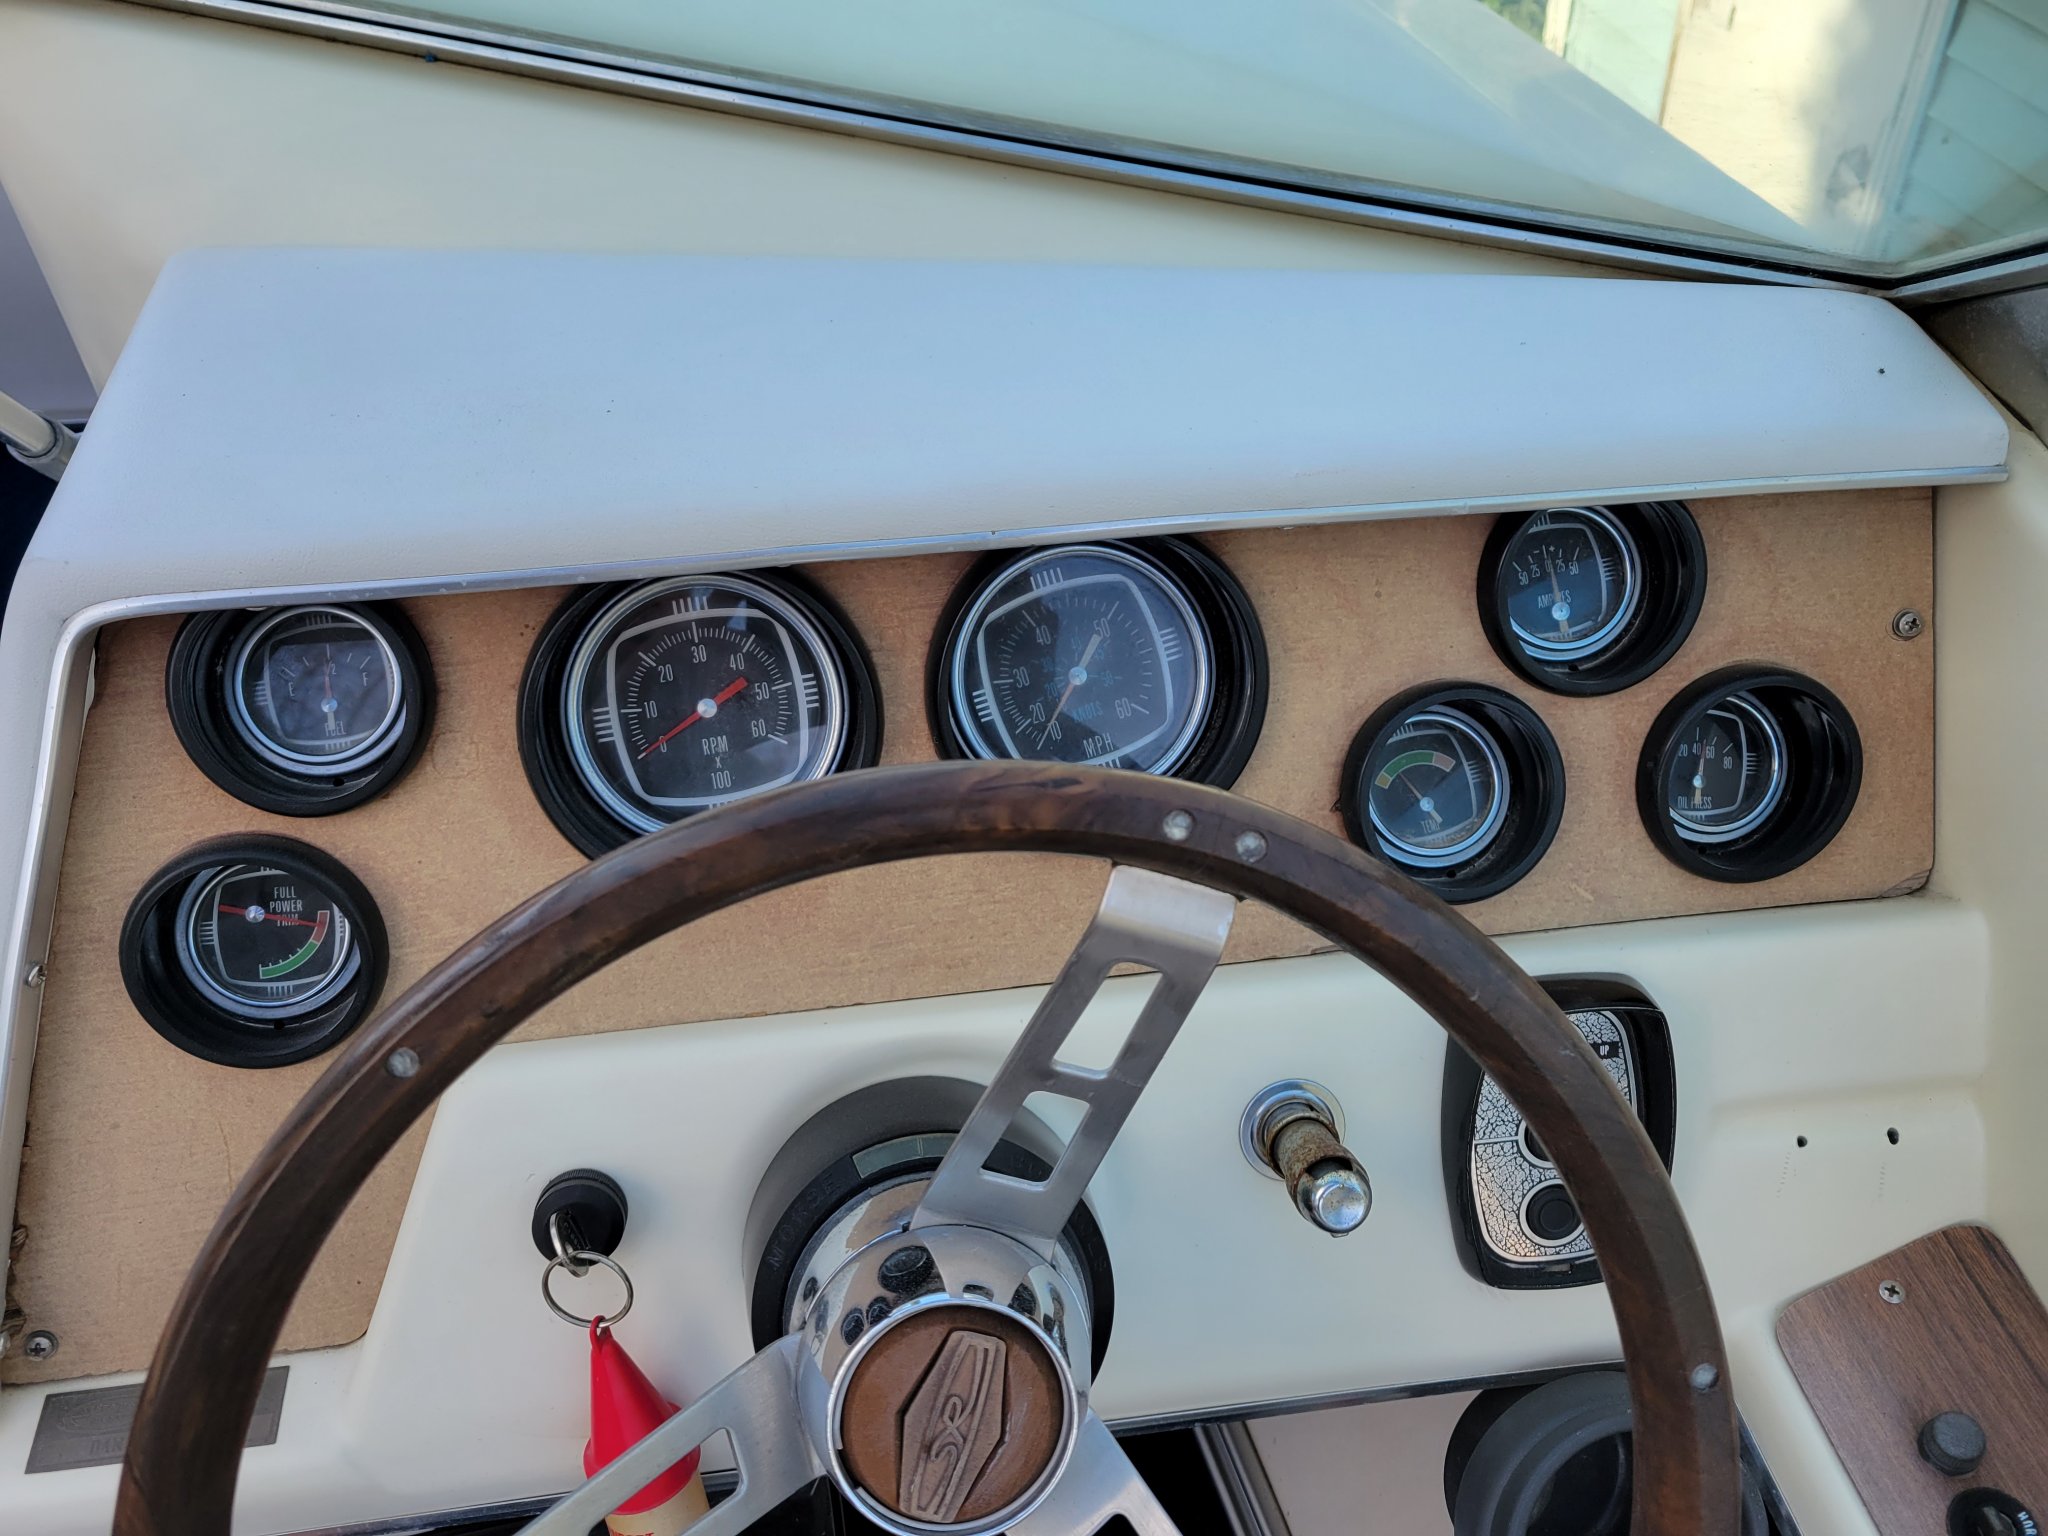
Notice the Trim Gage on the lower left with the needle currently sitting in the red. I then dove behind the console to to look for the signal wire:
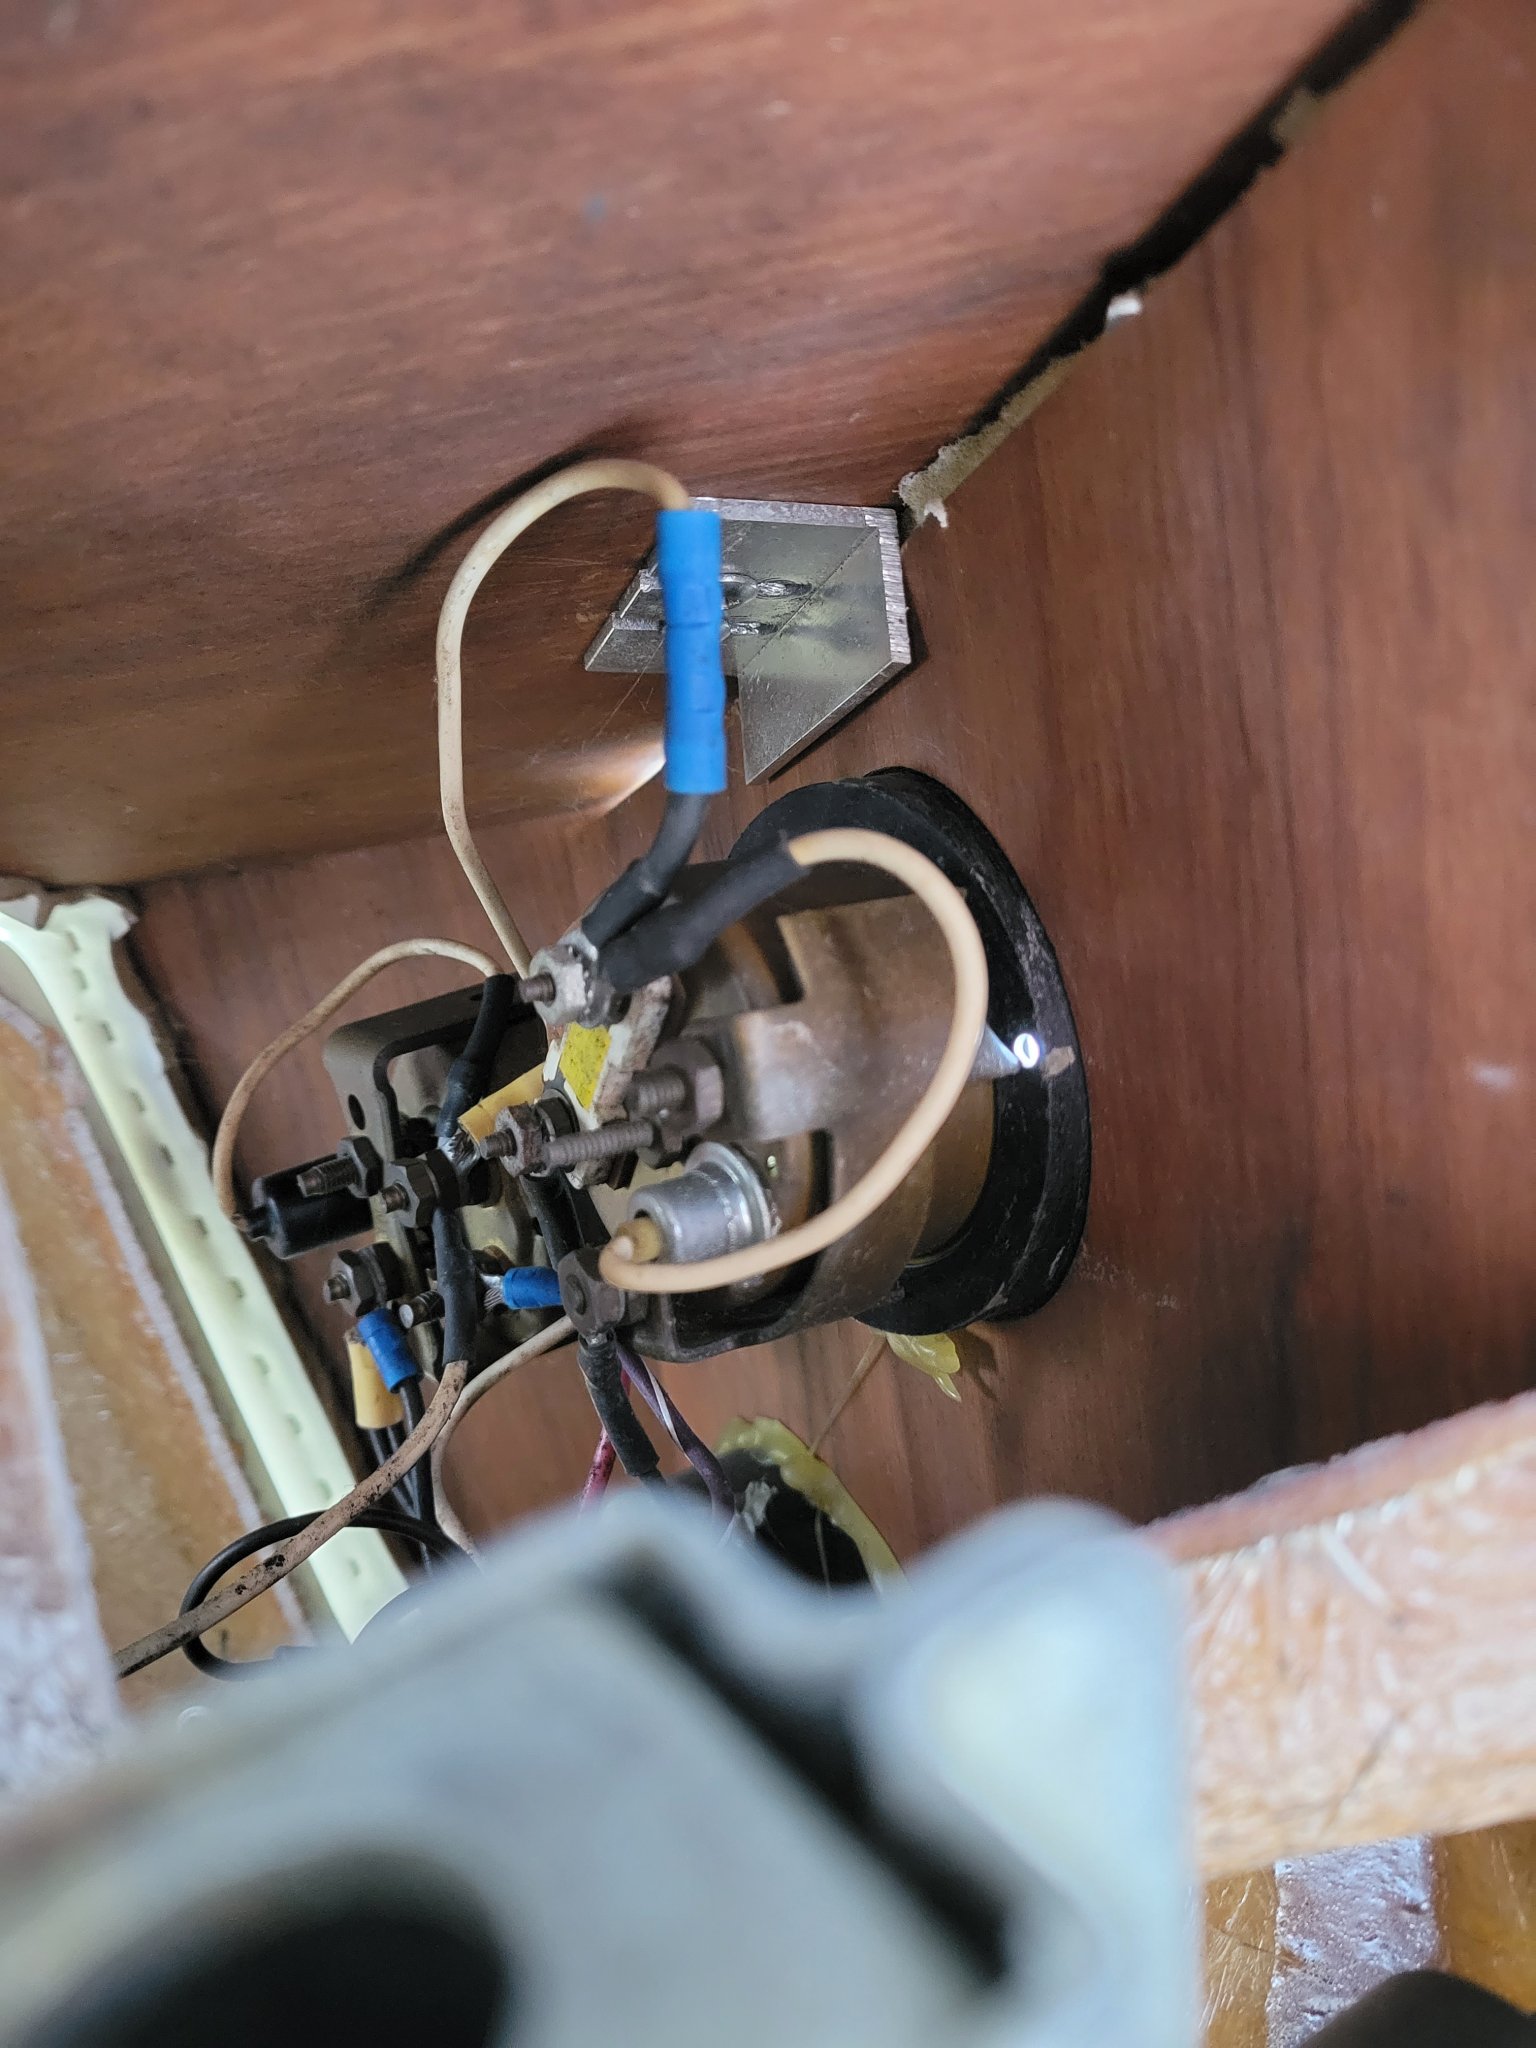
From this angle the lower of the two dials is the Trim Gage. From what I can surmise there are 4 wires attached to this gage: a white that attaches this gage to the previous one--I assume this is the hot coming in--, a white jumper--I assume this is actual hot to the gage--, a black--I assume this is neutral because all other gages also have a black wire to them--, and a purple-white--hello there little fella where do you go?
Now onto the meat and potatoes of the day. As stated at the start of the thread the boat came with the trim switch and sender wires cut both inside and outside the hull. This wouldn't have been a big deal if the boat was about 2 or 3 years newer because at that point Mercury would have moved to their modern standard of wire color coordination. So even though I have 2 different work shop manuals with detailed instructions on how to do almost everything to this motor and sterndrive setup, the wiring diagrams (while technically accurate) do not have the correct color notations for the boat. So off I went this morning chasing a single wire.
I started at the dash to correspond the trim gage location on the front so I can find it from under the console:
Notice the Trim Gage on the lower left with the needle currently sitting in the red. I then dove behind the console to to look for the signal wire:
From this angle the lower of the two dials is the Trim Gage. From what I can surmise there are 4 wires attached to this gage: a white that attaches this gage to the previous one--I assume this is the hot coming in--, a white jumper--I assume this is actual hot to the gage--, a black--I assume this is neutral because all other gages also have a black wire to them--, and a purple-white--hello there little fella where do you go?
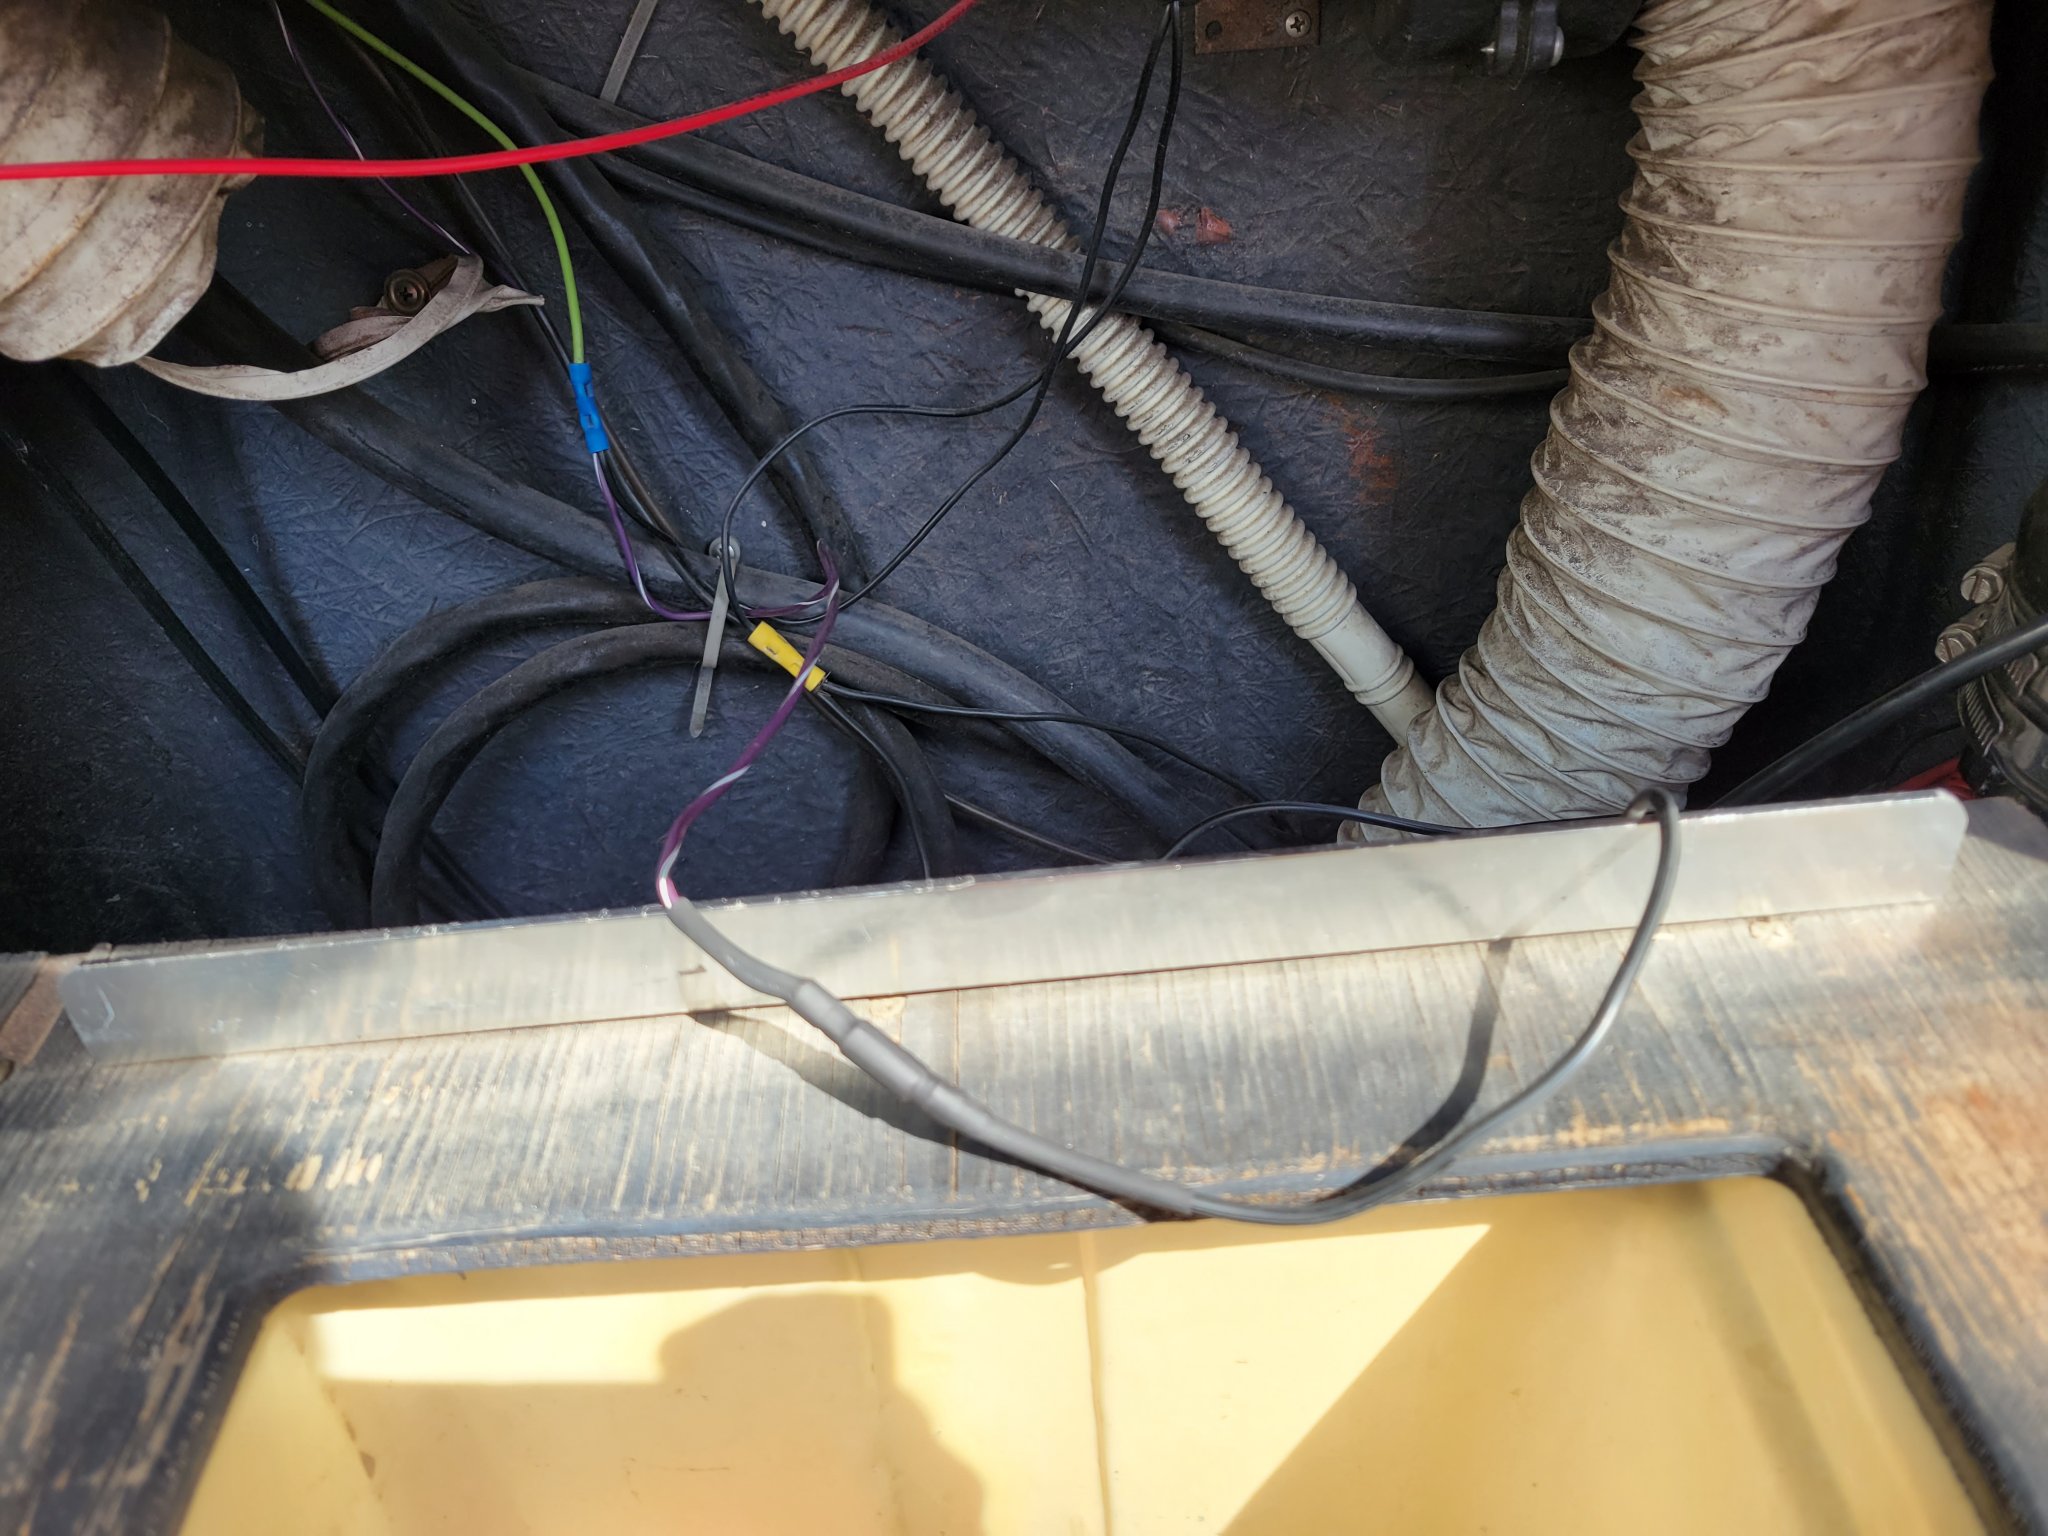
If this is indeed the wire that I want there is only one logical direction that it can go. The wires that go from the console to the stern follow within the little hollow cubby under the gunnel. Seeing as I am not a child and (if you ask my brothers, friends, and wife) have a big head I cannot easily follow the wire from the console back without loosing visual contact so I just take a short cut and go directly to the Starboard Stern to start the search. For those of you who do not know which is starboard (right) and which is port (left) when looking towards the bow, remember that port and left have the same number of letters.
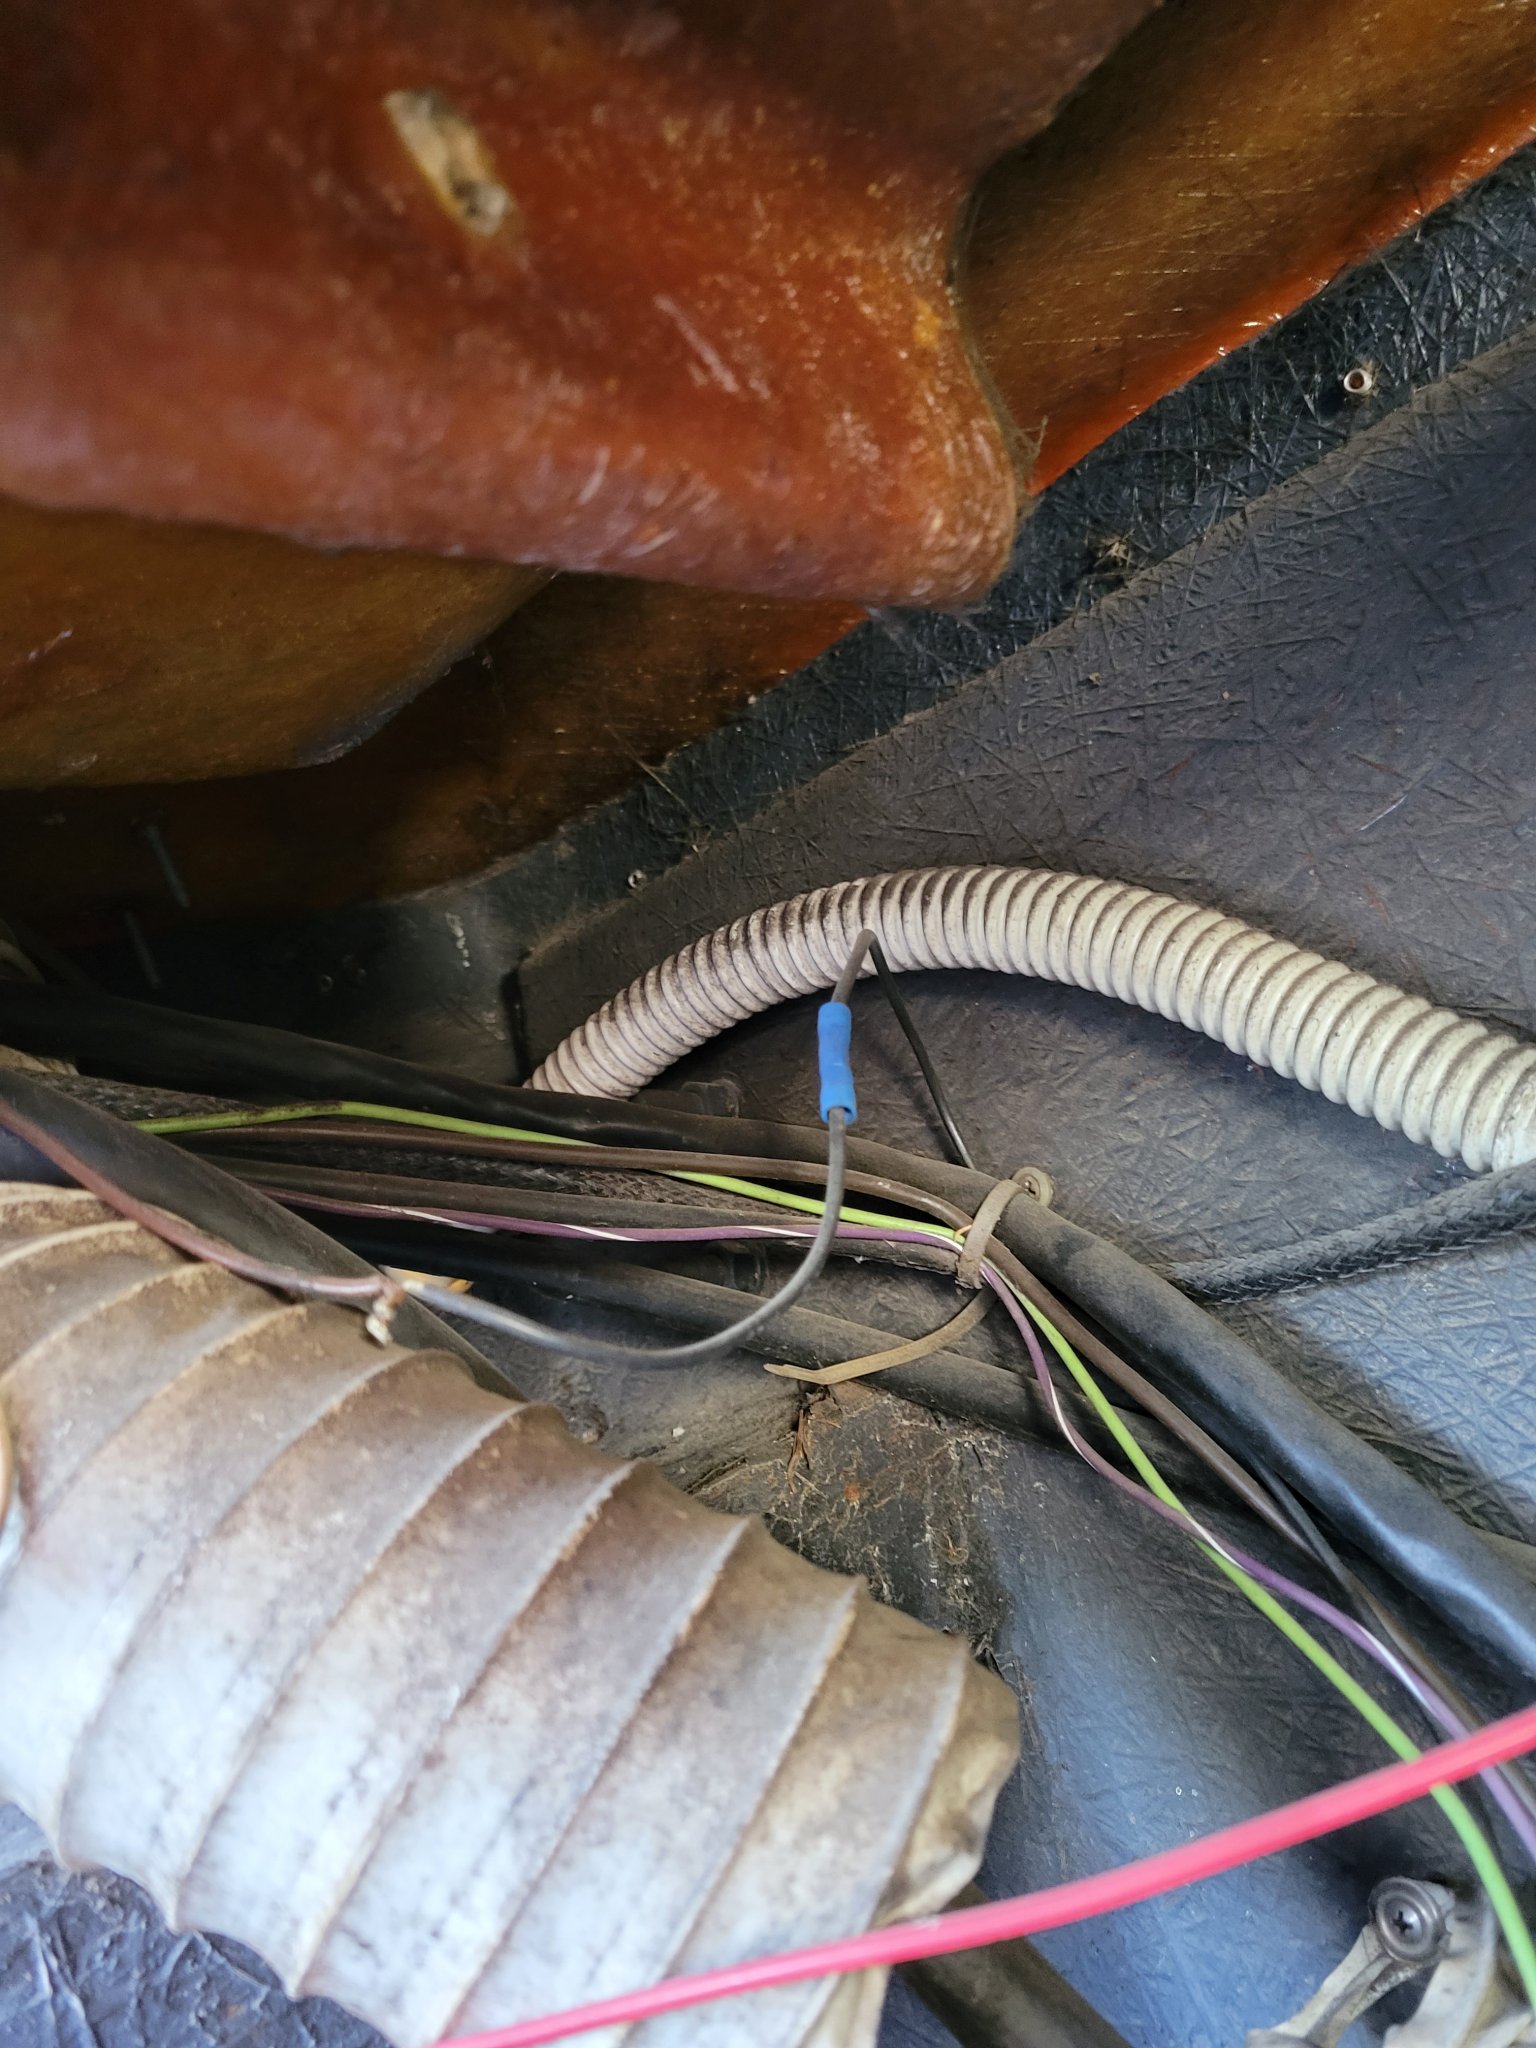
Oh hey there buddy, you enjoying your time next to your good friend green? Now here is the question, are you the wire I want or some imposter that wants attention? There are a couple of ways to find out, the easiest would be to find out how you are terminated to see if you are already connected to something (boo), if you have the female bullet termination (yay), or if you terminate is something different (confused yodeling).
Let the yodeling begin. Well you look like a duck and walk like a duck so I guess it is time to see if you quack like a duck. So being the engimeneer that I claim to be, I have a little ammeter to fiddle around with and make all my electrical friends cringe over me using. So I get a brilliant idea to use it to check for continuity across the wire. If this is the correct one it should beep at me in the most annoying way. However, I have 2 big dilemmas, I am a mechanical engineer so electricity, and chemistry are magic to me; all I know is you put power to a black box and it do stuff, and being a mechanical engineer I don't usually keep spools of wire just laying about. So I go raid the junk, and miscellaneous home improvement odds and ends that I have stuffed away in there:
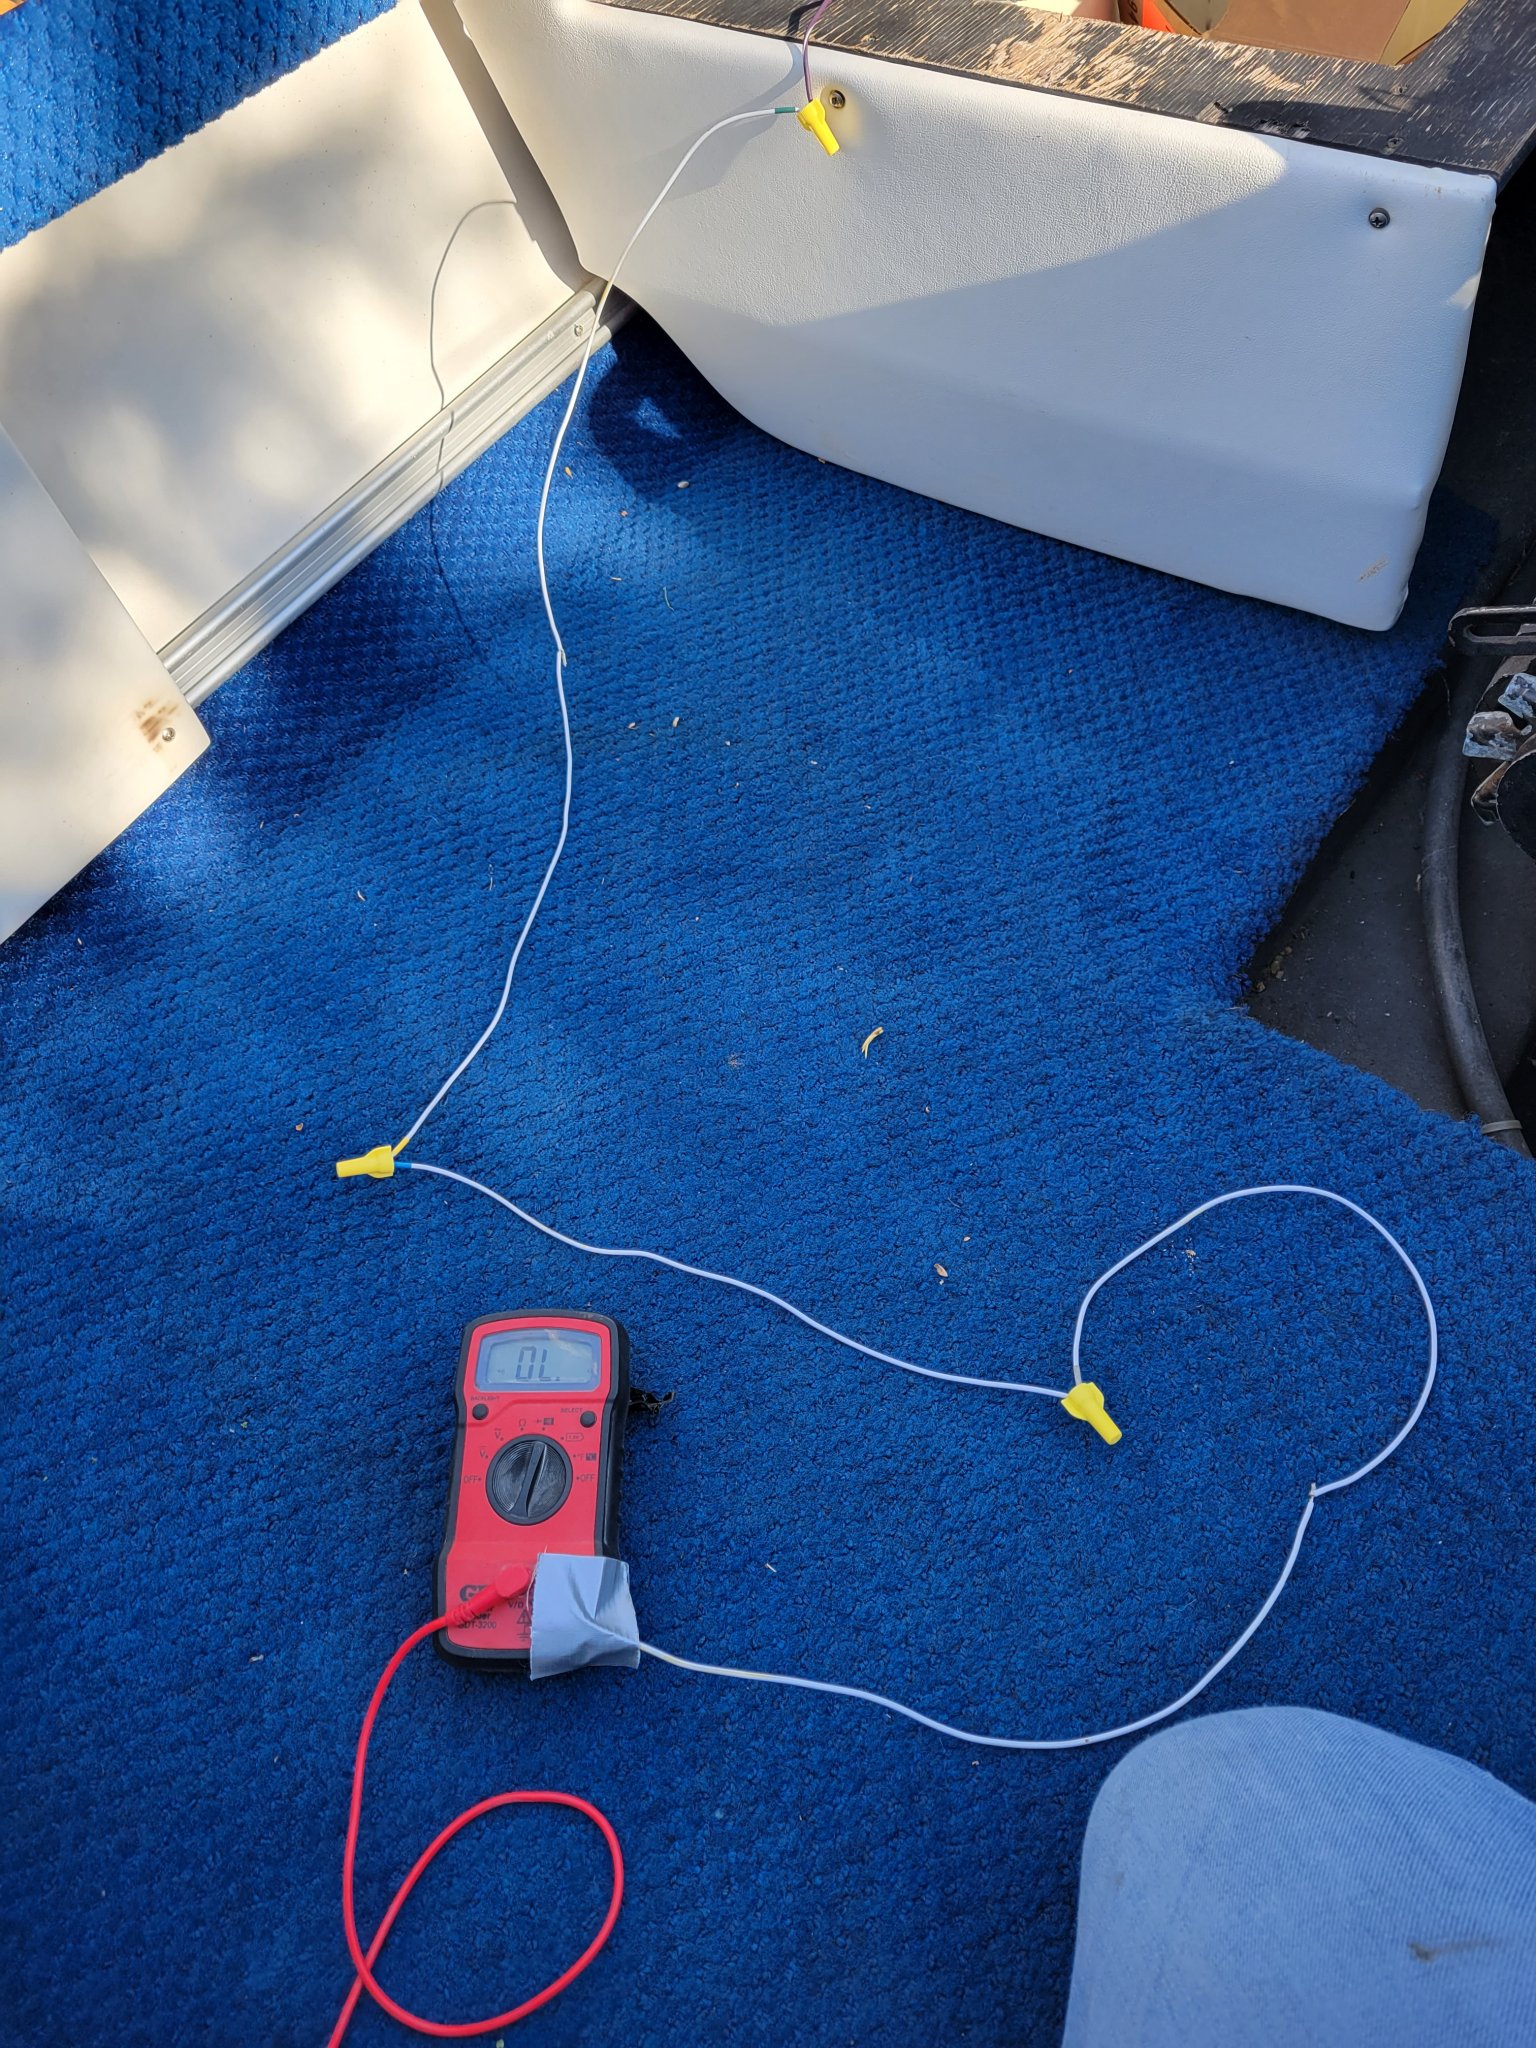
Yes folks your eyes do not deceive you that is an ammeter with the positive terminal correctly plugged in, don't worry about the other side... Ok fine if you insist, I don't have alligator clip terminals for my meter so stuffed a loose wire in the open receptacle and tested to make sure it worked by putting the positive end into one of the wire nuts to make sure it still worked. Since I mentioned the wire nuts I guess I should explain them too. A couple years ago my wife and I installed a smart thermostat so I can easily program it to save us money and not have to fiddle with a bunch of settings all the time. It had an adapter to be hooked up to older furnace control units that only had a 4 wire connection while the smart thermostat needs a 5 wire. My furnace didn't need it so it was just lying around gathering dust and getting in the way. I snipped the 4 wires off and initially connected them all with wire nuts but then realized I was about an inch short of reaching the other end of the wire. So I removed 2 and twisted those wires together as tightly as possible, and luckily it worked. Also the ammeter quacked so I found the duck! Splice on a new bullet connector and cover it with heat shrink to make sure it stays water proof and presto chango it almost looks like I know what I am doing:
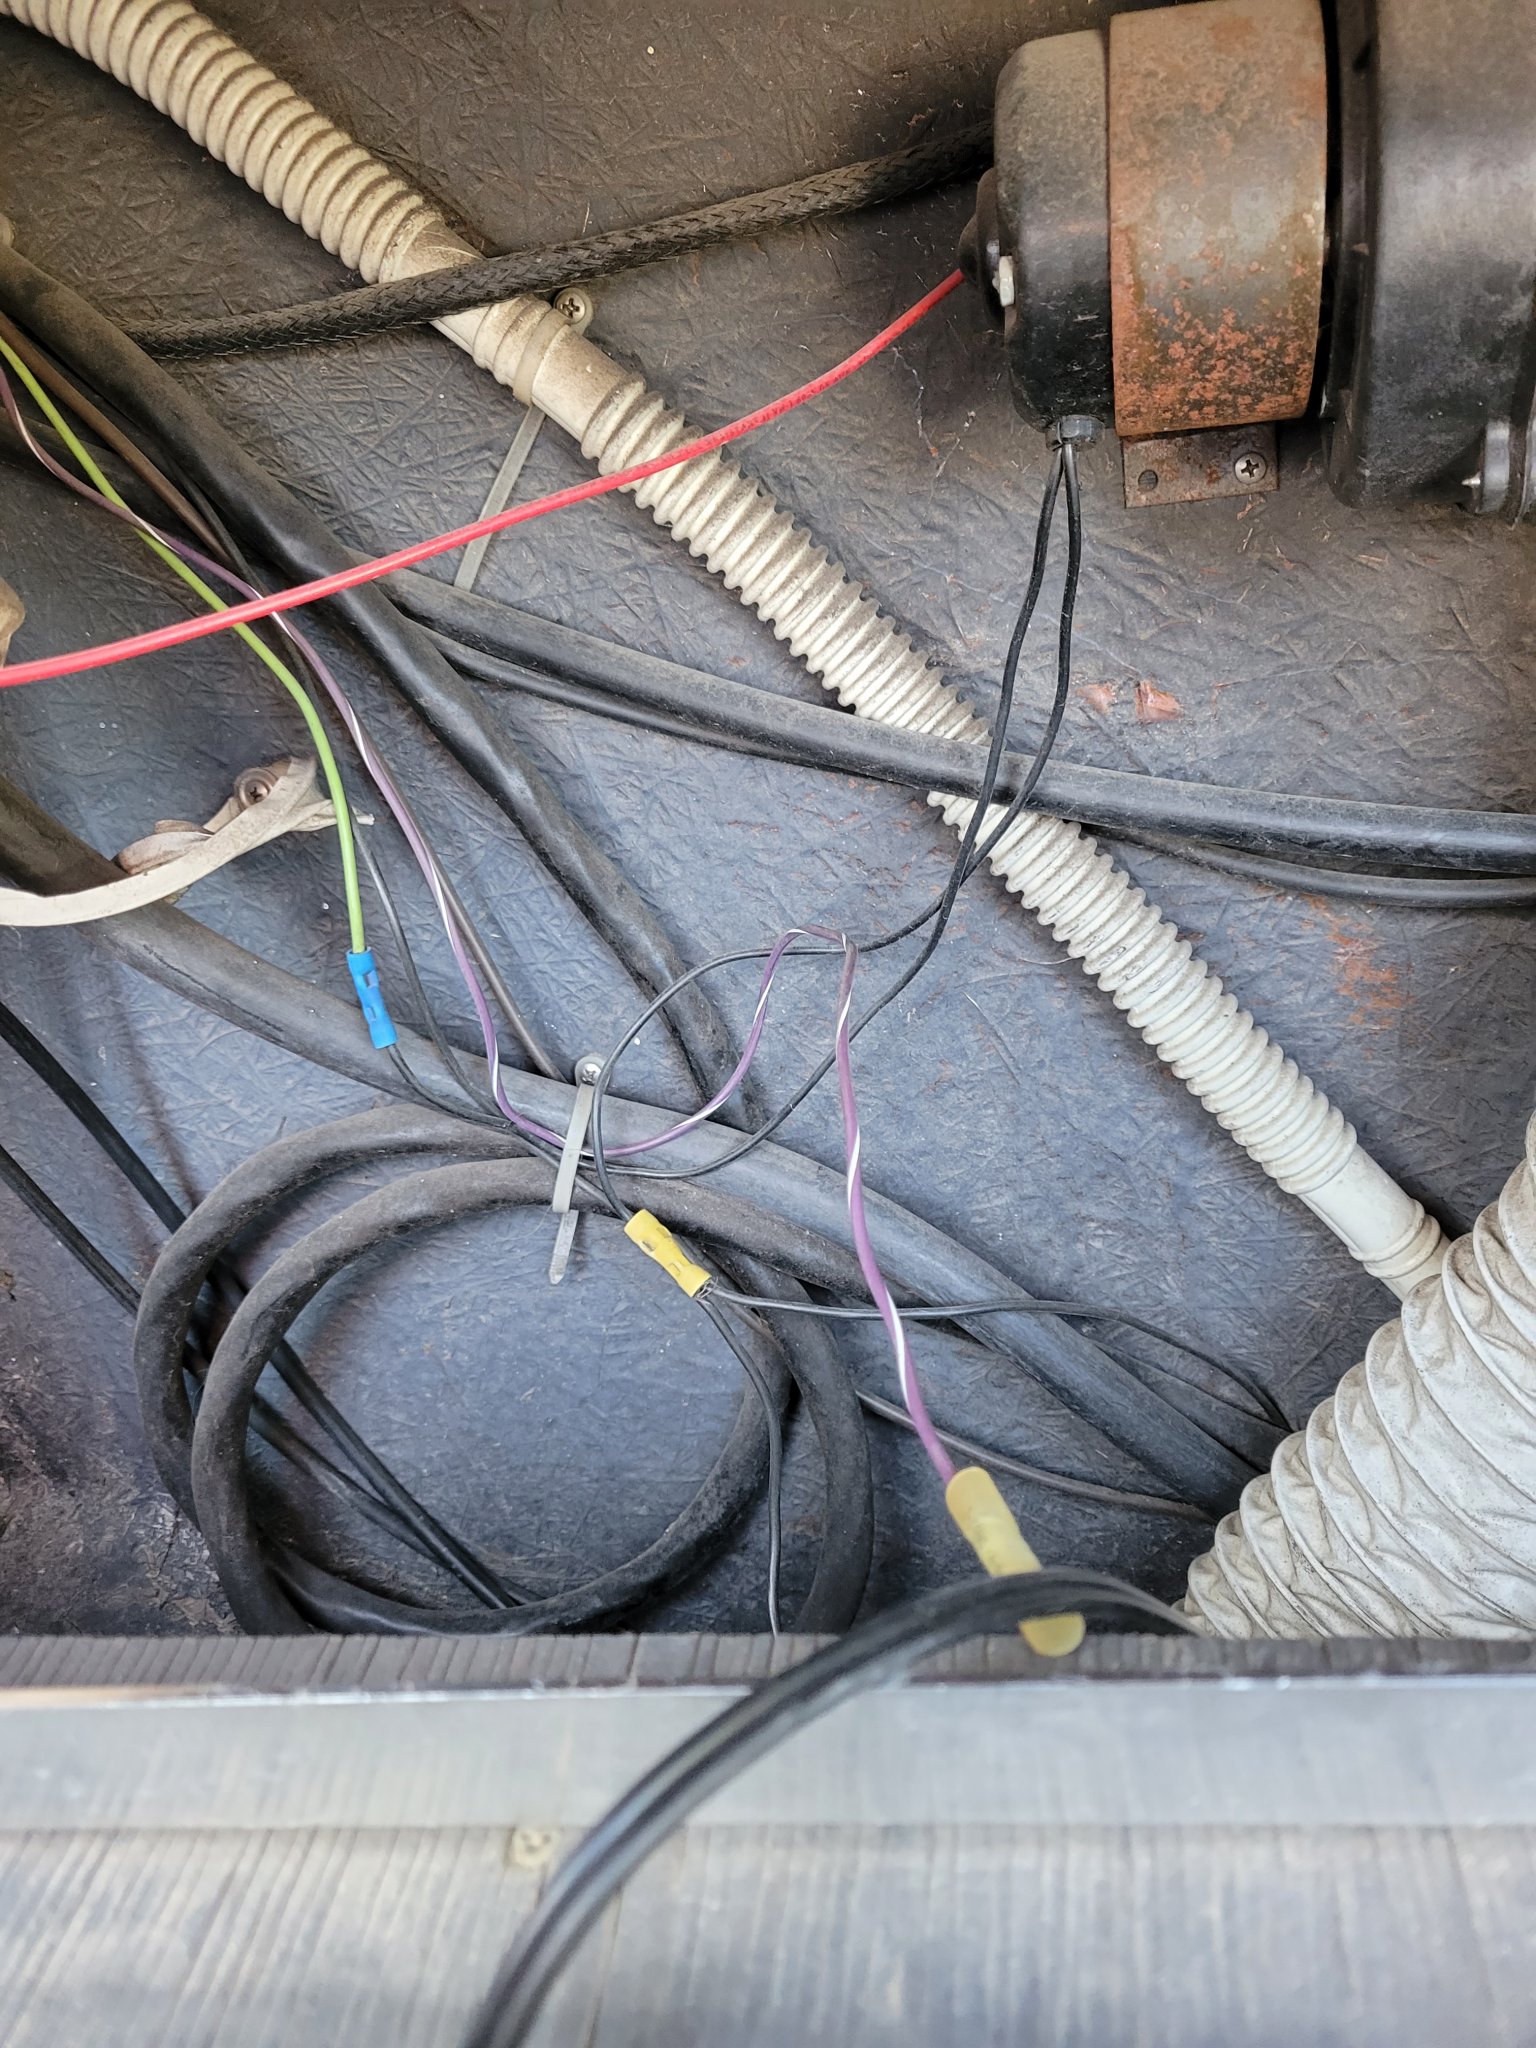
The other wire I had to connect to ground and it comes with a tiny ring adapter and about 2-3 feet of line length. This seems like a lot, except when you throw in a small block ford that the sucker has to navigate around. Quick solution is to find a ground at the back of the motor with a 5/16 bolt on it that is just ever so slightly too big for the current terminal ring to fit around so back to the garage and try and scavenge a ring terminal and wire from a different thing I am hoarding for no reason (some of you are definitely thinking "well no wonder you say your garage is small you are hoarding junk" and to that I say shhh, also even empty my wife's liberty's doors will still only open just enough to get out of) and use that as the new ground.
Well this plan goes swimmingly until the bullet connector breaks off in its counter part and I have no will to pull of the heat shrink to try again. So instead I go hunting for a different ground. Which I find on the alternator. Now the Alternator in a car is at the very front of the motor, and a boat is no different. So I weasel the wire back around the exhaust up into the engine harness and have just enough room to plug it into the alternator ground. Also this thing is from the 70's so I tested the alternator ground to the other ground I was going to use initially for continuity and get the beep. 20 minutes of trying to unscrew and rescrew in a bolt that is facing towards the engine block with cooling lines and wires doing their best to stop any movement on my 1/4" ratchet and the new ground is connected. So time to test.
I bolt up the wires to the battery, turn the key (without starting the noise maker) and rotate the switch... no movement on the dial. I then proceed to stand outside the boat scratching my head like a caveman for a solid 5 minutes wondering what I did wrong before I realize I didn't turn the kill switch to run. I'm and engimeneer I do smart. So off goes the key, on goes the kill switch (safety first), on goes the key and the trim dial jumps to the bottom of the dial, good sign. I hop out of the boat, go to the trim sender, rotate the nub, and jackpot the trim need moves and it moves in the correct direction even, which is good because I think beer thirty would have turned into whiskey lullaby real quick if I had to undo everything I just fought to do.
Tomorrow is the install of the bellows, mounting of the bell housing, and hopefully mounting of the outdrive. If I get to that point I will also be throwing some muffs on and spooling her up fully assembled.
Oh hey there buddy, you enjoying your time next to your good friend green? Now here is the question, are you the wire I want or some imposter that wants attention? There are a couple of ways to find out, the easiest would be to find out how you are terminated to see if you are already connected to something (boo), if you have the female bullet termination (yay), or if you terminate is something different (confused yodeling).
Let the yodeling begin. Well you look like a duck and walk like a duck so I guess it is time to see if you quack like a duck. So being the engimeneer that I claim to be, I have a little ammeter to fiddle around with and make all my electrical friends cringe over me using. So I get a brilliant idea to use it to check for continuity across the wire. If this is the correct one it should beep at me in the most annoying way. However, I have 2 big dilemmas, I am a mechanical engineer so electricity, and chemistry are magic to me; all I know is you put power to a black box and it do stuff, and being a mechanical engineer I don't usually keep spools of wire just laying about. So I go raid the junk, and miscellaneous home improvement odds and ends that I have stuffed away in there:
Yes folks your eyes do not deceive you that is an ammeter with the positive terminal correctly plugged in, don't worry about the other side... Ok fine if you insist, I don't have alligator clip terminals for my meter so stuffed a loose wire in the open receptacle and tested to make sure it worked by putting the positive end into one of the wire nuts to make sure it still worked. Since I mentioned the wire nuts I guess I should explain them too. A couple years ago my wife and I installed a smart thermostat so I can easily program it to save us money and not have to fiddle with a bunch of settings all the time. It had an adapter to be hooked up to older furnace control units that only had a 4 wire connection while the smart thermostat needs a 5 wire. My furnace didn't need it so it was just lying around gathering dust and getting in the way. I snipped the 4 wires off and initially connected them all with wire nuts but then realized I was about an inch short of reaching the other end of the wire. So I removed 2 and twisted those wires together as tightly as possible, and luckily it worked. Also the ammeter quacked so I found the duck! Splice on a new bullet connector and cover it with heat shrink to make sure it stays water proof and presto chango it almost looks like I know what I am doing:
The other wire I had to connect to ground and it comes with a tiny ring adapter and about 2-3 feet of line length. This seems like a lot, except when you throw in a small block ford that the sucker has to navigate around. Quick solution is to find a ground at the back of the motor with a 5/16 bolt on it that is just ever so slightly too big for the current terminal ring to fit around so back to the garage and try and scavenge a ring terminal and wire from a different thing I am hoarding for no reason (some of you are definitely thinking "well no wonder you say your garage is small you are hoarding junk" and to that I say shhh, also even empty my wife's liberty's doors will still only open just enough to get out of) and use that as the new ground.
Well this plan goes swimmingly until the bullet connector breaks off in its counter part and I have no will to pull of the heat shrink to try again. So instead I go hunting for a different ground. Which I find on the alternator. Now the Alternator in a car is at the very front of the motor, and a boat is no different. So I weasel the wire back around the exhaust up into the engine harness and have just enough room to plug it into the alternator ground. Also this thing is from the 70's so I tested the alternator ground to the other ground I was going to use initially for continuity and get the beep. 20 minutes of trying to unscrew and rescrew in a bolt that is facing towards the engine block with cooling lines and wires doing their best to stop any movement on my 1/4" ratchet and the new ground is connected. So time to test.
I bolt up the wires to the battery, turn the key (without starting the noise maker) and rotate the switch... no movement on the dial. I then proceed to stand outside the boat scratching my head like a caveman for a solid 5 minutes wondering what I did wrong before I realize I didn't turn the kill switch to run. I'm and engimeneer I do smart. So off goes the key, on goes the kill switch (safety first), on goes the key and the trim dial jumps to the bottom of the dial, good sign. I hop out of the boat, go to the trim sender, rotate the nub, and jackpot the trim need moves and it moves in the correct direction even, which is good because I think beer thirty would have turned into whiskey lullaby real quick if I had to undo everything I just fought to do.
Tomorrow is the install of the bellows, mounting of the bell housing, and hopefully mounting of the outdrive. If I get to that point I will also be throwing some muffs on and spooling her up fully assembled.
cliffboyer
Active member
Equipment
L3301 w/LA525 loader, G5200 mower w/RC48 deck, Kawasaki 610 Mule, DR mower
Yeah, I got frustrated maybe a little too frustrated by that trim sender over the last couple days so I was not taking chances with this whack at it.If nothing else, your ana...er thorough!
A '79 you say? Easy one..."Pina Colada"
motionclone
Well-known member
Lifetime Member
Equipment
L345DT with Lp mower, forks and grapple thumb, Bobcat 337 Midi Ex
Have you pulled up any deck to inspect the stringers underneath? Those are going to be wood encased in fiberglass and a good chance that because of the age are rotted and need to be fixed, they are the backbone of the boat. You say the transom is good, have you drilled holes to inspect it? Thats wood also and highly likely to have rot.
I would check those things out real good before dumping time and money.
I had a 1998 boat that had both stringer and transom rot. Looked fine and transom didnt flex but had rot so was only a matter of time.
Lot of folks dont realize a fiberglass boat has a lot of wood in it.
I would check those things out real good before dumping time and money.
I had a 1998 boat that had both stringer and transom rot. Looked fine and transom didnt flex but had rot so was only a matter of time.
Lot of folks dont realize a fiberglass boat has a lot of wood in it.