NoJacketRequired
Active member
Equipment
B7510 & LA302 FEL & B2782 blower, B7510 & B2781 blower, B2410 & B2550 blower
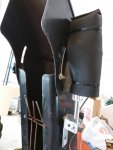
NoJacketRequired's B7510 / Jodale-Perry Cab Project
Well folks I guess the time has come to write up a little story here and share my experiences in modifying and installing a cab on one of my B7510's.
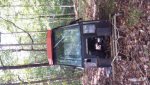
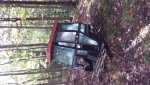
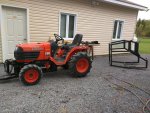
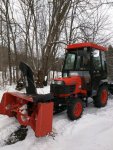
First the back story. In the fall of 2017 I purchased a bare B7510 on R1 ag tires. This was to replace the B7200 I had just sold to a neighbor who needed a good tractor around his new-to-him country home. Selling the B7200 left me without a tractor to use for snow removal at the airport. The B7510 came along at the right time and the right price so I figured, since I already had a B7510 at home, why not get a matching tractor for the airport?
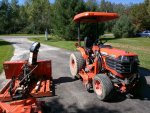
Here you can see the B7510 and B7200 side by side. at the airport. Both good basic tractors, but the B7200 has a mowing deck while the B7510 truly is a bare open-station tractor.
Fast forward a year to the summer of 2018. It was becoming clear that my father, at 84, was no longer able to use the MF-135 that I had loaned him. He wasn't able to use the clutch and he was really having troubles turning around in the seat to see behind him while steering. With several artificial joints in his body it's not hard to understand why he no longer was able to run the 135 with its heavy control forces.
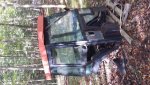
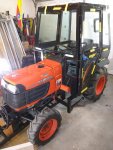
I got the brilliant idea to buy a B2410 for him - it came with a B2550 front mount blower, a canopy and a 54" MMM. Great! Once it was delivered I started to ponder how robust that B2550 blower was and realized I had made a tactical error. With a half mile of gravel driveway, Grandpa needed the best snow blower I could get him, and it needed to be on the best tractor. The decision was made to undertake a project to convert my bare, open-station B7510 into Grandpa's snow moving machine.
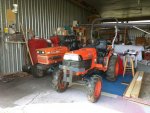
Below is a photo of the B2410 - it's a good unit, but also the oldest in my fleet.
Well folks I guess the time has come to write up a little story here and share my experiences in modifying and installing a cab on one of my B7510's.
First the back story. In the fall of 2017 I purchased a bare B7510 on R1 ag tires. This was to replace the B7200 I had just sold to a neighbor who needed a good tractor around his new-to-him country home. Selling the B7200 left me without a tractor to use for snow removal at the airport. The B7510 came along at the right time and the right price so I figured, since I already had a B7510 at home, why not get a matching tractor for the airport?
Here you can see the B7510 and B7200 side by side. at the airport. Both good basic tractors, but the B7200 has a mowing deck while the B7510 truly is a bare open-station tractor.
Fast forward a year to the summer of 2018. It was becoming clear that my father, at 84, was no longer able to use the MF-135 that I had loaned him. He wasn't able to use the clutch and he was really having troubles turning around in the seat to see behind him while steering. With several artificial joints in his body it's not hard to understand why he no longer was able to run the 135 with its heavy control forces.
I got the brilliant idea to buy a B2410 for him - it came with a B2550 front mount blower, a canopy and a 54" MMM. Great! Once it was delivered I started to ponder how robust that B2550 blower was and realized I had made a tactical error. With a half mile of gravel driveway, Grandpa needed the best snow blower I could get him, and it needed to be on the best tractor. The decision was made to undertake a project to convert my bare, open-station B7510 into Grandpa's snow moving machine.
Below is a photo of the B2410 - it's a good unit, but also the oldest in my fleet.
Attachments
-
 96.9 KB Views: 475
 -
 98.3 KB Views: 437
Last edited: