Wow, very nice! I've also got a B2650. Would you be interested in making another mount like that and shipping it to me in KY? I've got PayPal.
Post your ROPS light mounting pics
- Thread starter Burgie
- Start date
Thank youReal clean install!!
Great work!
Sent from my SM-N950U using Tapatalk
Thanks for the kind words but I don’t think I could do another one at this time. Way too many things going on right now.Wow, very nice! I've also got a B2650. Would you be interested in making another mount like that and shipping it to me in KY? I've got PayPal.
Creature Meadow
Well-known member
Lifetime Member
Equipment
2012 L4600, Disk, Brush Hog, GB60 Garden Bedder, GSS72 Grading Scraper
Added some lights to my L4600. Amazing the difference it makes I can now see.
I have a attached some pics of my setup.
Light bars mounted, front view

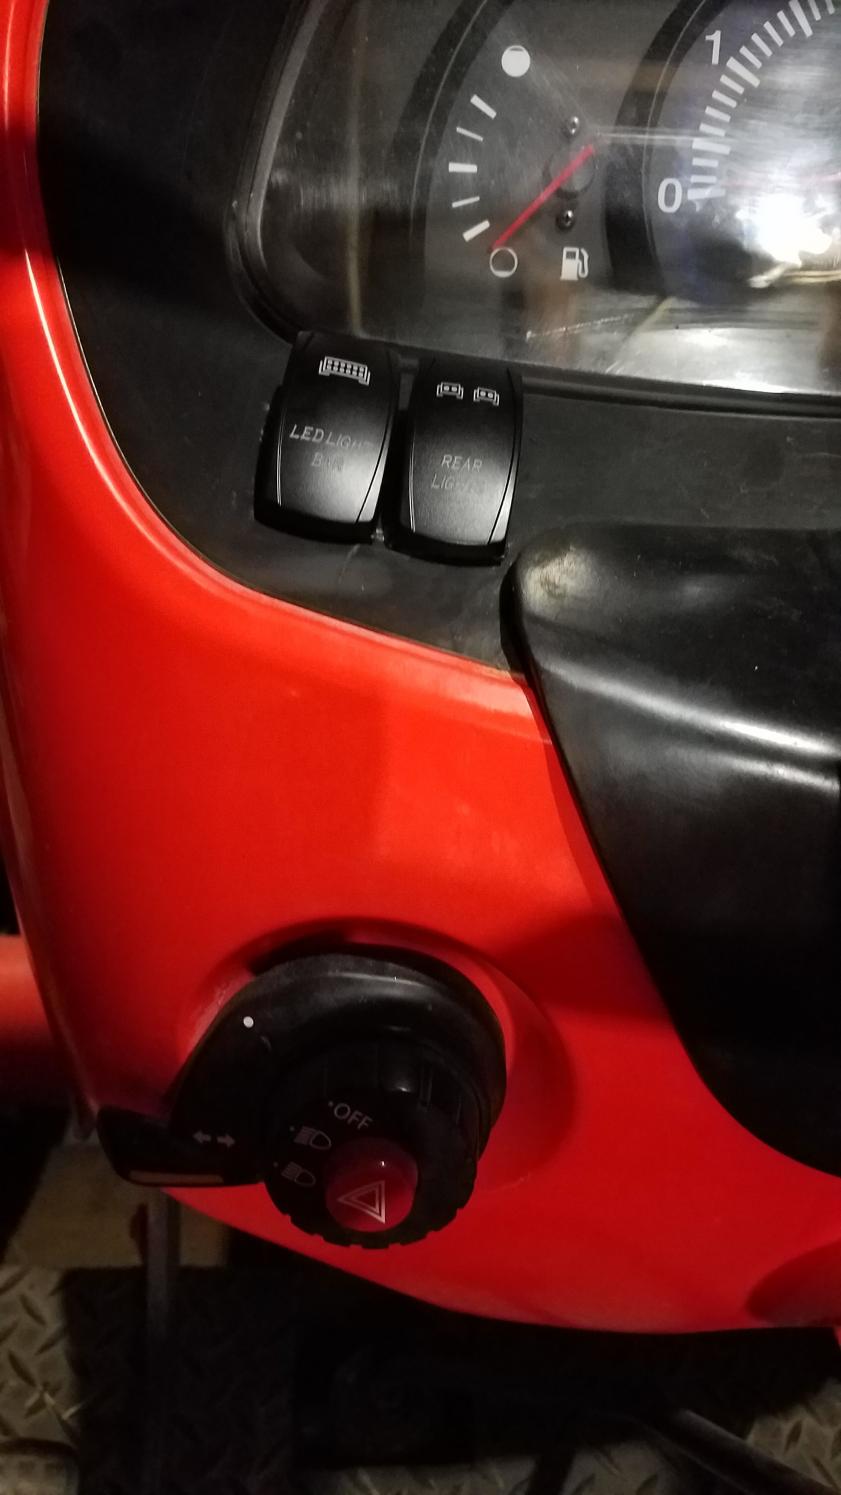
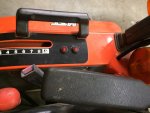
Switches on dash
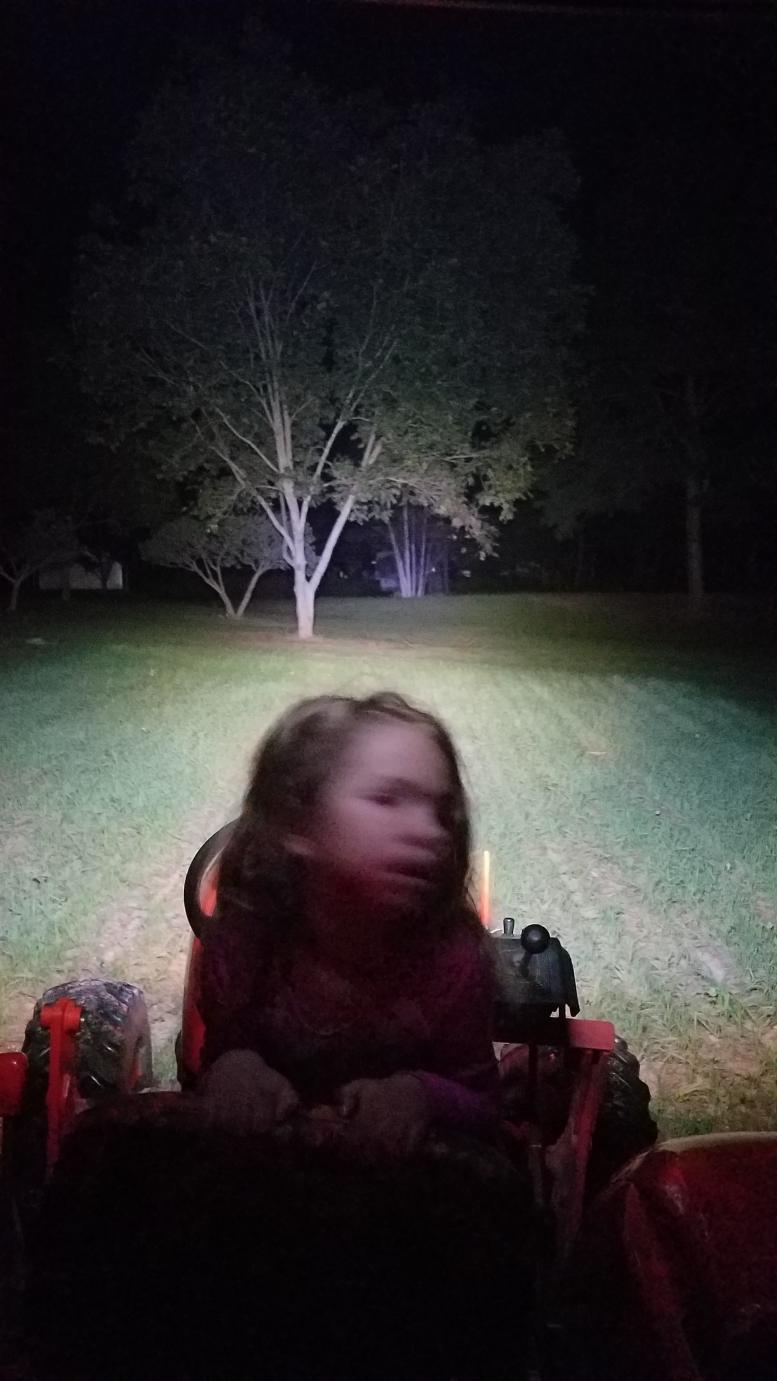
Before note the tree off in the distance

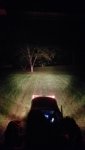
Bar light on
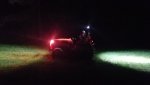
Pic showing front headlights on and rear light bar on notice difference in color and brightness.

I have a attached some pics of my setup.
Light bars mounted, front view
Switches on dash
Before note the tree off in the distance
Bar light on
Pic showing front headlights on and rear light bar on notice difference in color and brightness.
Attachments
-
 88.5 KB Views: 1,597
 -
 92.7 KB Views: 1,594
 -
 86.5 KB Views: 1,665
 -
 92.5 KB Views: 1,572
johnjk
Well-known member
Lifetime Member
Equipment
B3200 w/loader, Woods RC5 brush hog, 4' box blade, tooth bar, B1700 MMM,
Seeing all these great mounts and attachments makes me realize I need to get a welder and teach myself how.
I love your setup, how did you mount the lights to the ROPS?Installed my rear facing lights today!
The last three were shot in complete darkness with just the led lights on. I think that will work!!")


Last edited:
Thanks!! I used structural rivet nuts to mount the main bar. I then drilled and tapped the bar bracket to mount the small ones!I love your setup, how did you mount the lights to the ROPS?

Sent from my SM-N950U using Tapatalk
HOw do you like them.20" and a 12" LED bars on my 7040. Mounted with angle iron and square u-bolts. I have more pics if you want.
Great install. That is the same setup I'm preparing to install on my tractor. I bought the 20 inch Cree LED light bar forward facing and I bought the 18 inch rear amber/orange flashing lights for extra safety on the road.
View attachment 20853
View attachment 20854
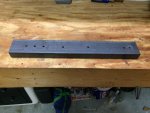
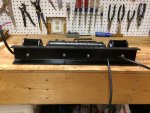
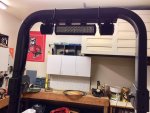
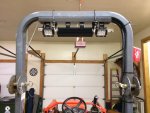
I started with a piece of 3” wide channel iron, which is the same width as my ROPS. I drilled holes in it to mount the lights and to run the wires through, then cleaned it up and painted it and the U bolts black with Rustoleum. Using channel iron gave me easy access to the wires when installing and it hides the wires after it’s installed. The wiring is in black corrugated conduit held to the ROPS with black cable ties and I ran it through the body near the turn signal. The switches are weatherproof (IP67) and mounted right behind the TPH control – one for the light bar and another for the two rear facing working lights.
The lights are a 72W 12” Nighlight light bar facing forward and two 18W 4” Nighlight work lights facing backwards. For the wiring I used pre-made harnesses with relays, fuses and switches all in one . I did need to solder on some additional wire to make the run to the lights, but not for the switches. I used connectors near the lights, so I can remove the assembly as one piece without cutting or removing the wiring.
The lights are a 72W 12” Nighlight light bar facing forward and two 18W 4” Nighlight work lights facing backwards. For the wiring I used pre-made harnesses with relays, fuses and switches all in one . I did need to solder on some additional wire to make the run to the lights, but not for the switches. I used connectors near the lights, so I can remove the assembly as one piece without cutting or removing the wiring.
Attachments
-
 89.9 KB Views: 496
 -
 92 KB Views: 481
 -
 90.4 KB Views: 527
 -
 88.7 KB Views: 550
 -
 93 KB Views: 522
Very nice clean setup and well thought out. I like how it's mounted under ROPS for best clearance. How and where did you connect to 12V power on your tractor? Does it put a big draw on your electrical charging system? I just got a '17 L3301 and adding additional lights is on my list.I started with a piece of 3***8221; wide channel iron, which is the same width as my ROPS. I drilled holes in it to mount the lights and to run the wires through, then cleaned it up and painted it and the U bolts black with Rustoleum. Using channel iron gave me easy access to the wires when installing and it hides the wires after it***8217;s installed. The wiring is in black corrugated conduit held to the ROPS with black cable ties and I ran it through the body near the turn signal. The switches are weatherproof (IP67) and mounted right behind the TPH control ***8211; one for the light bar and another for the two rear facing working lights.
The lights are a 72W 12***8221; Nighlight light bar facing forward and two 18W 4***8221; Nighlight work lights facing backwards. For the wiring I used pre-made harnesses with relays, fuses and switches all in one . I did need to solder on some additional wire to make the run to the lights, but not for the switches. I used connectors near the lights, so I can remove the assembly as one piece without cutting or removing the wiring.
Last edited:
Thanks for the compliment. I used two of these wiring harnesses:Very nice clean setup and well thought out. I like how it's mounted under ROPS for best clearance. How and where did you connect to 12V power on your tractor? Does it put a big draw on your electrical charging system? I just got a '17 L3301 and adding additional lights is on my list.
https://www.amazon.com/gp/product/B0727Y6F5K/ref=oh_aui_detailpage_o02_s00?ie=UTF8&psc=1
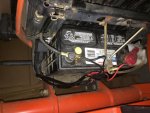
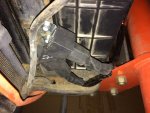
I’ll try to get a pic or two tonight, but here’s the gist for how I hooked them up. The harness connects directly to the battery and I connected mine to the bolt that tightens the battery cable connection to the battery post since the connector is not large enough to fit on the post itself (the picture will explain). I didn’t feel the need to swap out the connectors for ones that will fit on the post, but this could be done pretty easily. There are short leads to a relay with a 15A fuse on the positive side. The relays have a short piece of metal with a hole in it (possibly a heat sink), so I used that to bolt them to a vertical metal bar next to the battery and in front of the radiator that already has holes in it. The relays have two sets of wires coming out, one to the switch and the other to the lights (it’s the ones to the lights that were not long enough and I had to solder additional wire on). I drilled a hole in the ventilation plate under the battery that allows air to the radiator, so I could run the wiring underneath the tractor.
The lights are not connected to the ignition. So, for better or worse, they can be turned on while the tractor is not running. I’m not overly concerned about accidentally leaving them on or them being accidentally turned on. They’re bright enough and close enough to the house that I’ll know if they’re running.
As for the current draw, with all the lights on I’m looking at 108 Watts, which is 9 Amps.
Here's the pic of the relays and the battery connections. I hope it helps.Thanks for the compliment. I used two of these wiring harnesses:
https://www.amazon.com/gp/product/B0727Y6F5K/ref=oh_aui_detailpage_o02_s00?ie=UTF8&psc=1
I’ll try to get a pic or two tonight, but here’s the gist for how I hooked them up. The harness connects directly to the battery and I connected mine to the bolt that tightens the battery cable connection to the battery post since the connector is not large enough to fit on the post itself (the picture will explain). I didn’t feel the need to swap out the connectors for ones that will fit on the post, but this could be done pretty easily. There are short leads to a relay with a 15A fuse on the positive side. The relays have a short piece of metal with a hole in it (possibly a heat sink), so I used that to bolt them to a vertical metal bar next to the battery and in front of the radiator that already has holes in it. The relays have two sets of wires coming out, one to the switch and the other to the lights (it’s the ones to the lights that were not long enough and I had to solder additional wire on). I drilled a hole in the ventilation plate under the battery that allows air to the radiator, so I could run the wiring underneath the tractor.
The lights are not connected to the ignition. So, for better or worse, they can be turned on while the tractor is not running. I’m not overly concerned about accidentally leaving them on or them being accidentally turned on. They’re bright enough and close enough to the house that I’ll know if they’re running.
As for the current draw, with all the lights on I’m looking at 108 Watts, which is 9 Amps.
Attachments
-
 93.3 KB Views: 626
 -
 92.1 KB Views: 570
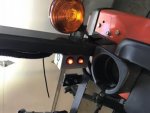
I decided to try a 3D printed bracket. I simply clamps around the ROPS using the mounting screws for the lights.
Not a very clean print but I'm going to use these over the winter and see how the plastic stands up to the vibration and weather and then decide if I will stick with plastic or produce a set out of Billet Aluminum.
I am happy with them so far.

Not a very clean print but I'm going to use these over the winter and see how the plastic stands up to the vibration and weather and then decide if I will stick with plastic or produce a set out of Billet Aluminum.
I am happy with them so far.
dirtydeed
Well-known member
Lifetime Member
Equipment
B2650 BH77, U27-4R2, BX23TLBM, box blade, rear blade, flail mower, Stump Grinder
jmf78
Member
Equipment
BX23S W/ Factory Deluxe Cab, 60" MMM, 60" BX-2612 Snow Blade & BX-2816 Blower
Looks great!! What 3D printer did you use? I have a Fortus FDM and an Objet (polyjet) at my disposal at work. Didnt really consider using them for my ROPS lights as I had material to use but that looks great! I'd think nylon or PC would hold up well.I decided to try a 3D printed bracket. I simply clamps around the ROPS using the mounting screws for the lights.
Not a very clean print but I'm going to use these over the winter and see how the plastic stands up to the vibration and weather and then decide if I will stick with plastic or produce a set out of Billet Aluminum.
I am happy with them so far.
Sent from my SM-N920V using Tapatalk
they were printed on a LulzBot Taz 6 printer that belongs to a co-worker since my own printer doesn't have a large enough printing surface. We are using hobby type printers so I am sure that you would get amazing results with the ones you have access to.Looks great!! What 3D printer did you use?
Kubota_Man
Member
Equipment
BX24, Rear blade, Front blade, Snowblower, 54" MMM, Box scraper, Landscape rake
I would love to get a set.they were printed on a LulzBot Taz 6 printer that belongs to a co-worker since my own printer doesn't have a large enough printing surface. We are using hobby type printers so I am sure that you would get amazing results with the ones you have access to.
The only picture I have after installing my ROPS lights. I also added led headlights which make a huge difference by themselves.
Attachments
-
 14.3 KB Views: 502
 -
 15 KB Views: 503
Last edited:
I have the standard Kubota work lights, front and back. Can you change out just the bulbs to LEDs or do you have to change the complete fixture? We have started using LEDs in our home fixtures and they really put out the light.
beaterboss
Member
Lifetime Member
Equipment
L3901, LA525-FEL, BMLX-3164 3pt Blower, 72" Coteck Sno Pusher, 60" Box Blade
Posted this last year. Works great and no issues as of yet.
http://www.orangetractortalks.com/forums/showthread.php?t=29361
http://www.orangetractortalks.com/forums/showthread.php?t=29361