OK Gents,
Gave the plow its first workout this morning on 8" snow and a 120' driveway and it worked really well, but there's a couple things I learned and also confirmed things others have recommended here in this thread. Bear in mind I have never operated/maintained a plow in my life so this was just as much an experiment as a necessity.
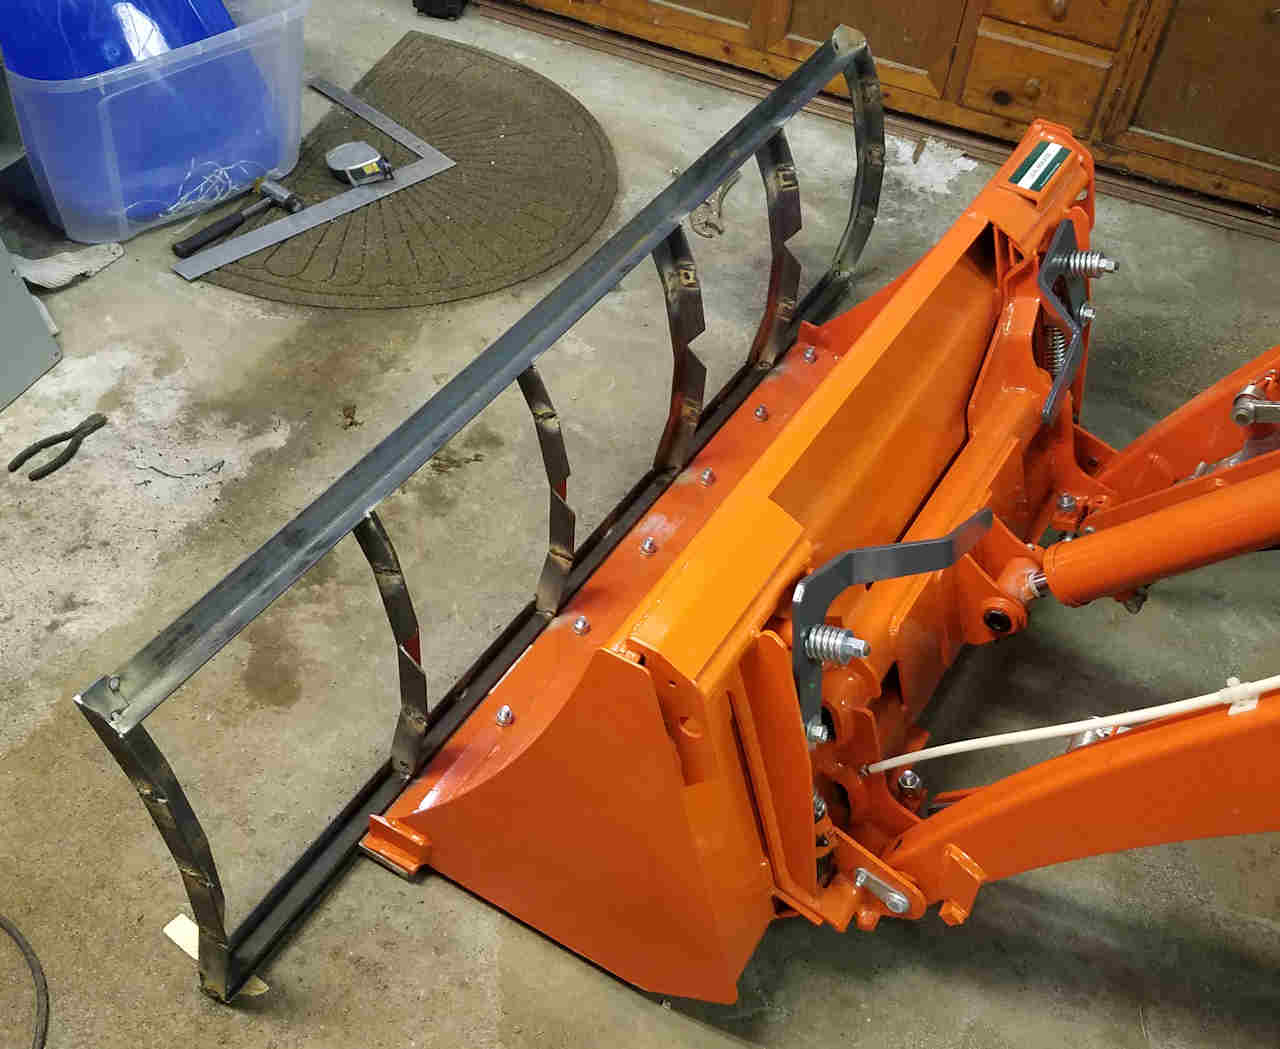
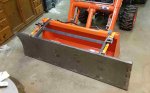
First, as harsh as the scraping sounded, there was no wear on the cinch straps when I took it off after I was done. I also bumped it pretty hard on the sides and there was no bending, so I believe it's built strong enough.
What it needs:
- D2Cat mentioned side plates. Definitely needs those and I'll probably retrofit.
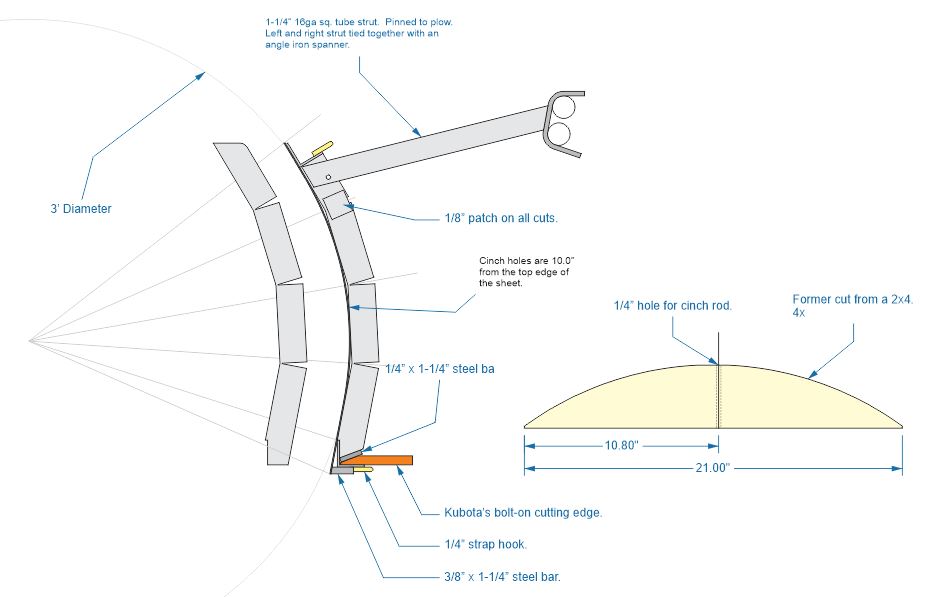
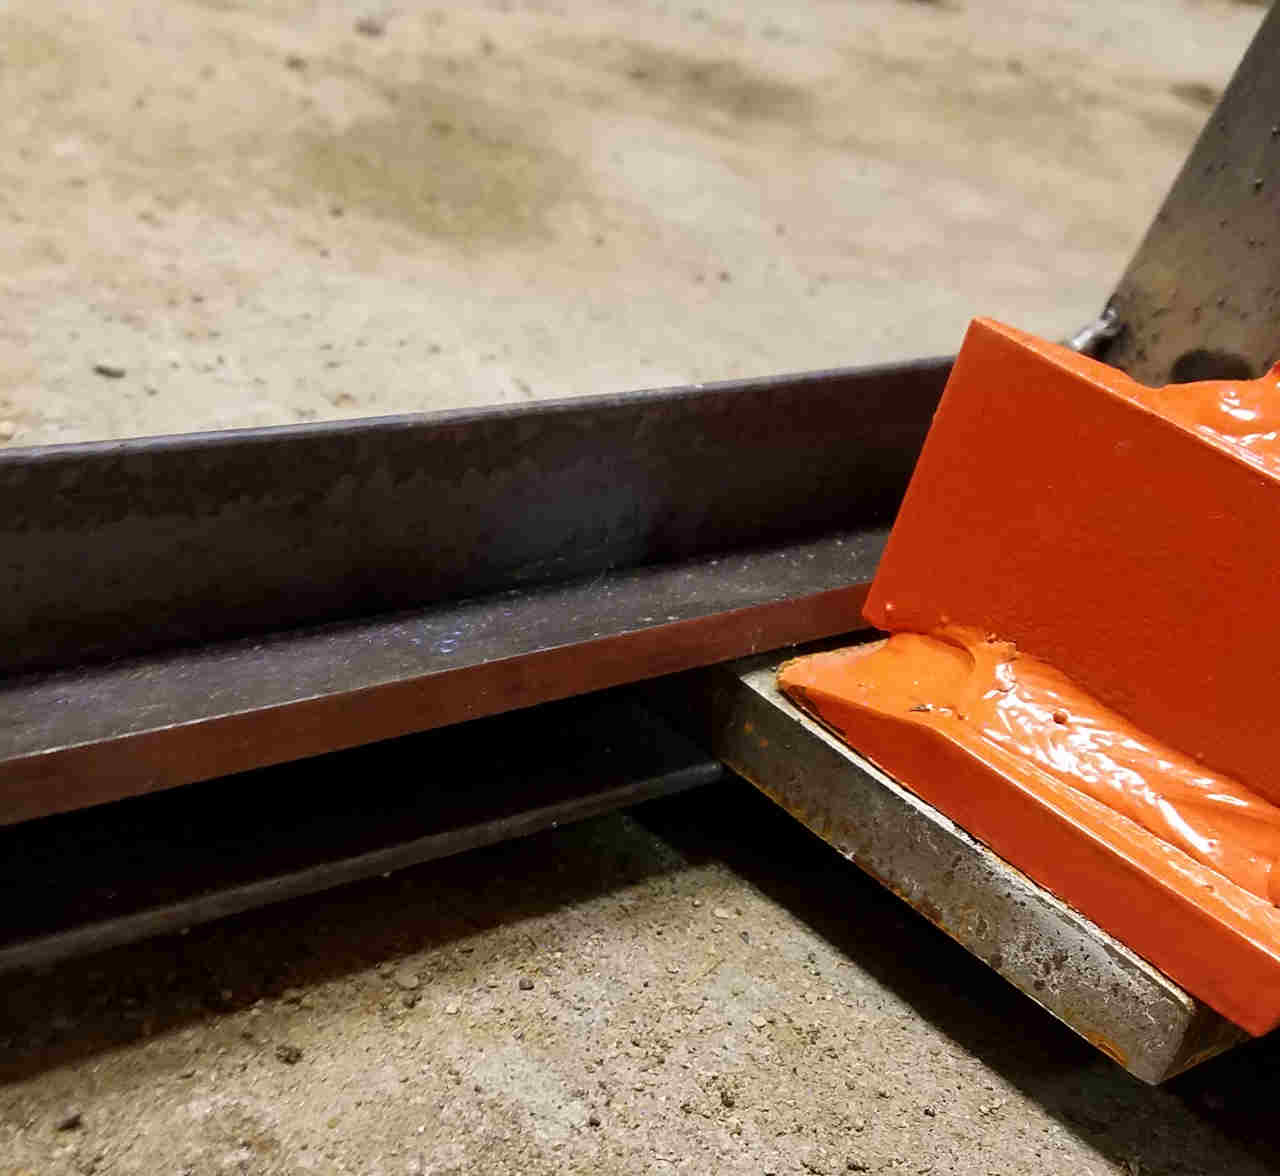
- NIW mentioned a cutting blade. Needs that too. I'm leaning toward a really thick piece ( 1/2" + ) of belt rubber ... the type with cords embedded. Let it hang down 1/2" or so and sandwich it between a front plate and secure with several bolts. Rubber would also let me plow our sealed patio without scraping the hell out of it.
- While the curl furrowed the snow forward really well, some fell back and the bucket was full of snow by the time I finished. Needs a lightweight deflector at the top. A 1/8 piece of polyprope would work well for this.
I noticed that floating the bucket didn't work so well because extra width really cuts in and causes the tractor to do the typical buckle, jacking the front wheels up. I ended up floating into position, then adjusting the boom slightly as I drove. Very easy.
It remained very secure on the bucket and the straps didn't loosen a bit, so I'm satisfied with the attachment scheme, and lifting it another 1/2" with a sacrificial scraper blade would further protect the straps. Hell, even if the straps do wear out, they're only a few $$$ to replace.
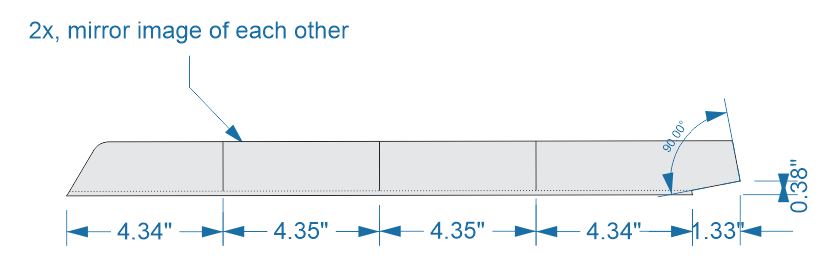
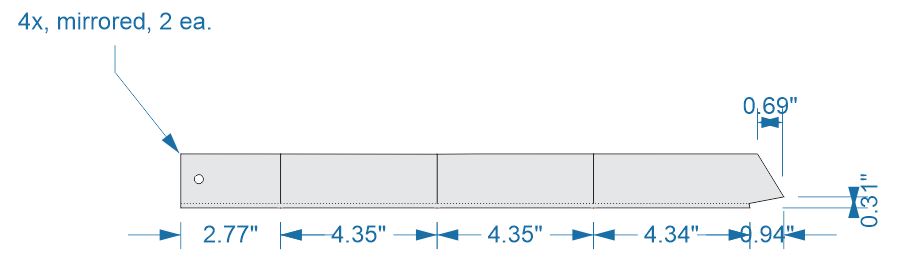
I can post more construction pics and a bill-of-materials if anyone would like, but I don't have an account here and I'm not sure if there's enough storage room for all the pics. Frankly, I'm very inclined to redesign it knowing what I now know from the first attempt and make improvements.
 63.9 KB Views: 992
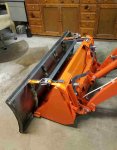 57.9 KB Views: 1,078
")